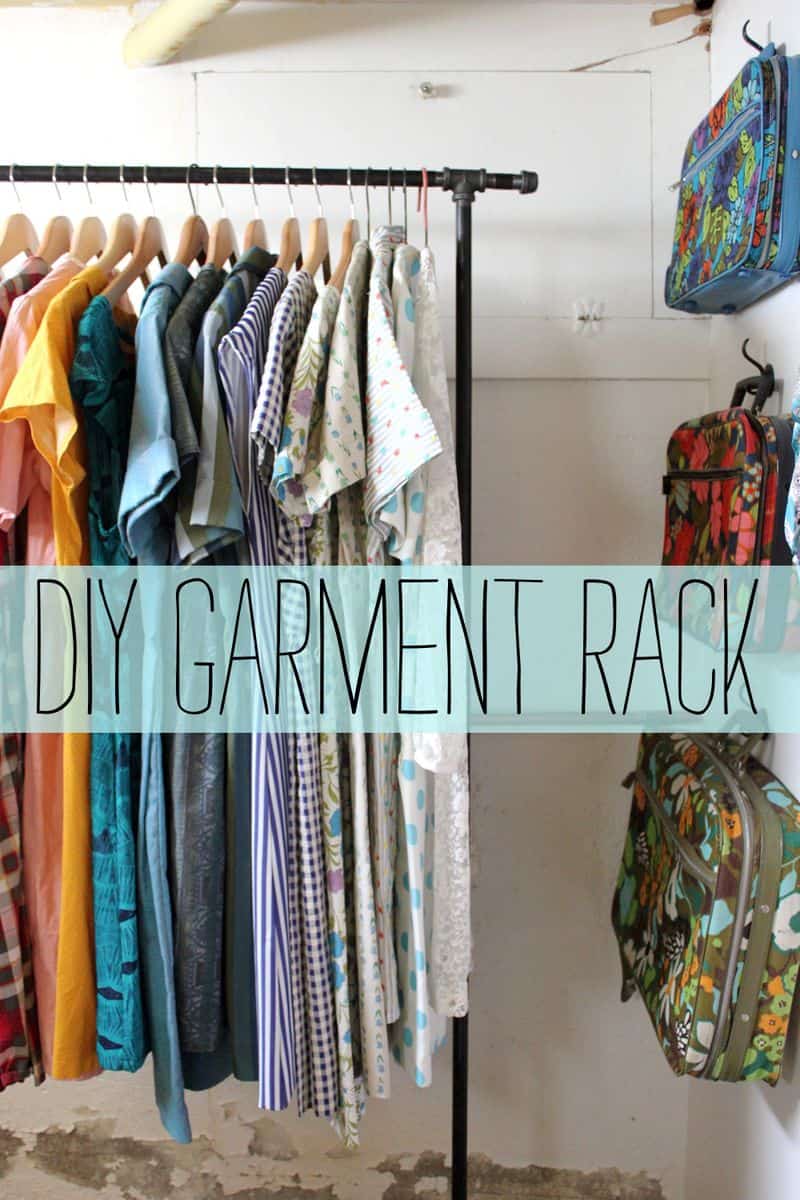
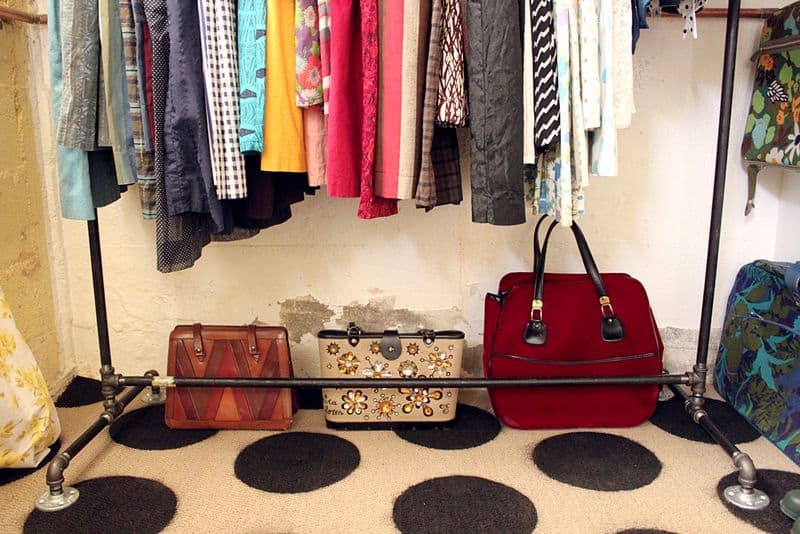
Looking for a budget friendly way to create garment racks for your home? Today, Rachel shares her D.I.Y. method…
You’ll Need: Two 1/2″ x 60″ black steel pipes, Two 1/2″ x 48″ black steel pipes, Four 1/2″ x 8″ black steel pipe nipples, Two 1/2″ x 2 1/2″ black steel pipe nipples, Six 1/2″ x 1 1/2″ black steel pipe nipples, Six 1/2″ black tees, Four 1/2″ black 90 degree elbows, Four 1/2″ galvanized floor flanges, Two 1/2″ black steel end caps, 1 can of black spray paint (optional) and Work gloves. *Note: My supplies cost around $70-$80.
Preparation: Spray paint your floor flanges black to make it consistent with the rest of the pieces. Take the orange plastic caps off each end of the black pipes. For a truly consistent look, spray paint each piece. Wait until they’ve dried before assembling.
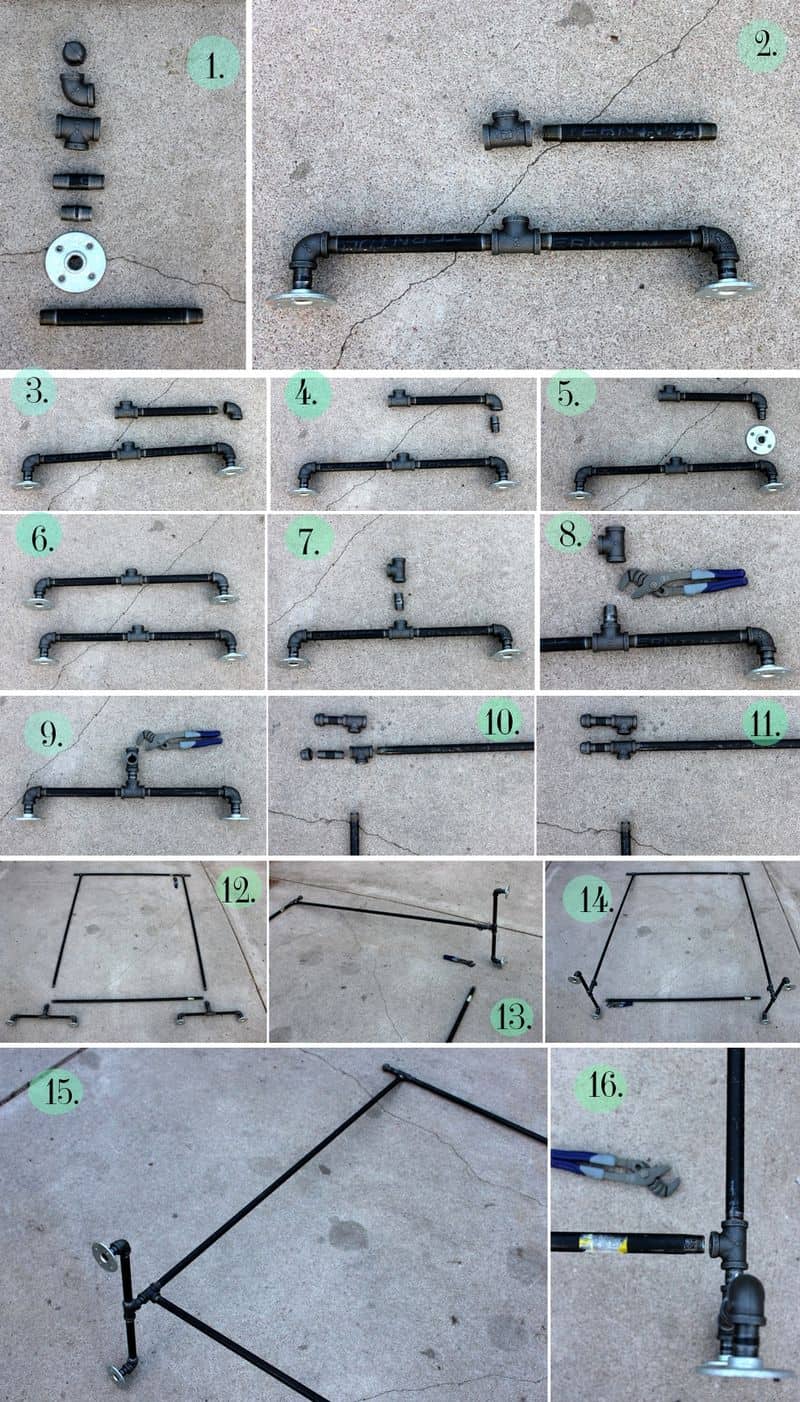
One: Group your small pieces for easier assembly. Just so you know what they look like I’ve lined them up. In descending order: end cap, 90 degree elbow, tee, 2 1/2″ steel nipple, 1 1/2″ steel nipple, galvanized floor flange, 8″ steel nipple.
Two: To create each base, screw one 8″ steel nipple into the tee as shown.
Three: Attach one 90 degree elbow to the end of your 8″ nipple making sure it’s facing the opposite direction of the top of your tee when tightened.
Four: Attach a 1 1/2″ steel nipple to the open end of the elbow joint.
Five: Attach your floor flange to the other end of the nipple and tighten.
Six: Repeat on the opposite side of your base.
Seven: Attach one 1 1/2″ steel nipple to the open end of your tee joint.
Eight: Attach another tee joint to the 1 1/2″ nipple as shown. Tighten with a wrench so that the tee joint is facing as shown.
Nine: Repeat steps 2-8 to create your second base.
Ten: Lay your long pipes on the ground with the shorter two on the top and bottom and the longer two on the sides. First you will assemble the top of the rack by screwing one 2 1/2″ nipple into one end cap. Then screw one tee joint into the other end of the nipple as shown.
Eleven: Screw that piece onto one end of your 4′ steel pipe as shown. Repeat with the other end of the 4′ steel pipe to complete the top of your rack.
Twelve: Screw each 6′ steel pipe into the open tee joints.
Thirteen: Screw one base onto the end of one 6′ steel pipe and tighten so that the open joint is facing the opposite side.
Fourteen: Repeat with the other base.
Fifteen: Screw one end of the last 4′ steel pipe into the left side tightly with a wrench.
Sixteen: Fit the other end of the 4′ pipe into the other open tee joint and screw it in three times. This will unscrew it three times from the opposite end but neither end will be in danger of coming off.
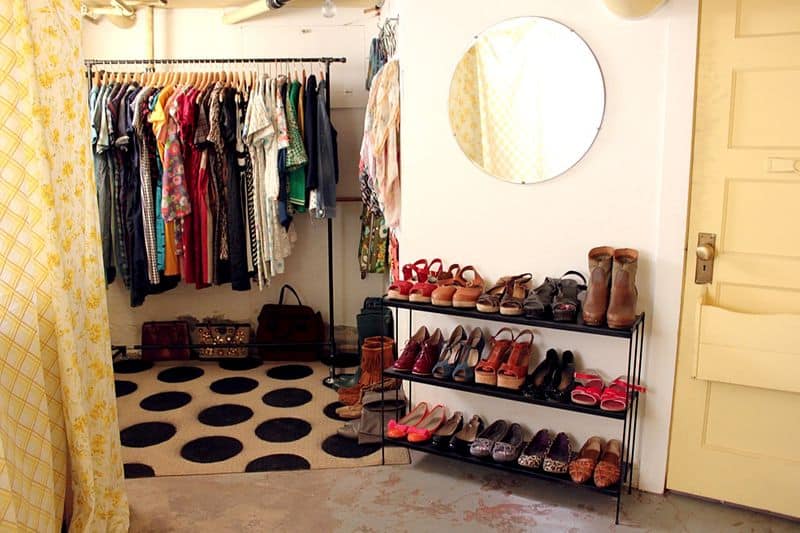
If you plan on transporting your garment rack to events or are moving houses, just unscrew the bases, the bottom 4′ pipe, and the two 6′ pipes.
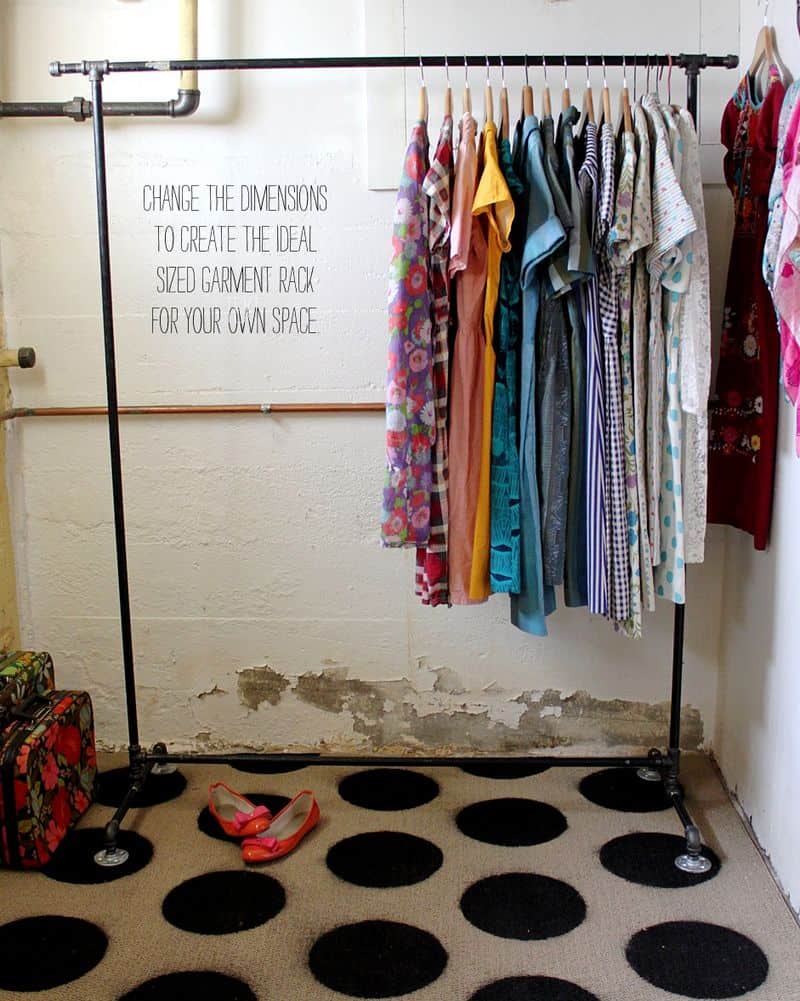
They’re easy to reassemble and store and can take a good beating since they’re so sturdy. Change the dimensions to create the ideal sized garment rack for your own space. –Rachel
This is great ! thanks for the brilliant idea !! I have nos space for cuppboards at home this will help me a lot !
Hola donde puedo comprar los tubos y todo lo demás