 Hello, friends! Today I am here to share a project that I had SO much fun making! I have been a longtime fan of retro hand colored photos as well as embroidering or collaging photos. It’s been something I’ve loved every since high school, so it has a special place in my heart.
For today’s project, I partnered with our friends at Canon USA and am combining these two techniques to make some really fun art for my home from an old and a new family photo. I hope you enjoy it!
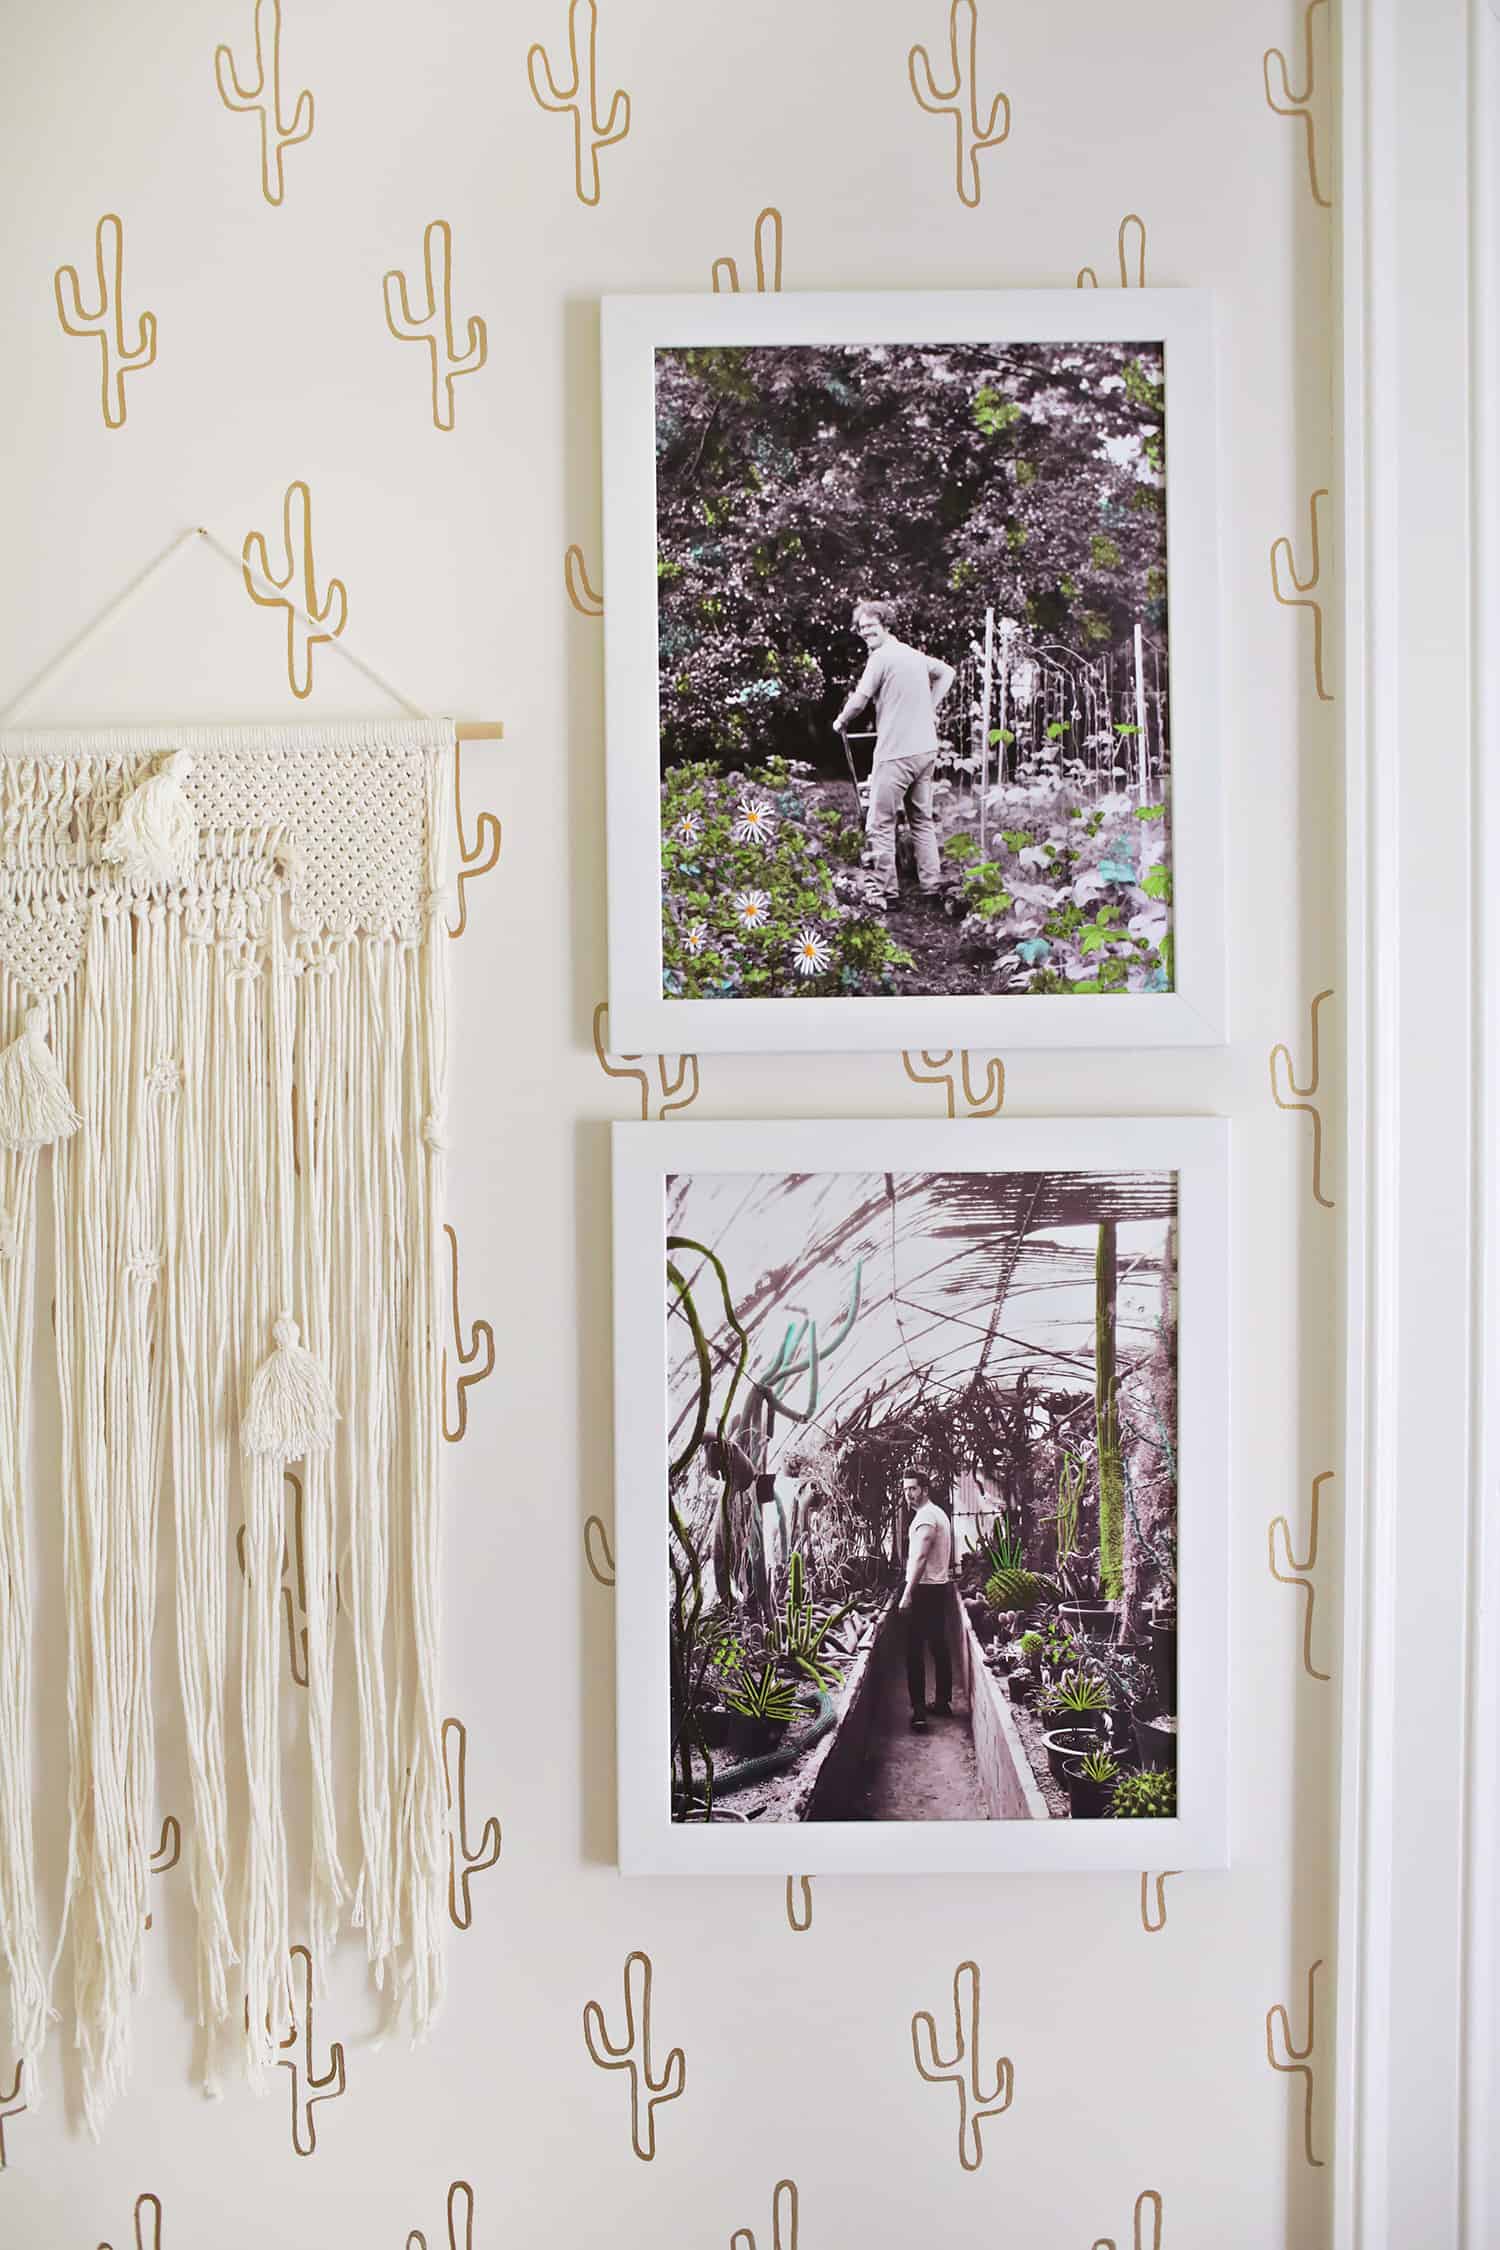
 While I was going though my (gigantic) photo stash, narrowing down options for this project, I stumbled upon a new and an old photo that are almost identical in composition. The first one is a photo of my husband from a vacation a couple years ago. The second one is a photo of my dad, working in his garden when I was a little kid in the 80s.
As soon as I saw them side by side, I knew I had to use these for my project!
If you like this project, I challenge you to find an old photo and recreate it. I did this by accident, but it’s super easy to do on purpose as well. I think it’s a great way to show a mother and daughter, or other set of family members. In this case it’s extra special to me because it’s the two men who mean the most to me in the whole world.
I love photo projects that mix old and new photos. Old photos tend to remind me that while life is constantly changing, it is repeating itself as well. This is very comforting to me, and I like to be reminded of what was as much as possible.
 To transfer my two photos to digital, I took photos with my phone, emailed them to myself, and then photoshopped them to the correct size and matching tones. You can also scan them or take a photo with your DSLR. I wasn’t all that concerned about quality since the photo of my dad was already a bit blurry. I firmly, FIRMLY believe that blurry photos can still be meaningful, sometimes even more so than perfect photos.
 I used my Canon PIXMA iP8720 printer to print them both to size 11×14 on 13×19 Luster photo paper… my favorite! I love how this printer can handle the larger sized format for custom projects like this and this photo paper is definitely my go to choice. When I had them in Photoshop, I made sure the crops and tones were as similar as possible.
 Supplies:
-photos printed to the size of your frames
-frames
-embroidery thread
-embroidery needles
-pens (I used my mildliner highlighter set)
 Use your markers to color in sections of the photo. Go slowly and be careful to not do too much. I think a sparse use of hand coloring is so much prettier than fully coloring the entire photo.
 Next, add some hand embroidery. I used several different colors and techniques to add stitches and kept the look pretty random. Unlike with the markers, I think the more embroidery you do the better. I just kept going until my hands hurt. Haha!
 Here are some closeup photos of my finished pieces!


 I had the best time working on this. This is one of those projects that is somewhat therapeutic just because it takes forever yet it’s super simple.
I am obsessed with old family photos right now. I have another project in the works that uses dozens of them, and I can’t wait to share it with you later this summer. It’s crazy.
If you have old family photos sitting in boxes, I encourage you to pull them out, make a stack of your favorites and let your imagination run wild on how you can display them in your home!
Oh! And if you’re curious about my gold cactus wallpaper, it’s a DIY here.
Have a great day. xx -Elsie
I love, LOVE how this turned out! Beautiful. Definitely, something I want to try.
It’s been something I’ve loved every since high school, so it has a special place in my heart.
I love this! Such a great idea.
i have to admit… most of your tutorials just aren’t my style… BUT… i absolutely love this and cannot wait to try it!! i recently ordered some black and white 4×4’s from artifact uprising and i think the stiff matte paper they use will be perfect for this! thank you so much for the inspiration and lovely tutorial!!
Just stunning!
xoxo
Love the almost 3D effect the embroidery gives off. Looks beautiful.
This is such an amazing idea!
Such a fun project! I need new reasons to use yarn – I miss the old days of friendship bracelets. Sigh!
www.shessobright.com
I looooove looove this project! It’s sooo soo pretty and unique! xx
www.serenbird.com
This is a great idea. Thanks for sharing!
xo,
Vicky
http://www.aspiringsocialite.com/
Thanks, as a stitcher I’ve actually been wanting to try this for years, bus wasn’t sure how it would turn out…I’ve been worried it wouldn’t turn out & I’d just ruin a perfectly good photo. Hopefully this will be enough to get me to try it…although I’d only want to do embroidery, not the colouring in part…but the way you’ve mixed the two mediums really works.
I’d love to know how well the embroidery works on those photo canvas prints…the photo I want to do most is an adorable photo of two 4 year old kids (my son & a little girl) in silhouette, standing on the beach (just in the edge of the water) looking at a shell (although it makes you think of those images of two little kids kissing) with a beautiful water sunset behind them. I’ve been wanting to do it as a canvas print & only embroider their dark silhouettes.
Hopefully when I get around to doing it, it’ll work as well as yours!
I’m sure yours would be amazing!!!!
xx
This is such a great idea and wonderful embroidered photo diy. It looks awesome. Thanks
I love the look of the end product! Going to try it out this week!
Isn’t it amazing how similar the photos of your dad and husband were! You made such a special keepsake with this project. I don’t think I’ve ever seen both hand coloring and embroidery on a photo before. Such a creative idea! And they turned out beautifully!
Thank you! I was SO excited when I discovered these!
xx
You did such a beautiful job on this! I love how it turned out!
Paige
http://thehappyflammily.com
This looks so amazing!! I’d of never thought of doing something like this and it looks so effective!!! x
Abi | abistreetx
So fun… the 2 photos are perfect.
It is sooo good. Very inspirational 🙂
That is so so adorable! I’d never think of embroiding a photograph (and maybe that’s why I am not a DIY goddess.. 🙂 )
Very creative, a must try.