Anyone can make this woven rag rug, and it’s SO easy to customize it to be any size, shape, or color you need for your space. If you are new to weaving, start here: Weaving for Beginners
I wanted to make a woven rag rug that was cute, woven, relatively easy for a first-time rug maker. After a bit of research, I found the perfect woven rug that fits all my needs!
If you have a few old bedsheets around, this is the perfect way to use them (and get an adorable rug out of the process).
Related: Make Your Own Rope Rug, Easy Stenciled Outdoor Rug, Washable Rug DIY, and Weaving for Beginners.

 Supplies:
-3 king-size flat cotton bedsheets
-piece of cardboard (23″ x 43″)
–fabric scissors
–masking tape
-marker
–clear ruler
 Step One: Use your ruler and marker to make a mark every 2″ across the longest side of each of your bedsheets. Use fabric scissors to make a 2″ cut at each mark.

 Step Two: At each cut, rip the fabric apart (it should tear evenly all the way across the sheet). Repeat this process until each sheet is ripped into even strips. Separate strips by color and pattern.
 Step Three: On each of the short ends of your cardboard, start 2″ from each end and mark 2″ long lines every 1/2″. Use scissors to cut 2″ slots at each mark.
 Step Four: Gather three fabric strips of various colors into a group, fold the group in half lengthwise, and place one end into the first slot (it should hang over the edge a few inches).
Place the other end into the corresponding spot on the opposite side. If you have a lot of strings hanging off the sides of your strips, try and pull the big clumps of strings off before you place into the cardboard slots.
Repeat this process for each strip across the cardboard. It will get pretty full after you have a few groups placed, but just keep going until you are done.

 Step Five: Designate one color as your weaving strip, and wrap a piece of masking tape around one end to make it easier to weave through the strips.
Starting about 2″ in from the end of your cardboard slots, begin to weave the weaving strip under and over each group until you get to the other side.
Make sure to leave a 6″ tail at your beginning spot (you’ll lengthen this at the end). Because the cardboard is so full, the first row of weaving will be the hardest since it’s difficult to tell one group from another.
Just do the best you can—if you get a few strips into the wrong bunch, it won’t make a difference at the end.
Once you get to the other end with your weaving strip, make a U-turn by going over or under the last bunch (whichever is needed depending on where you end up), and weave your way back to the other side (it should be much easier this time).
As you finish each row, straighten out the weaved strip with your fingers and slide it as close to the row before it as you can.
Repeat the weaving process until you’re about 2″ from the cardboard slots on the other end of the rug. Make sure to pay attention to the width of your rug as you go, and keep it as even as you can.
This type of weaving gives you a lot of control over your width since you can simply tighten or loosen your strip as you make the turn at each end.
When you get to the end of your weaving strip, you’ll want to join a new strip to the existing one so you can keep on weaving.
Cut a slot into the end of your weaving strip and the beginning of your new strip, and pull an inch or two of your new strip through the slot on the existing strip.
Pass the tail end of your new strip through the slot on the new strip and pull tight. Now you have a longer strip! Keep doing that each time you need to extend your weaving strip.
 Step Six: To finish the ends, make a U-turn around the last bunch where your weaving ended, and thread your weaving strip down through the first exposed section of your last row of weaving (see above photo).
Pull tight. Again, cross over to the next exposed weaving and thread down through that section and pull tight. Continue until you reach the end, and tie your weaving strip onto one of the strips in the last group of strips.
Repeat process on the opposite end (you’ll have to join a strip to lengthen the tail of your beginning weaving strip first).
 Step Seven: You’re almost done! Just place a ruler or a piece of cardboard inside of where you want to trim your ends and use fabric scissors to trim the excess pieces. Once the ends are cut, you can remove the cardboard backing.
You did it! You just made a rug!


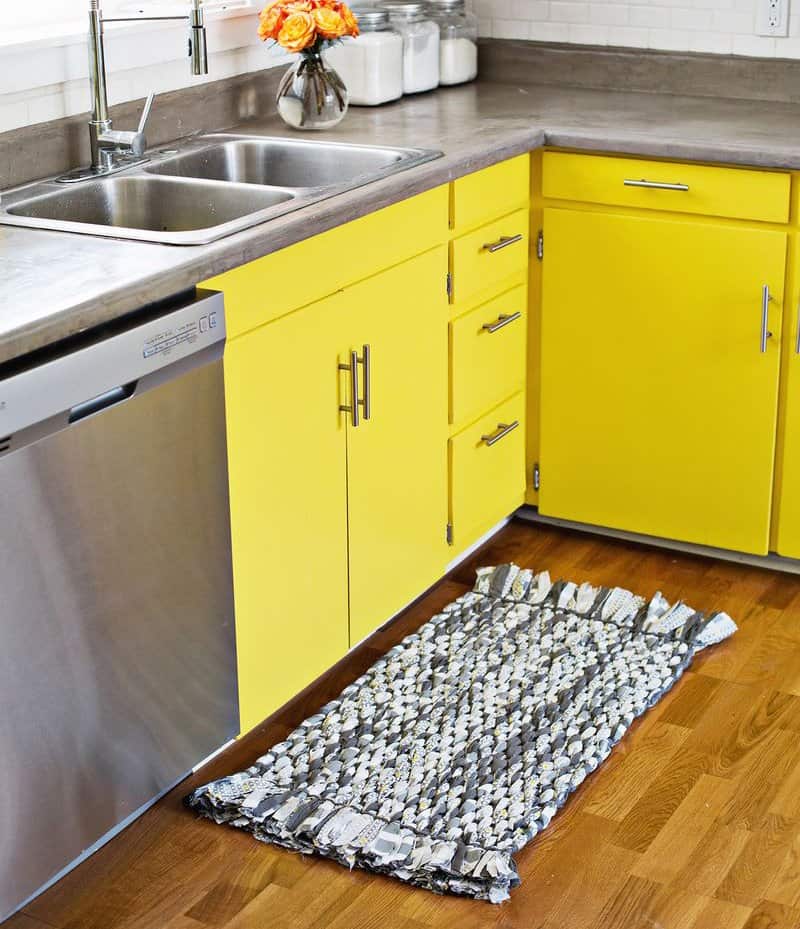
 I’m pretty proud of my first attempt at rug making. I think it’s just what our space needed (the color looks so nice with the DIY concrete countertop).
If you prefer to buy a handmade rug, check out Elsie’s favorite rugs on Etsy. xo, Laura
Love this post? Sign up for our newsletter for more ideas!

Get creative ideas for recipes, crafts, decor, and more in your inbox!
 Get the How-To

Supplies
- 3 king-size flat sheets (cotton )
Equipment
- pair of fabric scissors
- masking tape
- marker
- clear ruler
- piece of cardboard 23" x 43"
Instructions
- Use your ruler and marker to make a mark every 2″ across the longest side of each of your bedsheets. Use fabric scissors to make a 2″ cut at each mark.
- At each cut, rip the fabric apart, and it should tear evenly all the way across the sheet. Repeat process until each sheet is ripped into even strips. Separate strips by color and pattern.
- On each of the short ends of your cardboard, start 2″ from each end and mark 2″ long lines every 1/2″. Use scissors to cut 2″ slots at each mark.
- Gather three fabric strips of various colors into a group, fold the group in half lengthwise, and place one end into the first slot (it should hang over the edge a few inches). Place the other end into the corresponding spot on the opposite side. If you have a lot of strings hanging off the sides of your strips, try and pull the big clumps of strings off before you place into the cardboard slots. Repeat this process for each strip across the cardboard. It will get pretty full after you have a few groups placed, but just keep going until you are done.
- Designate one color as your weaving strip, and wrap a piece of masking tape around one end to make it easier to weave through the strips. Starting about 2″ in from the end of your cardboard slots, begin to weave the weaving strip under and over each group until you get to the other side. Make sure to leave a 6″ tail at your beginning spot (you’ll lengthen this at the end). Because the cardboard is so full, the first row of weaving will be the hardest since it’s difficult to tell one group from another. Just do the best you can, and if you get a few strips into the wrong bunch, it won’t make a difference at the end.
- Once you get to the other end with your weaving strip, make a U-turn by going over or under the last bunch (whichever is needed depending on where you end up), and weave your way back to the other side (it should be much easier this time). As you finish each row, straighten out the weaved strip with your fingers and slide it as close to the row before it as you can. Repeat the weaving process until you are about 2″ from the cardboard slots on the other end of the rug. Make sure to pay attention to the width of your rug as you go, and keep it as even as you can. This type of weaving gives you a lot of control over your width since you can simply tighten or loosen your strip as you make the turn at each end.
- When you get to the end of your weaving strip, you’ll want to join a new strip to the existing one so you can keep on weaving. Cut a slot into the end of your weaving strip and the beginning of your new strip. Pull an inch or two of your new strip through the slot on the existing strip. Pass the tail end of your new strip through the slot on the new strip, and pull tight. Now you have a longer strip! Keep doing that each time you need to extend your weaving strip.
- To finish the ends, make a U-turn around the last bunch where your weaving ended, and thread your weaving strip down through the first exposed section of your last row of weaving (see above photo). Pull tight. Again, cross over to the next exposed weaving and thread down through that section and pull tight. Continue until you reach the end, and tie your weaving strip onto one of the strips in the last group of strips. Repeat process on the opposite end (you’ll have to join a strip to lengthen the tail of your beginning weaving strip first).
- Place a ruler or a piece of cardboard inside of where you want to trim your ends and use fabric scissors to trim the excess pieces. Once the ends are cut, you can remove the cardboard backing.

This is excellent! So motivating. I’m old & currently homebound, been depressed because I haven’t felt productive or creative. Weaving is the answer. Weaving will keep my mind positive, my hands busy plus create unique art. I’m so glad I found this site.
This is a woven rug. I clicked through to find a braided one, but don’t see it on your site. Can you help?
Weaving and braiding are very similar but technically this is a braided rug.
Try searching for Twined rugs, that’s more like a braided rug than this woven rug is.
I have heard about this year’s ago. Good to see it again. Looking forward to making one.
Did you cut all of the sheets into fabric strips and use in one rug or is there enough to make 2-3 or more rugs. I’d like to make multiple rugs to use around the house and if I can make a few from the 3 sheets all the better.
Love the look
Love rag rugs! They are my favourite for around the house. Not made one though – yet 😉 Love your choice of colours – did you pre-wash the sheets before making? Just thinking that when you want to wash said rug don’t want it doing weird things in the wash/dry process + get all distorted o_O
I would definitely prewash sheets on hot and dry on hot if you plan on washing the rug! That way they will shrink up before you weave it together
Laura
Can not wait to start rug .
My wife used to make rug. Unable to do so now, I am reluctant to throw away the rolls of material.
Is their a volunteer club or organization in the Boston area that I can give them away?
John
You could donate to a church that has a quilt group or a school. Teacher can always use supplies for projects,
I love rag rugs and I want to try this
How many strips do you need for the weaving strips? Is that total in the 3 king flat sheets? Thanks.
I did this. Had a couple problems… The slits in the cardboard didn’t hold the ends and I ended up using a bulletin board with tacks to hold the waft. Also found that tying the end of the weaving makes an unpleasant lump and doesn’t keep the weave from slipping off the waft on the other side over time — had to sew it in place.
Can this rug be washed in a washing machine? Love the yellow and grey!
You should be able to! I would wash it on cold and dry on low to be safe 🙂
Laura
Love your rug. I just bought a weaving loom for the kids and I to be creative with this summer. I might have to try to make a rug w some thrift shop sheets.
Love, love, love this!! Have made a couple already and given as gifts from weddings to birthdays! Just getting the sheets from second hand stores so it’s not expensive and working on them at night while watching movies with the kids. Thank you so much!!
I went to a used clothing store (sal) and got sheets for around $3.00 each
Do you have a video of this rug?
Oh wow! I love it! Sheets make such great decorating fabric. Another use for sheets, I’m’ going to be on the lookout for the right color/pattern. Thanks!
Very excited to try this! Can you please explain what you mean by leaving a 6″ tail at your beginning spot?
I’m definitely going to do this! Thank you for such a wonderful idea
simply put, you all over at ABM just rock!
I wanny try making this too. Thanks, Laura. Its inspiring!
I wanna try this too! thanks, laura!