
 Don’t you just love these mini triangle shelves!? Today husband and wife team Josh + Sarah show us how to make your own.
 Supplies needed: 1″x4″ by 6-foot pine boards (x2), wood glue, sandpaper (100 and 220 grit), miter saw, measuring tape.
*Optional: paint (we used acrylic) or stain,gloss medium & varnish (for acrylic paint).
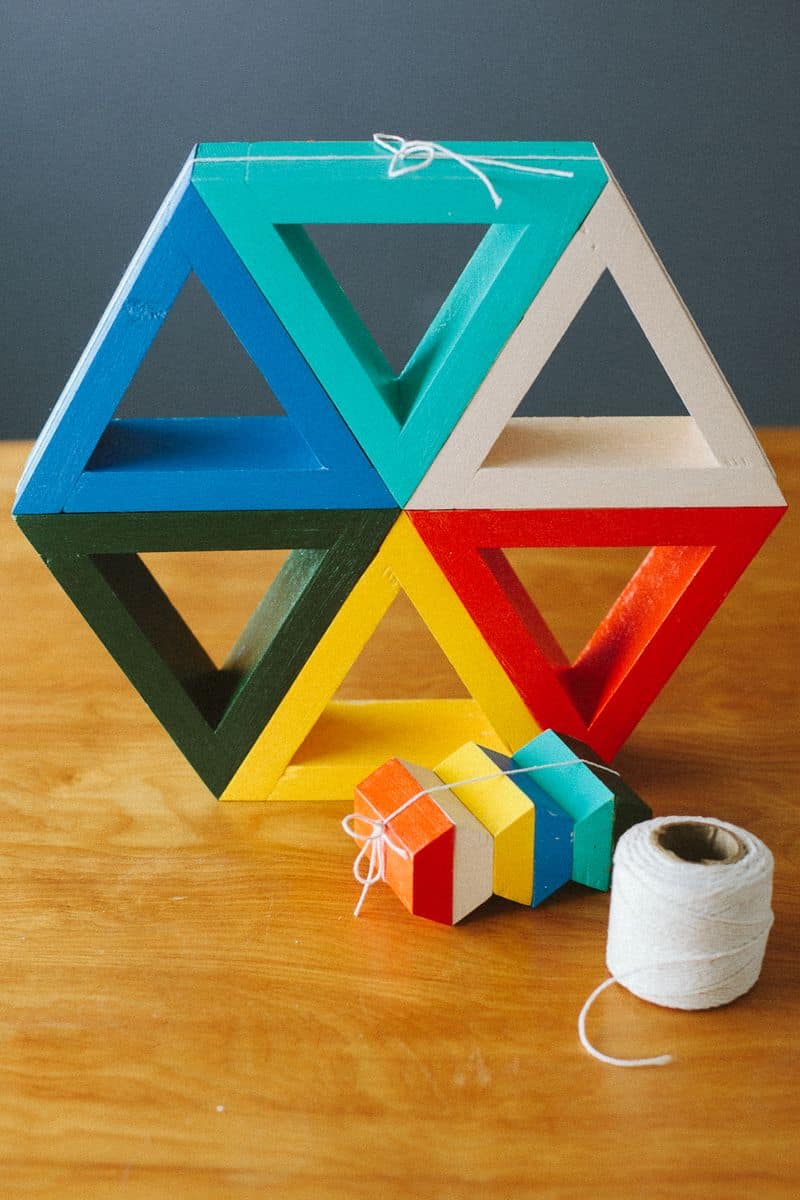
Step 1. Set miter saw to 30˚ Step 2. Cut 1st 30˚ angle then flip board and measure long end 6″. Step 3. Cut 18 6″ (long side) pieces with 30˚ angles on either end. (*Length is optional, you can make these as big or small as you like, as long as all sides are equal.) Optional Step: Cut 2″ (long side) pieces with 30˚ angles if you’d like to add inset shelves for the triangles that will hang upside down. Step 4. Sand off all burrs and rough spots with the 100 grit sandpaper, making all the pieces nice and smooth. Step 5. Arrange the first triangle (as pictured). Step 6. Glue together using a thin yet generous smear along connecting edge. Be sure to press pieces nice and tight together. Wipe off any excess glue. Repeat for all 6 triangles. Let glue dry for at least 4 hrs. Step 7. Sand any exposed, dried glue. Now you can paint your shelves if you choose to.
Tip: When painting smaller pieces, use a tack to keep it from getting too messy!
 You could give these as a gift or hang in your home! Thanks so much Josh + Sarah! (You can meet them on Instagram: Josh @subtletakeover and Sarah @arrowandapple)
Genial idea!!!
I think its easy to made and very affordable shelves (Estantes). Even looking pretty good.
Cute idea!
XO Nat
http://www.natinlove.com?cm=1
I actually love this. So much! This is so cute.
X
http://kendra-genevieve-rose.blogspot.com
these are adorable! colorful.
I really love these shelves, but I don’t know anything about saws/ woodworking, and im wondering if they are available for purchase ever? If so I would be very interested in buying a set!
I make these at custom sizes.
You can order one triangle or one hundred starting at $4.95
http://kinyadiggit.us/stores/product_info.php?products_id=33&osCsid=8092d31e5488d58cb0cfe15004754e21
We moved to: http://www.frazierslist.us/store/
i need to find a cute boy with a miter saw i guess.
Though very cute, my husband has enough on his to-do list. Triangles will have to wait!
Kim
http://loopsoflavender.blogspot.com/
These are fun and stylish. However, without splines or biscuits in those joints, weight or changes in humidity and temperature will eventually cause them to split at their joints. Be careful with gluing end-grain, it doesn’t hold a tight bold for very long.
Just a quick tip from a former woodworker 😉
Oh my goodness, I love these shelves! Thanks for this amazing tutorial!
http://higgledypiggledywonderland.wordpress.com
These are amazing, i want some!
so cute! would love a set of these for my room! 😀
this looks so cool!love the colours and it look so easy to make!
thank you for sharing 🙂
awesome idea! check in my DIYblog www.milavojtowicz.blogspot com
Look amazing! Great idea! Cute!
xx
biskvittka.blogspot.com
great idea for the little man’s room 🙂
www.mamajulesbrussels.blogspot.com
x
This is so lovely! Anything mini is adorable. Now I will have to find lots of cute things to put on these teeny shelves….
www.little-beast.blogspot.com
These are lovely! Like the bright colours 🙂 x
I wouldnt really call these shelves unless they were much bigger but as wall art its great. 🙂
What a lovely idea. I like how simple it is! These triangles look amazing!