 Photography has come a long way since I can remember. In the 90s when I was in high school, I bought a disposable film camera nearly every week. I carried them with me everywhere and amassed a pretty impressive collection of random high school memories. My favorite disposable cameras were the black and white ones, which I liked to paint with a set of Dr. Ph. Martin’s paint that my mom let me borrow from her art room.
Today I’m working with Canon USA and taking a time machine back to my high school days to show you my favorite painting technique. It’s so fun! So pick out a variety of your favorite black and white images, print them out and paint with me!
 As always I used my Canon PIXMA iP8720 printer to print my photos on luster paper. The quality is amazing! No matter what size photos I am printing, I use 13×19 paper and arrange the photos in Photoshop on a 13×19 page. Here I am printing four photos, all 5×7 inches.
 Supplies needed: Printed black and white photos, watercolor paints (I love these Dr. Ph. Martin’s brand, which you can find at most art shops), paint brushes and water.
 Tip 1: Start with light coats of paint, water it down a bit before applying. You can always add more color, but you can’t go back if you apply too much.
 Tip 2: Photos with more contrast and darker areas look more realistic when painted. Photos with large blocks of white space (or very light tones) will show more brush marks and look less realistic.
 Tip 3: Print extras so you can practice! This is probably the most important tip. Not only is it good to practice your technique, but it’s also fun to try coloring different areas of the photo or experimenting with different colors before you commit.
You can see here that I tried something kinda weird on the bike photo. It didn’t end up being my favorite, but it was fun to try. And the sky on the house photo was just too much space to fill evenly, so on the final print I decided to leave the sky and focus the color just on the buildings.
 The thing I enjoyed most about this project was the experimenting. Laura and I printed a bunch of extra prints and tried different colors and applications. I could do this all day. The “playing” part is by far my favorite!
 I’m super in love with the result. It’s kind of a pop art effect. A little bit of an Andy Warhol vibe due to the punchy colors. Fun!

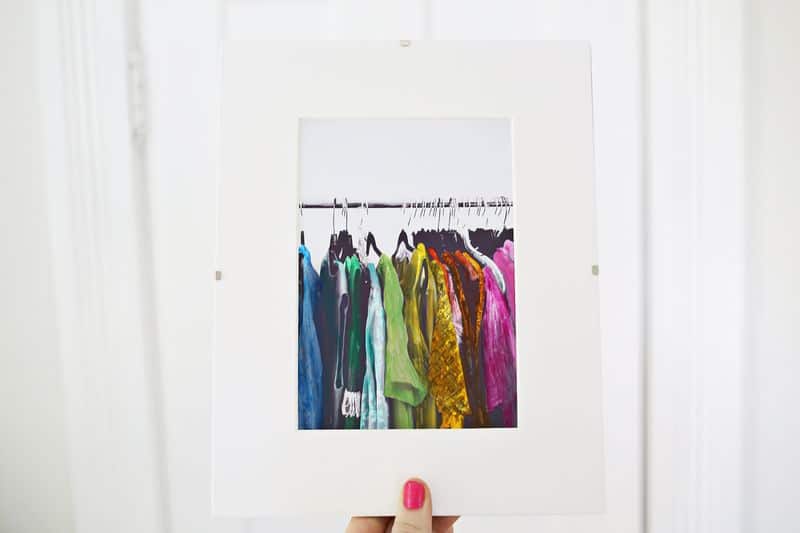
 I framed my photos minimally with white mats and simple, inexpensive frames. I think they make a pretty rad grid as a set of four.
What do you think? Do you want to try this technique? Please do. I promise you’ll have fun. We’d love to see your photos on Instagram using #mybeautifulmess XX! Elsie
Credits//Author and Photography: Elsie Larson. Project Assistant: Laura Gummerman. Photos edited with A Beautiful Mess Actions.
Hello – thank you for the advice re: hand colouring photographic prints. Have you used a matte finish print to hand colour? Which P H Martin’s watercolour paints do you recommend?
Thank you.
I am a high school teacher and I’m planning on using this method for a project. I am going to take your advice and try the watercolors you recommended. There are several kits available online. Which kit would you recommend. Each one seems to have different colors. Set of 12-14 etc are available. I’m not concerned about the price because I plan on using them for my own photography as well. Thank you
Melissa
I used to hand color photos for a studio with my mother when I was young. I used oils, and have never tried watercolor. I’m going to try. Matte finish.
This is so awesome! so gonna try this!
I love this idea, and these photos make for a great keepsake! Xo
www.theblushdiaries.com
What a great idea. Will be trying that one myself.
Did you try printing the photos on watercolor paper at all? Just wondering how that would turn out. Thanks!
This technique is so cute! I love it!
www.homeschooledhoosier.blogspot.com
I never would have thought of this. Great idea! http://www.hannamarielei.com
What a great idea!
http://carinazz.blogspot.com/
Thank you!
I love your hand-colored photographs!!!!!!
And I will definitely try it…
Thanks for sharing 🙂
xxx
Eu amei essa técnica, com certeza vou tentar fazer. Ficou muito criativo é lindo 😀
http://joicyrecco.blogspot.com.br/
Wow this is beautiful! Definitely going to give this a go Dreams and Colour Schemes
I found mine on sale at Hobby Lobby for 30 bucks. If you get a smaller set, you can still mix the colors yourself!
xx- Elsie
I didn’t have any issues with smudging. You should try it!
xx- Elsie
Yep!
xx- Elsie
I just bought pre-cut photo mats.
xx- Elsie
Oh, my goodness! This is adorable. I love how it’s classic looking with all the fun pops of color. Thank you for the beautiful idea, Elsie!
Anna Neumann from The Whistling Willow
I believe it would work with any prints, but you’d have to try out each individual combo to be sure! I tried the Canon Luster paper and something more matte and I liked the Luster better for the paint application. Hope that helps!
xx- Elsie