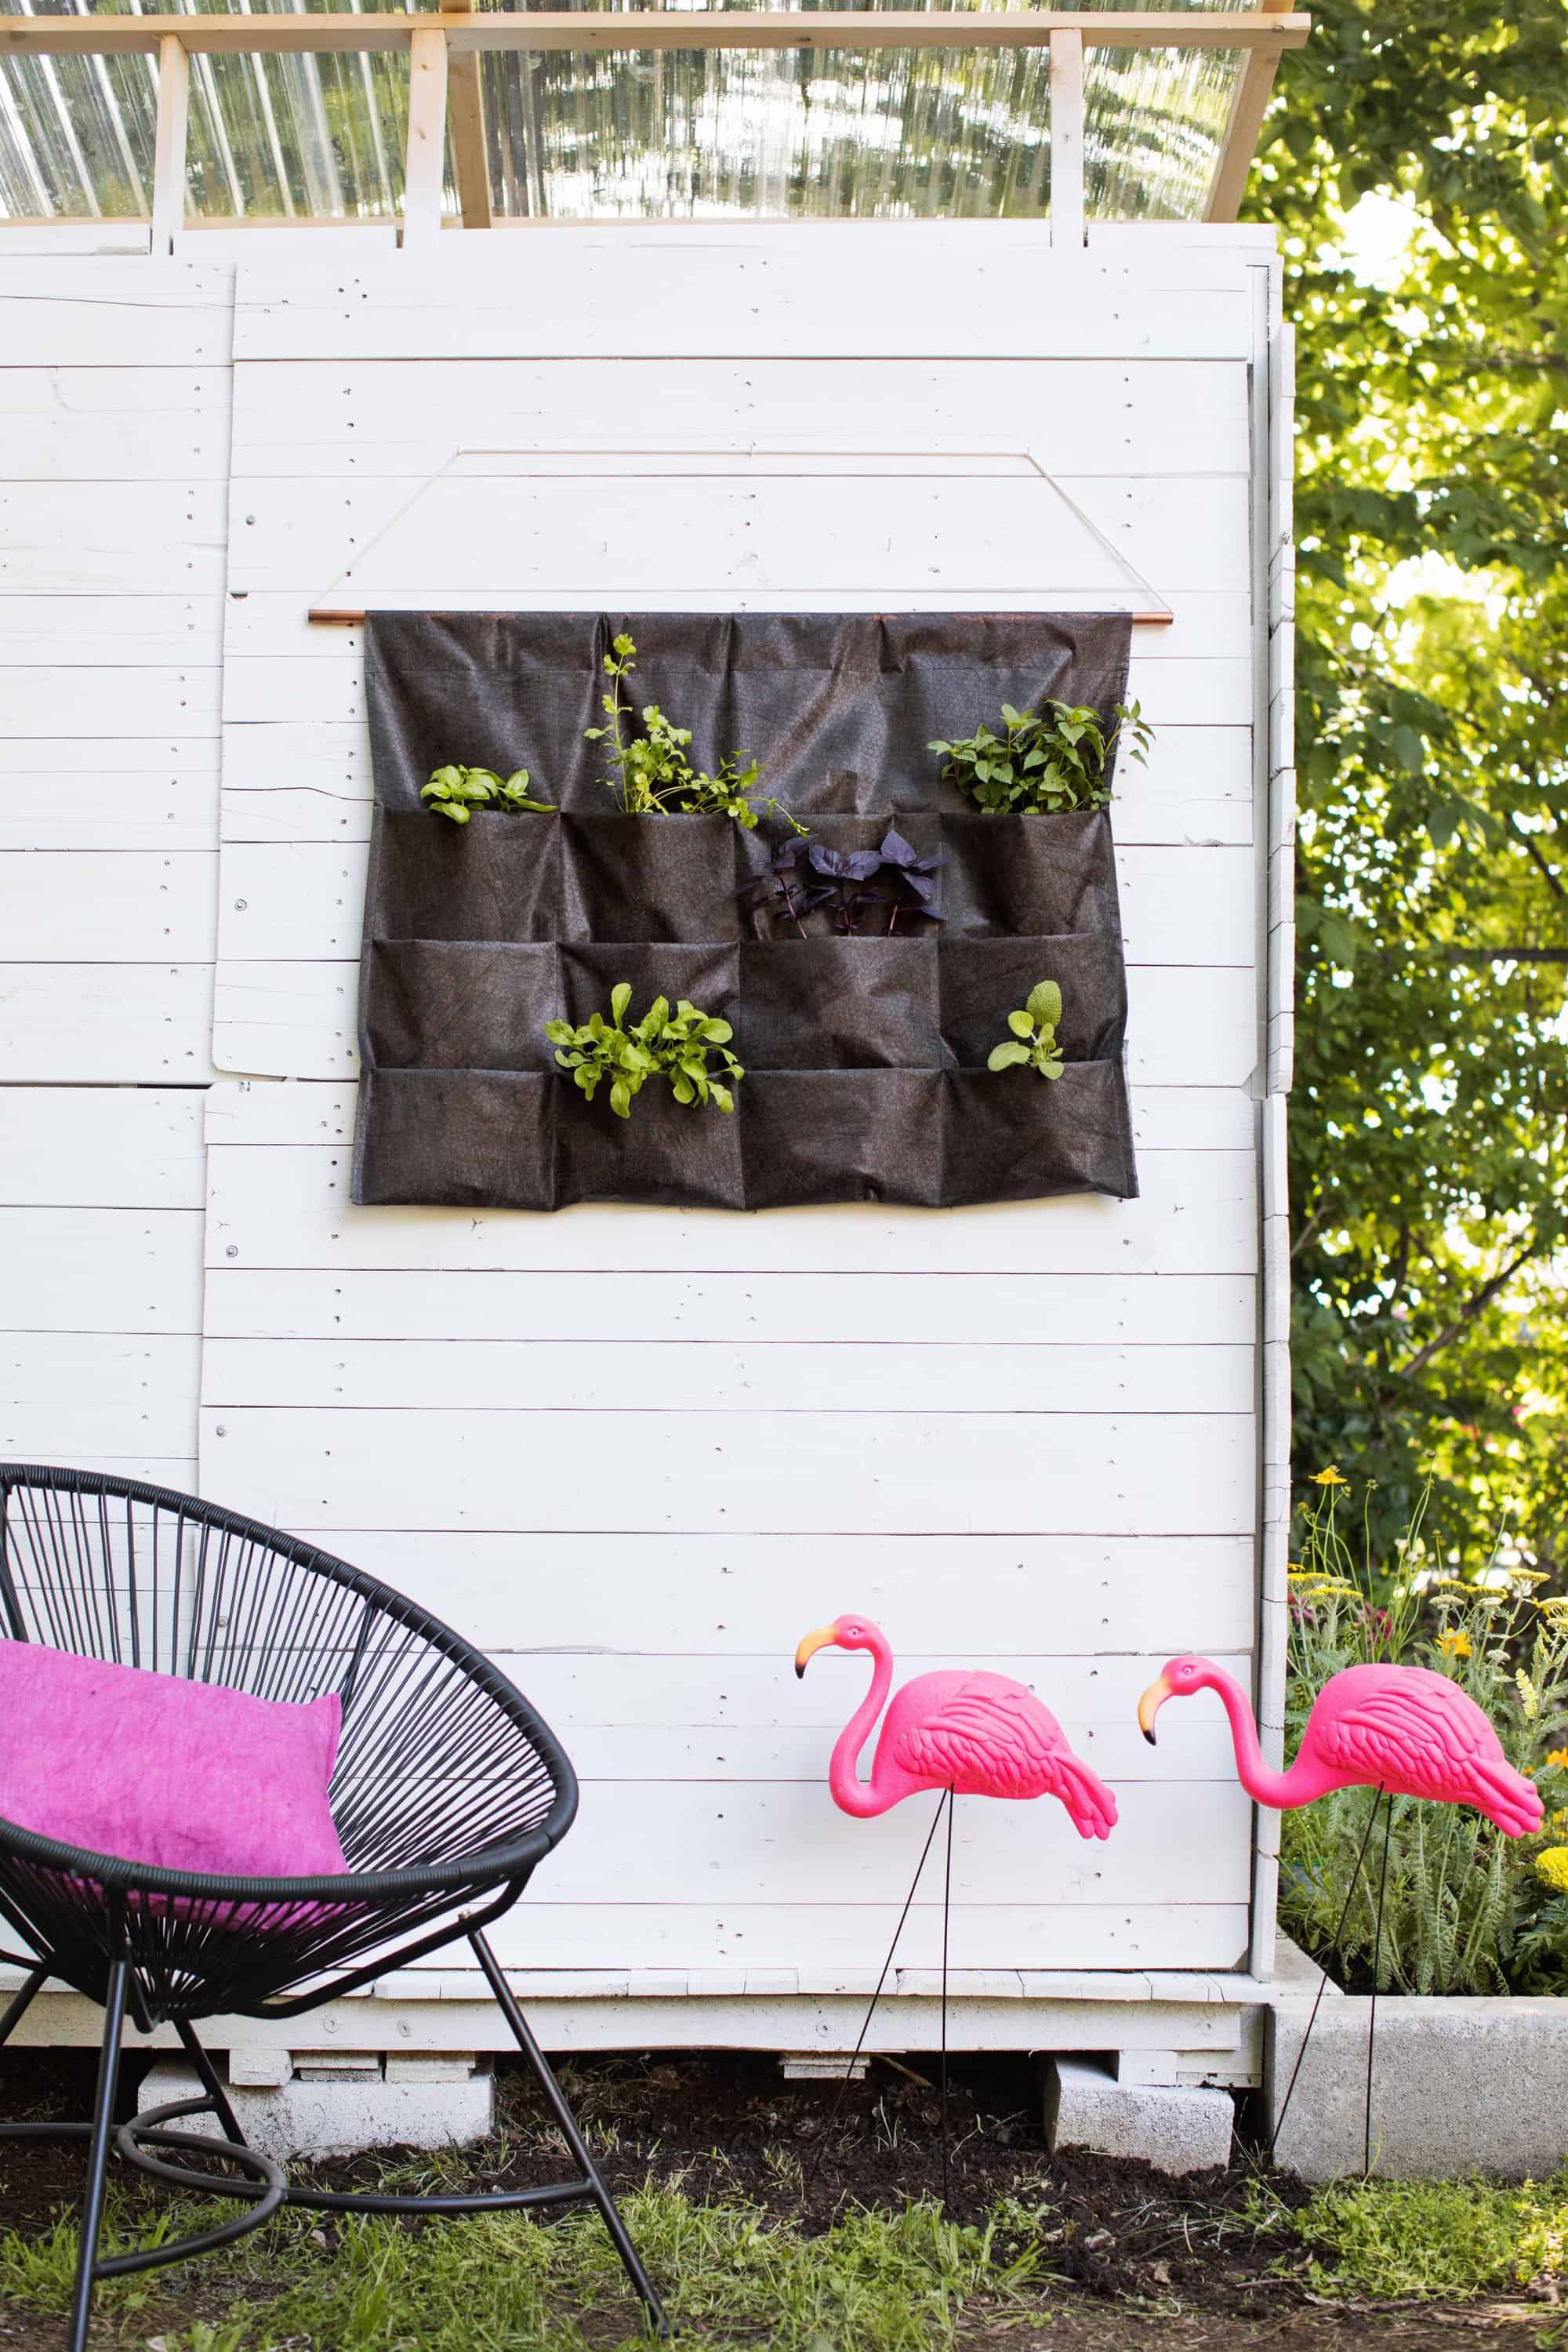
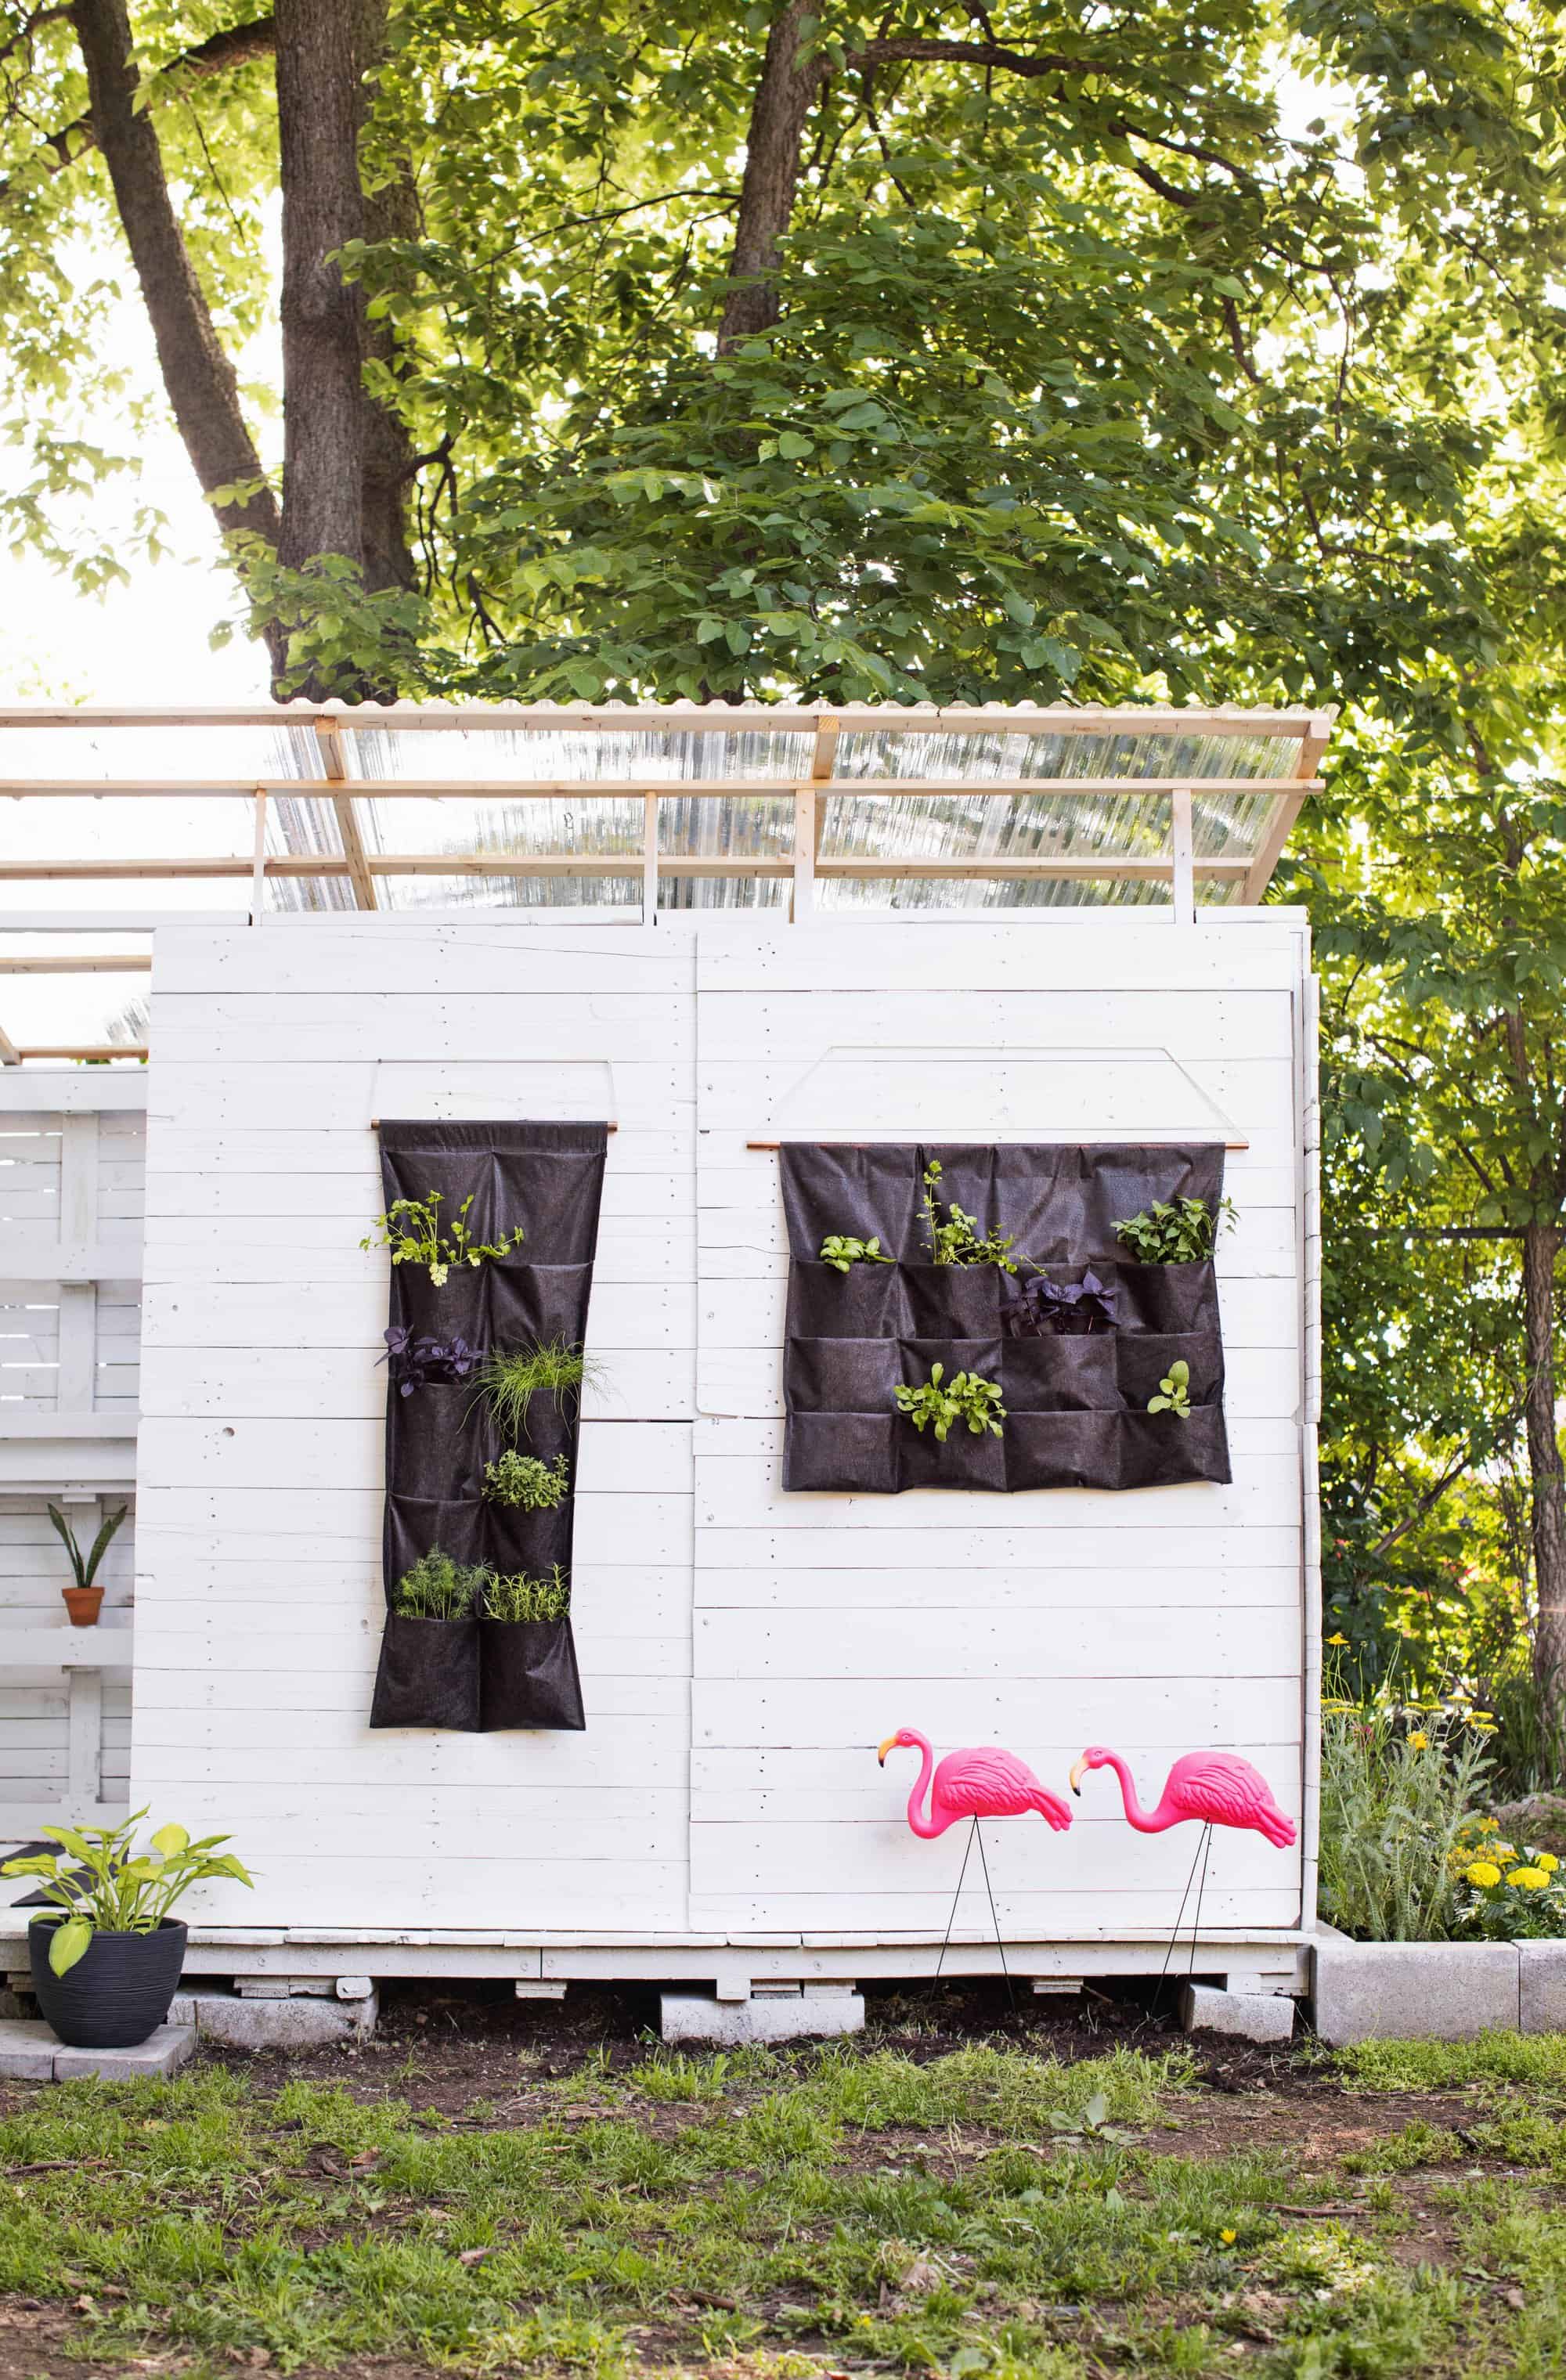
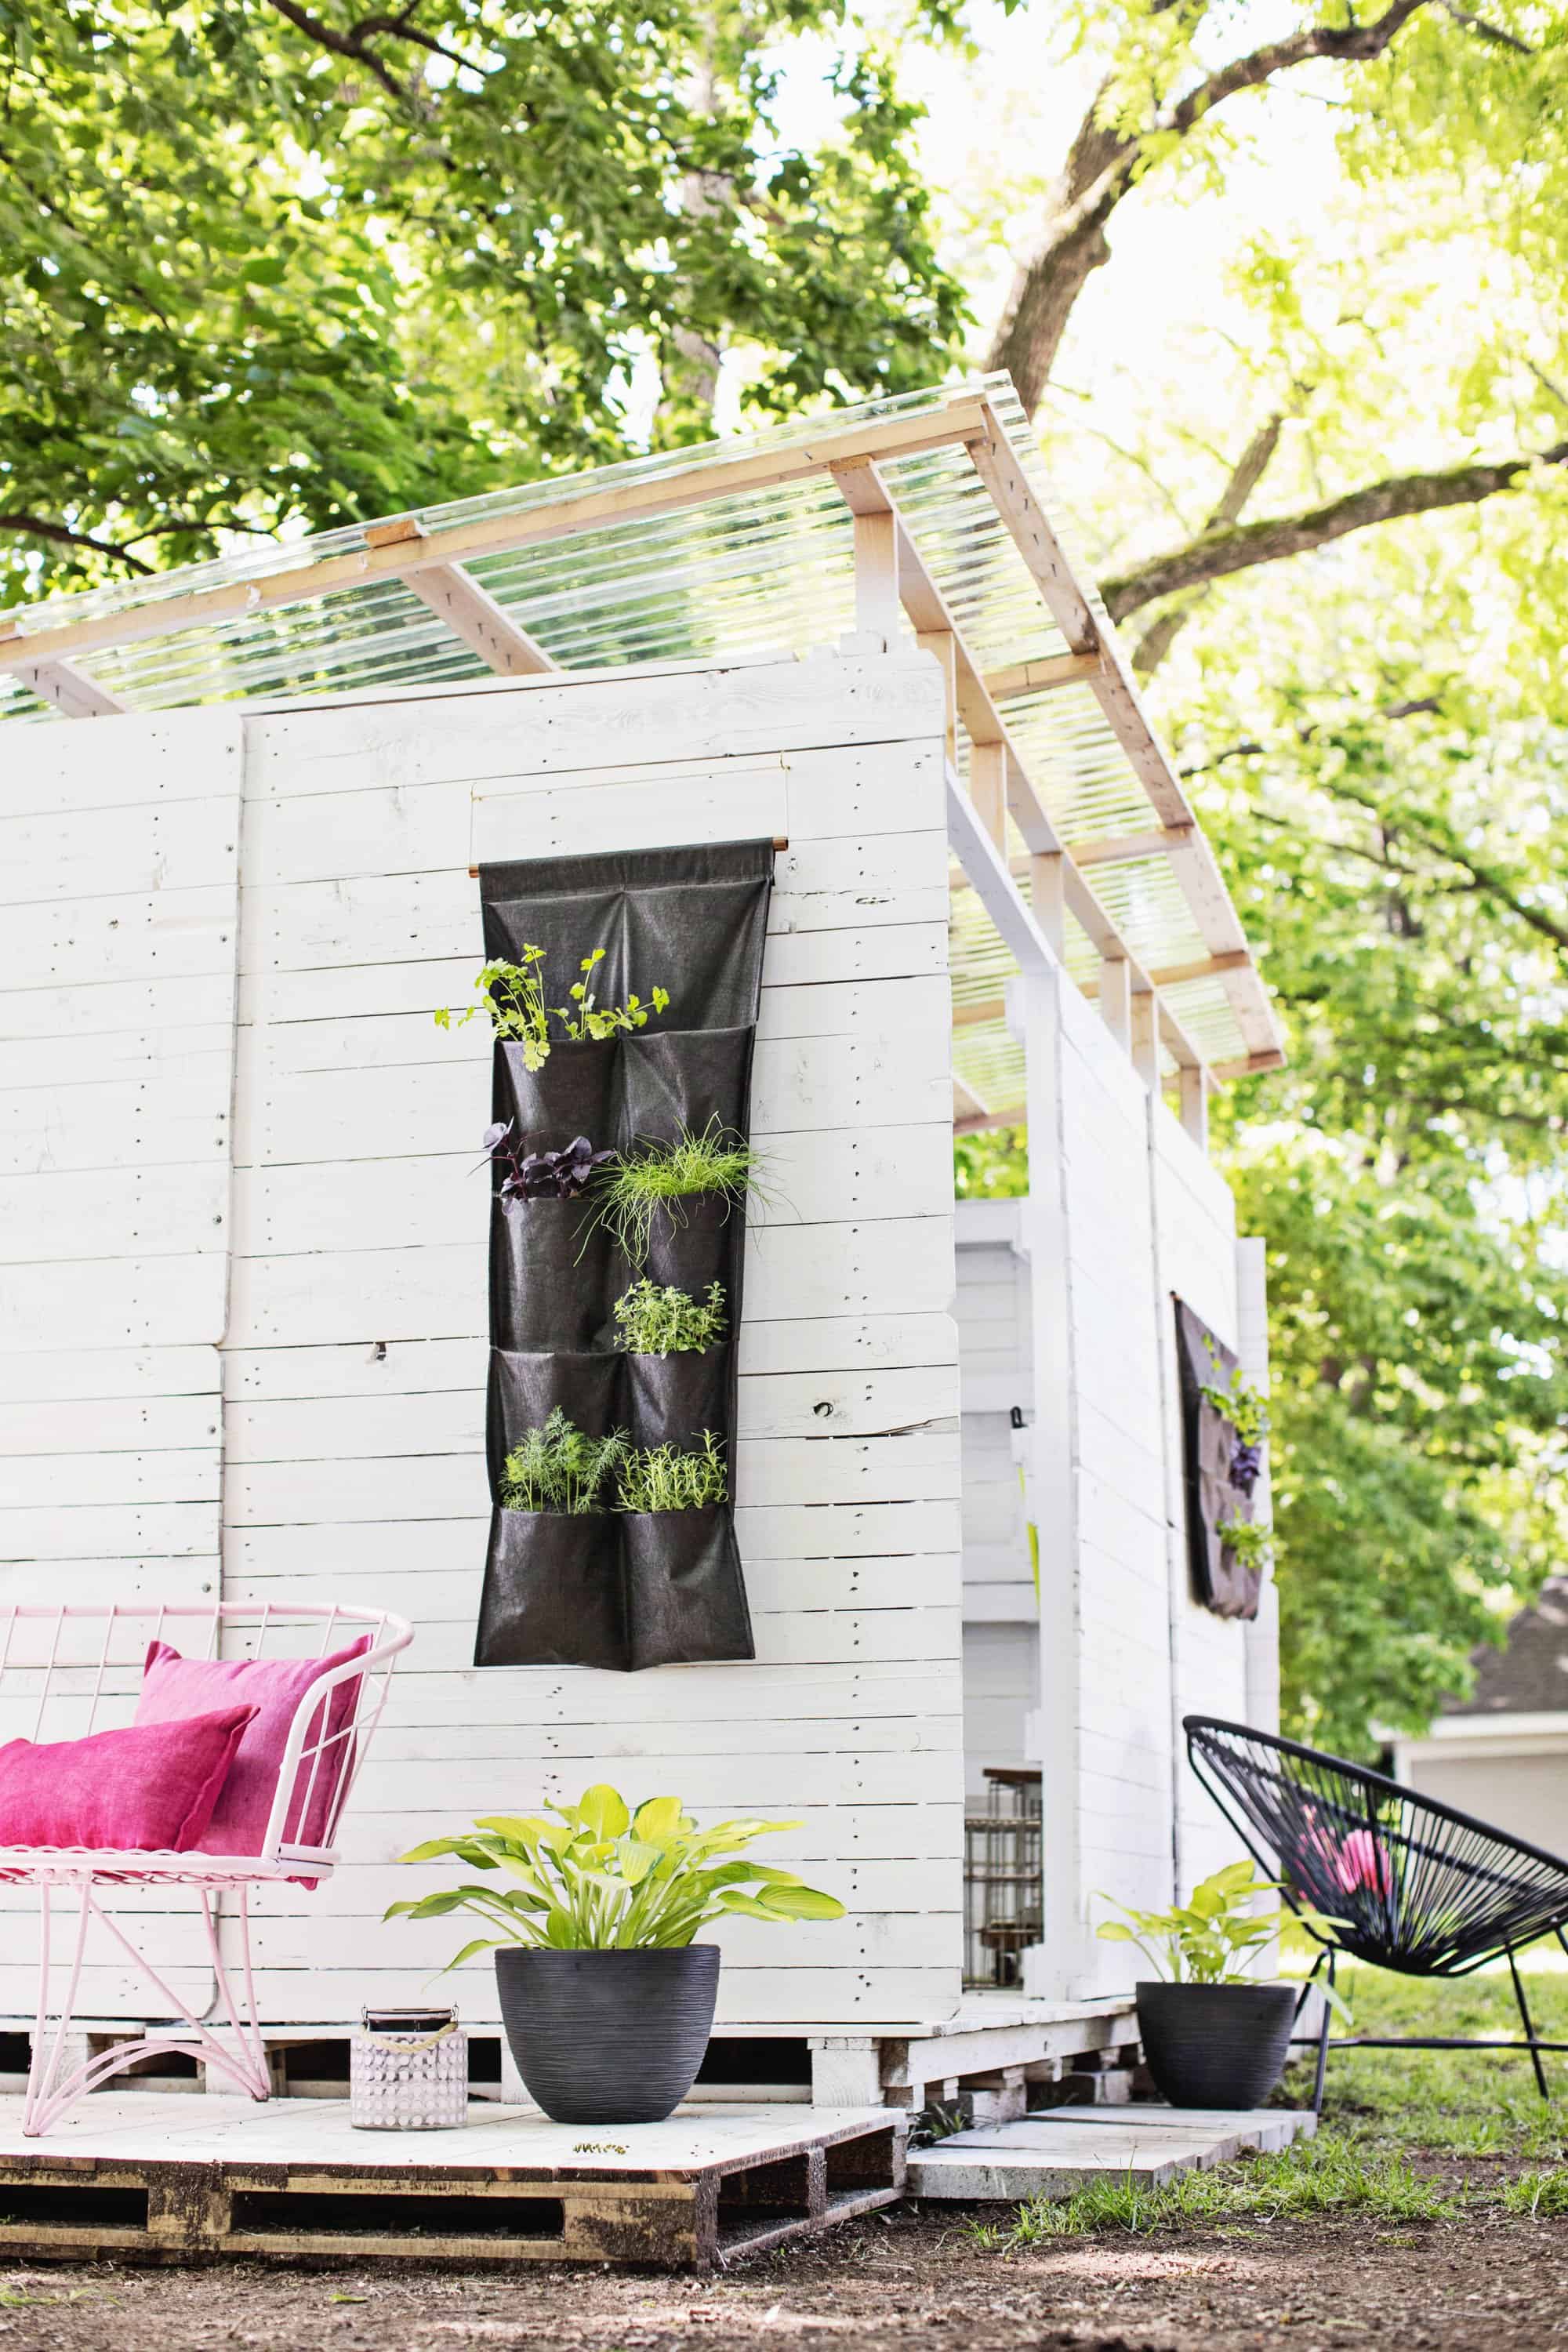
 We’ve had container herb gardens in the past at other rental houses, but this year we’ve built a fun little shed in our backyard that has the perfect space for a vertical herb garden.
There’s not much sunshine in our mature yard with its 100-year-old walnut trees, so I needed to be smart with how I used my space. Since we’re also putting in a veggie and a dye garden (more on this soon), I decided to go vertical with some herbs.
It’s the perfect project for anyone else with a limited amount of yard space, or no yard at all! Also, renter-friendly!
Related: Check out our outdoor spaces archive for more ideas.
 Since this project requires a few more yards of weed barrier than I have room to shoot in my studio, I’m going to show you a miniature version using a not-to-scale, scaled down size. Or, if you’re into dollhouses, a regular size?
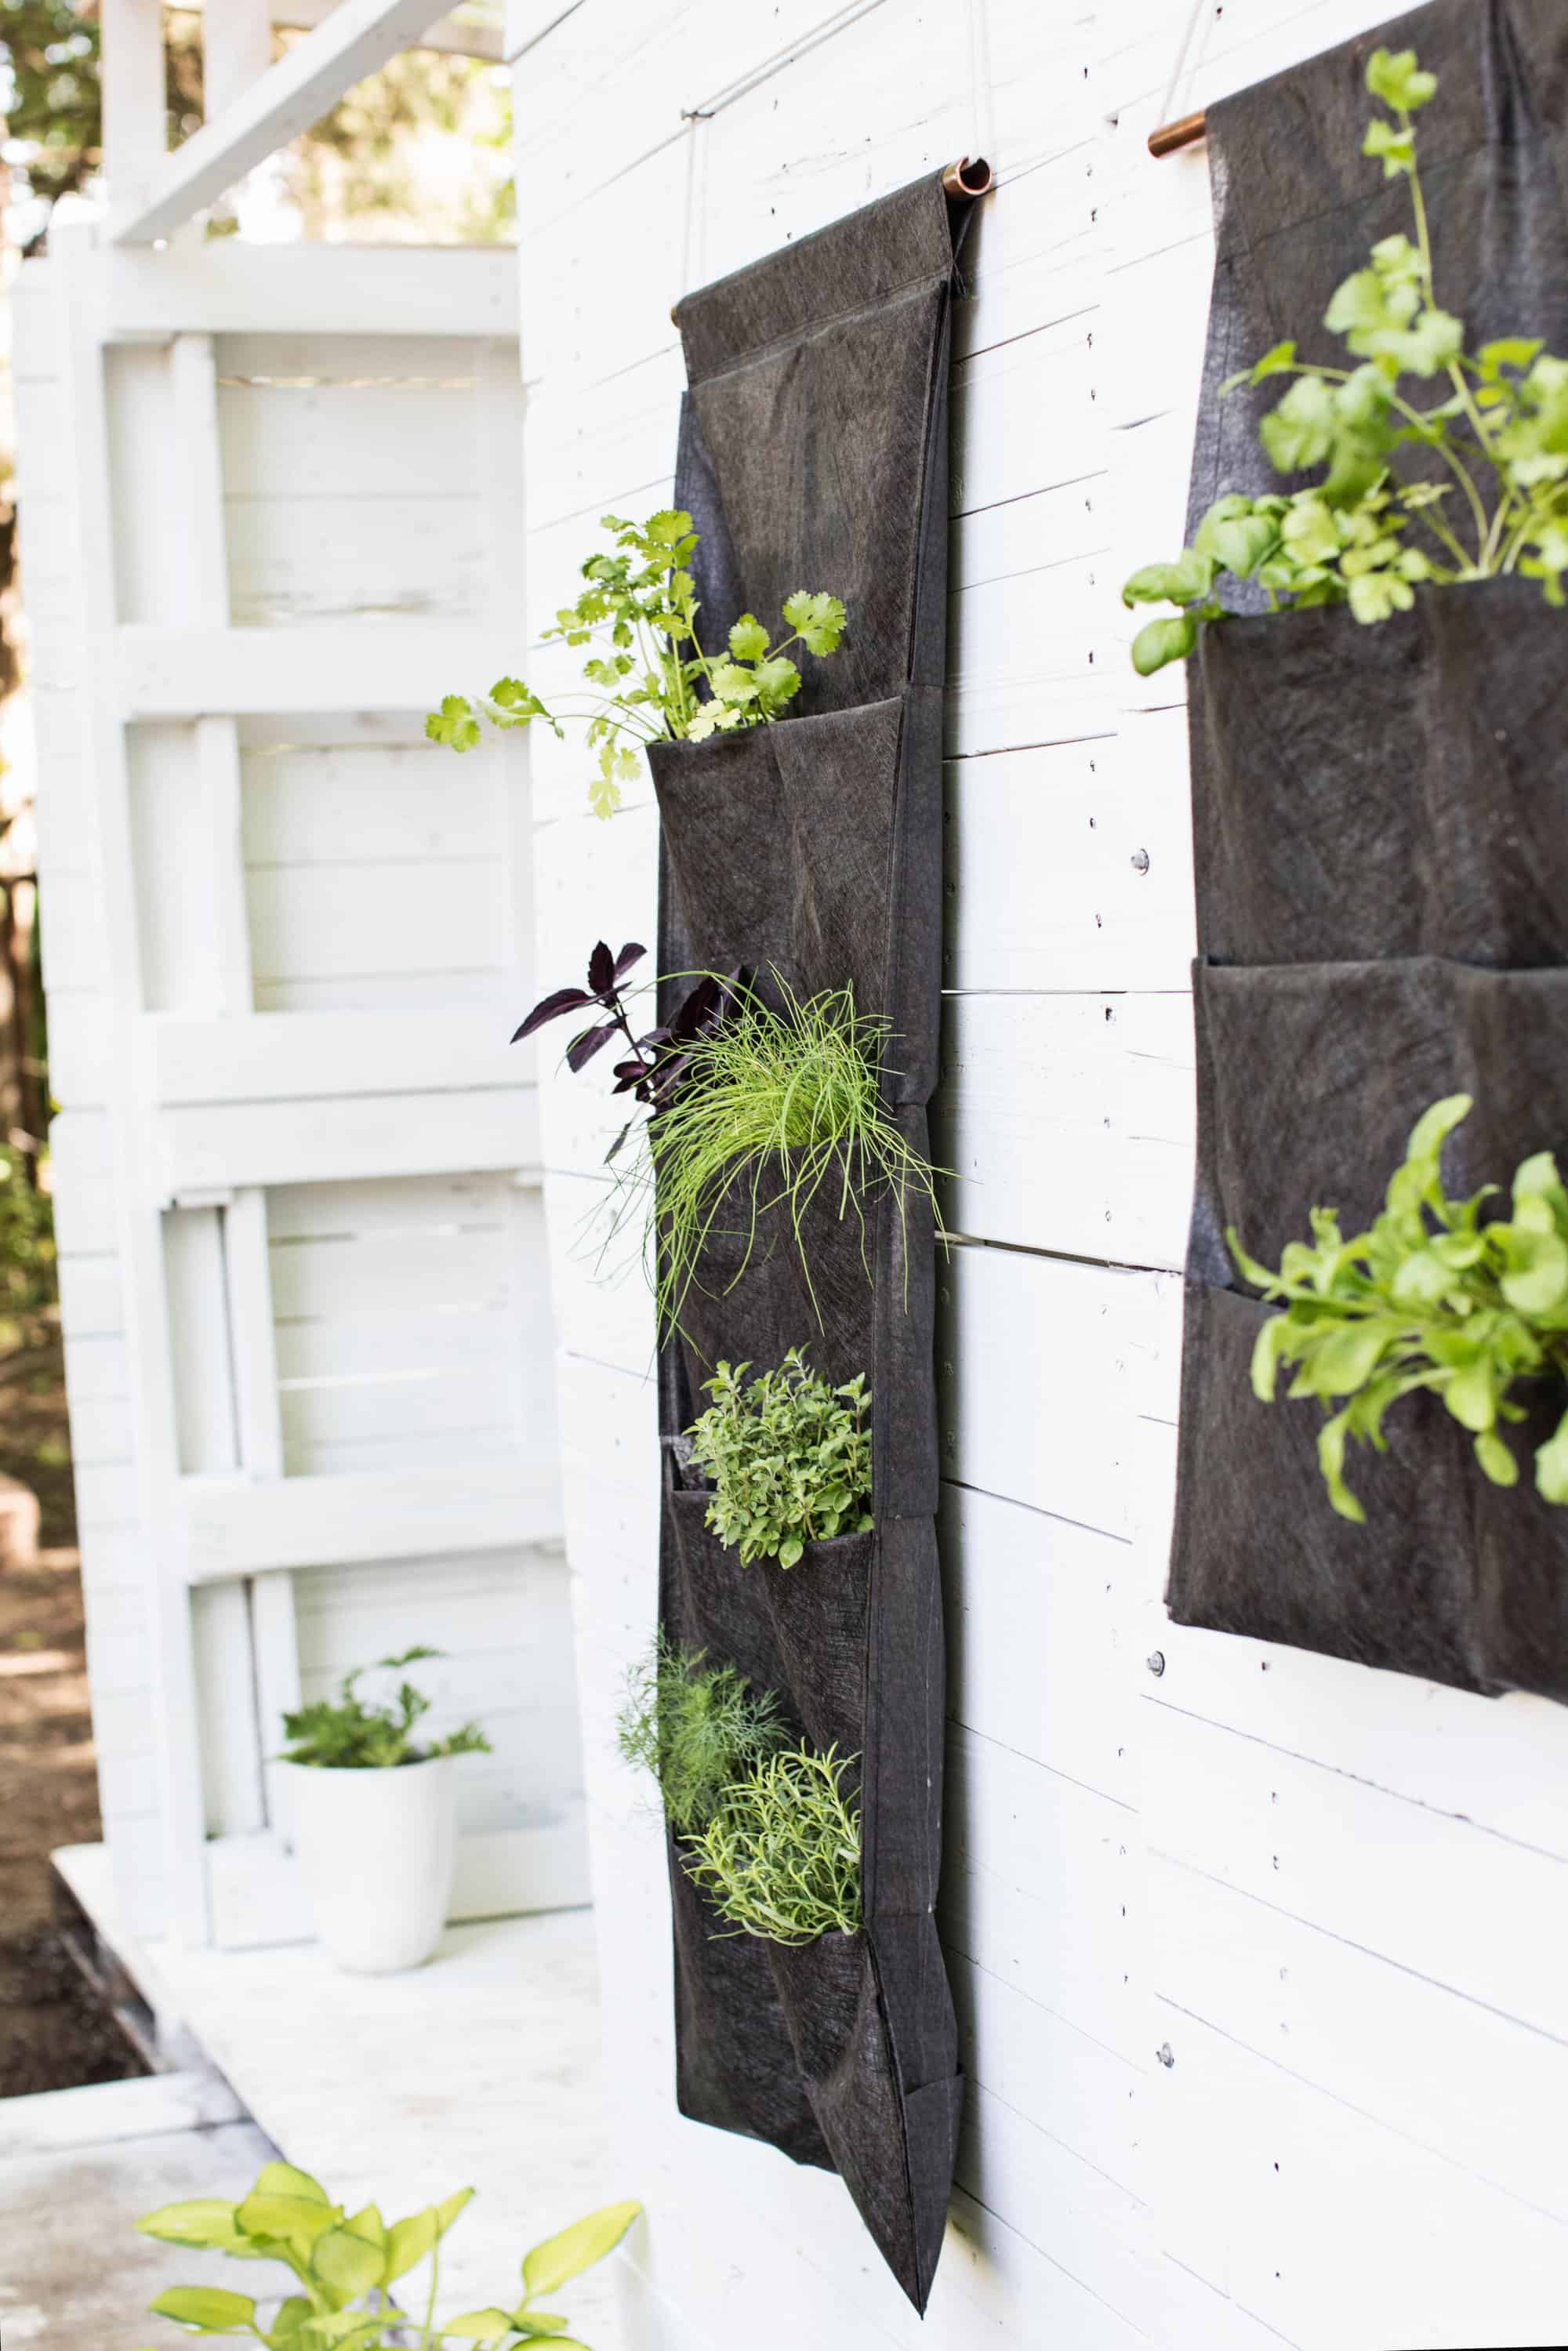
This will show you all of the steps but will be providing you the correct measurements in the instructions below. In the end, you’ll end up with a 2′ x 4′ hanging herb garden and all of the knowledge you need to adjust your measurements in case you need a different size.
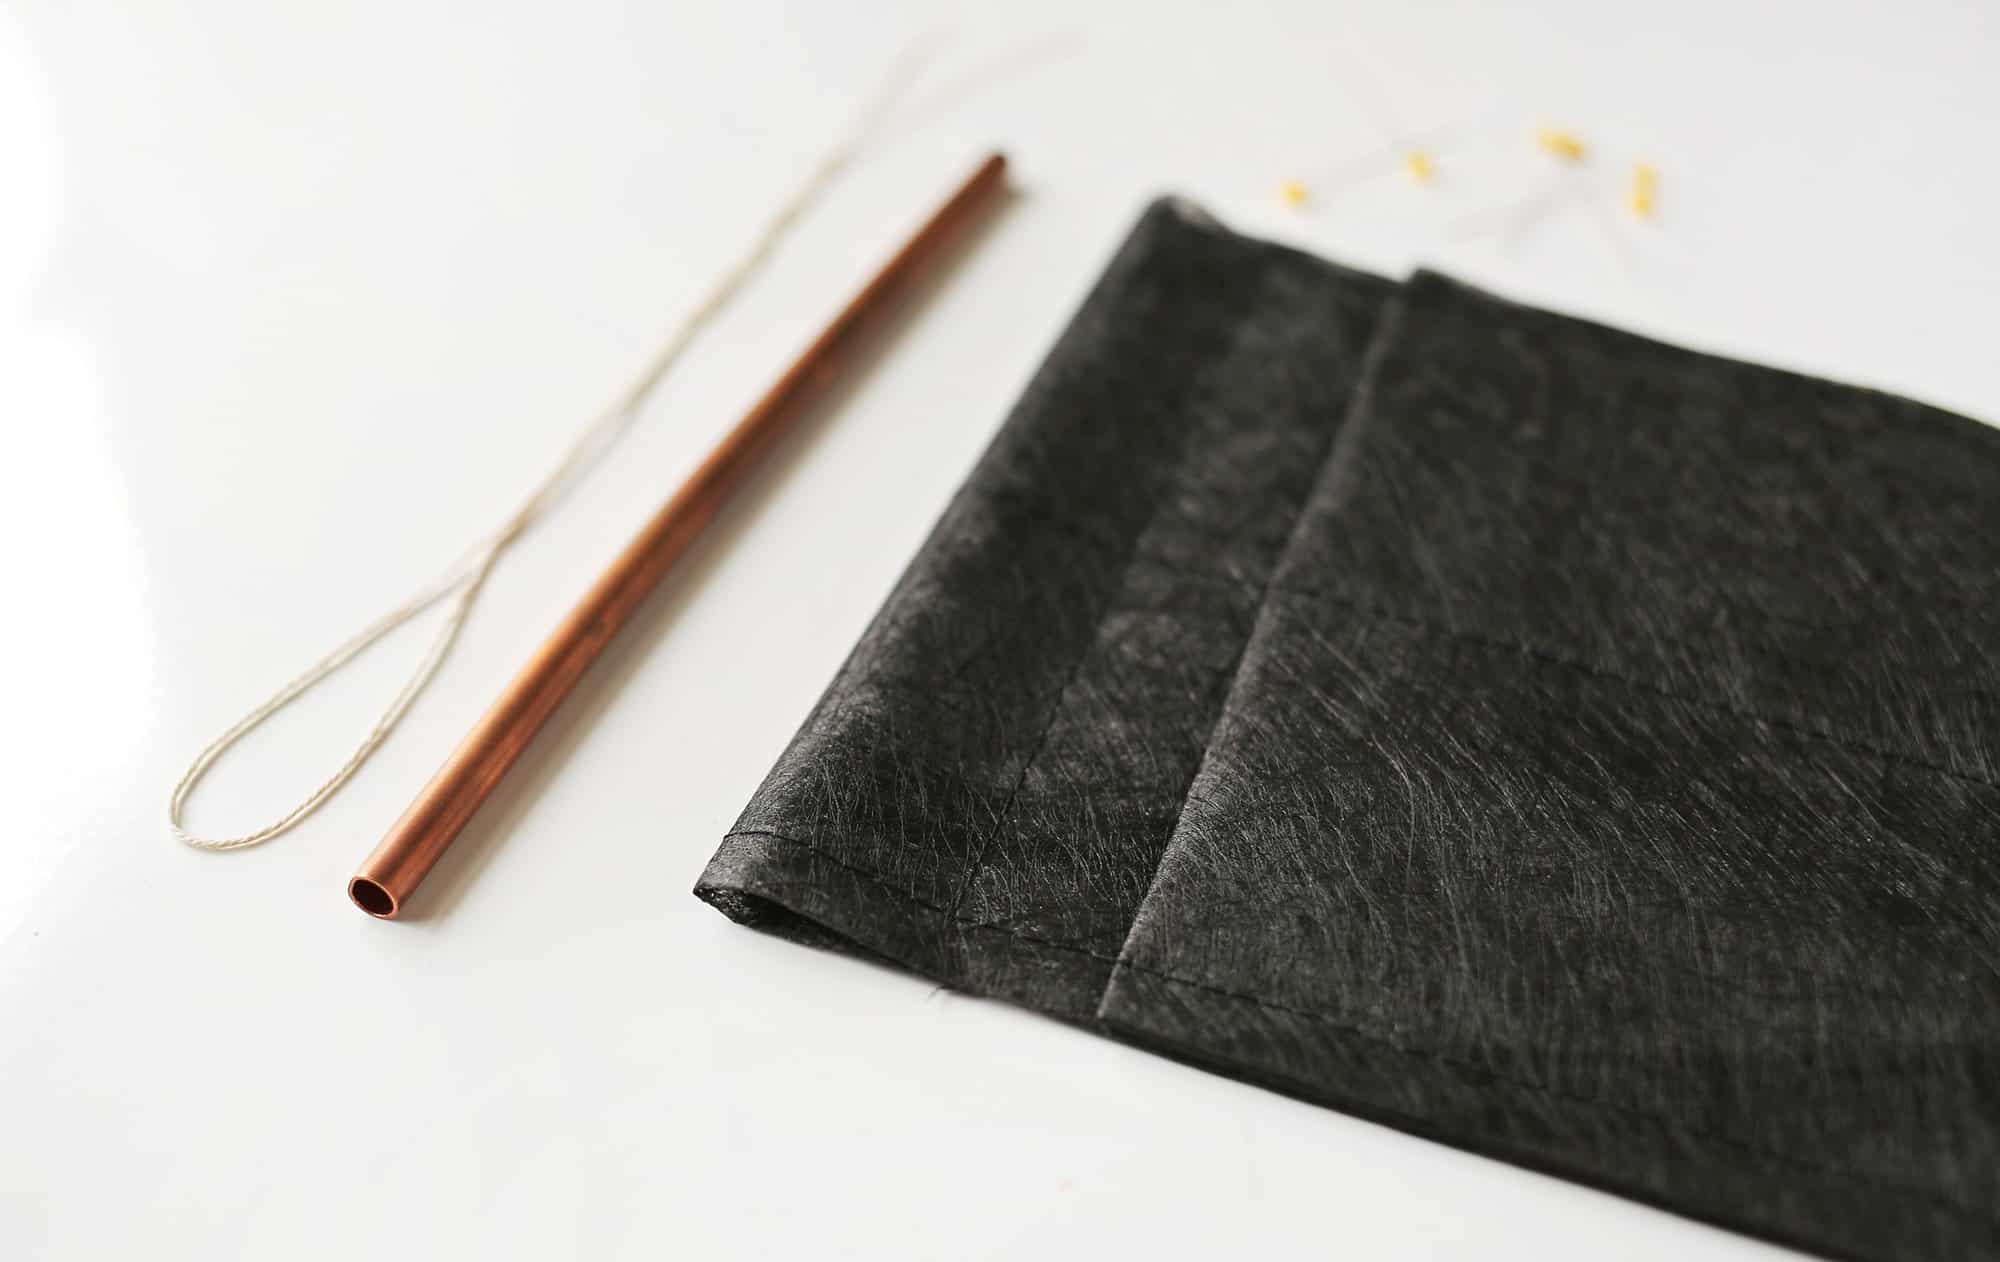
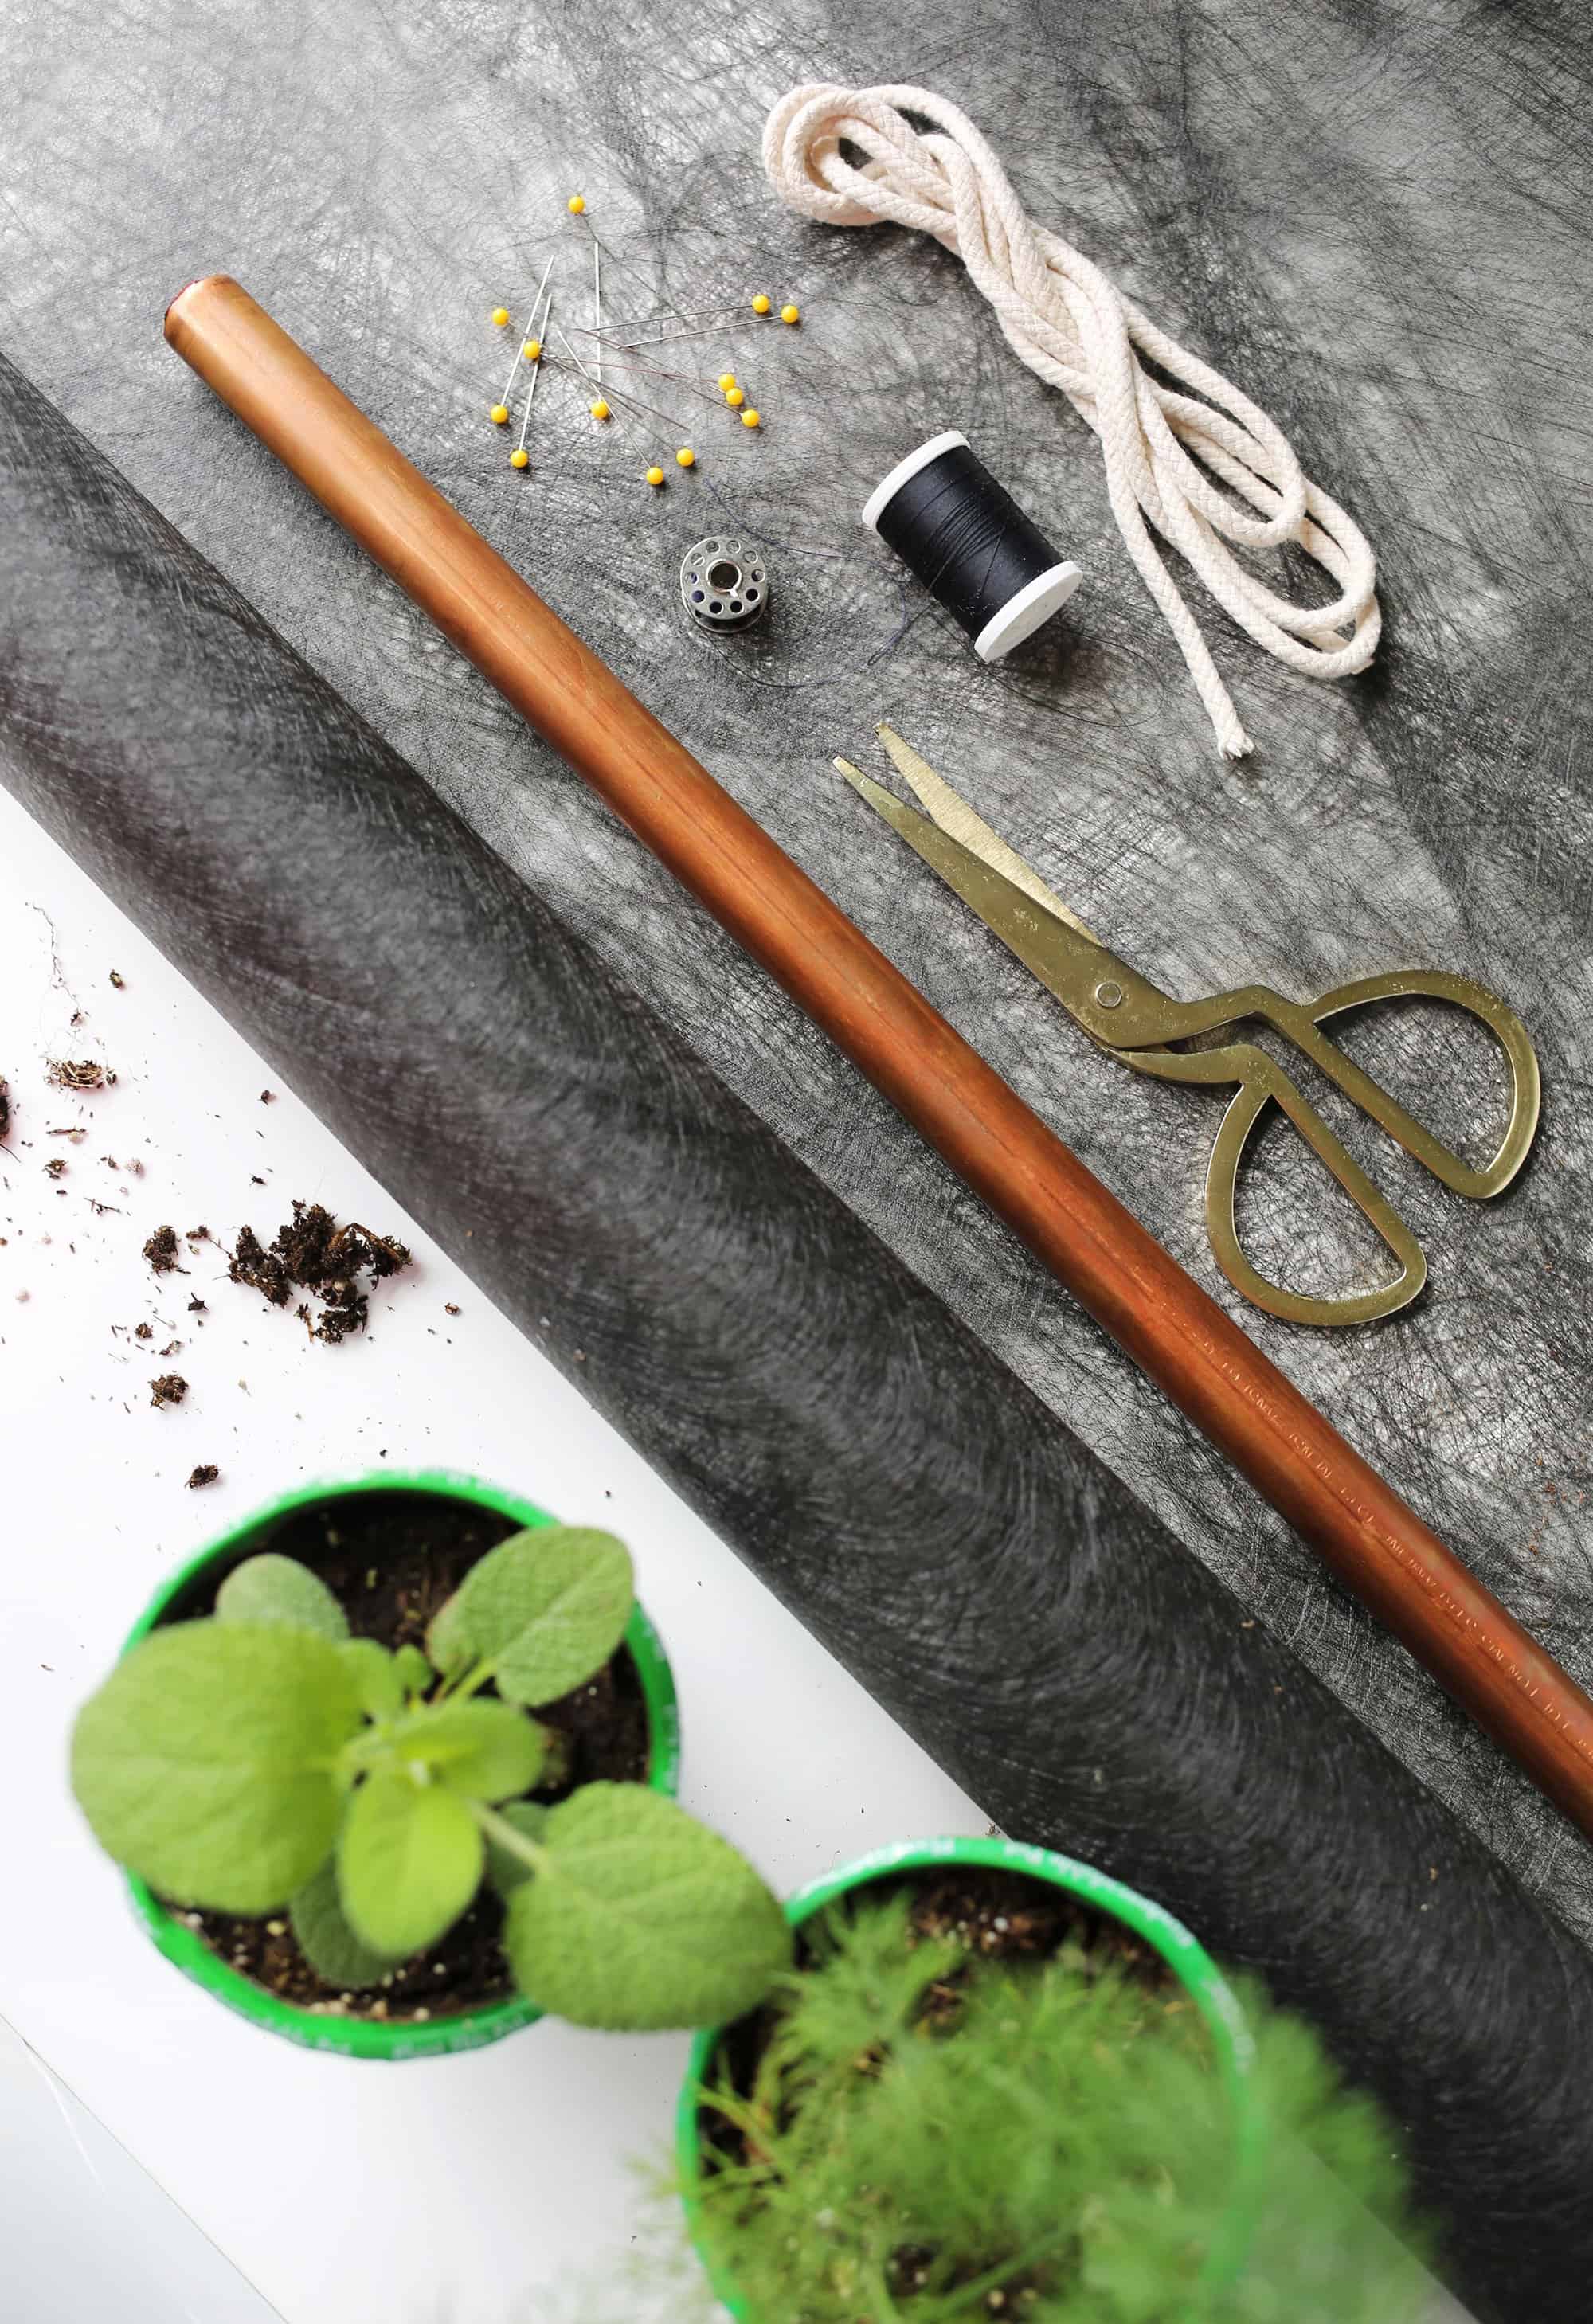 Supplies:
–one 3’x50′ roll of weed barrier
-1″ x 2′ copper pipe
-sewing machine
-straight pins
–5′ cotton rope
-scissors
-herbs of your choice
-potting soil
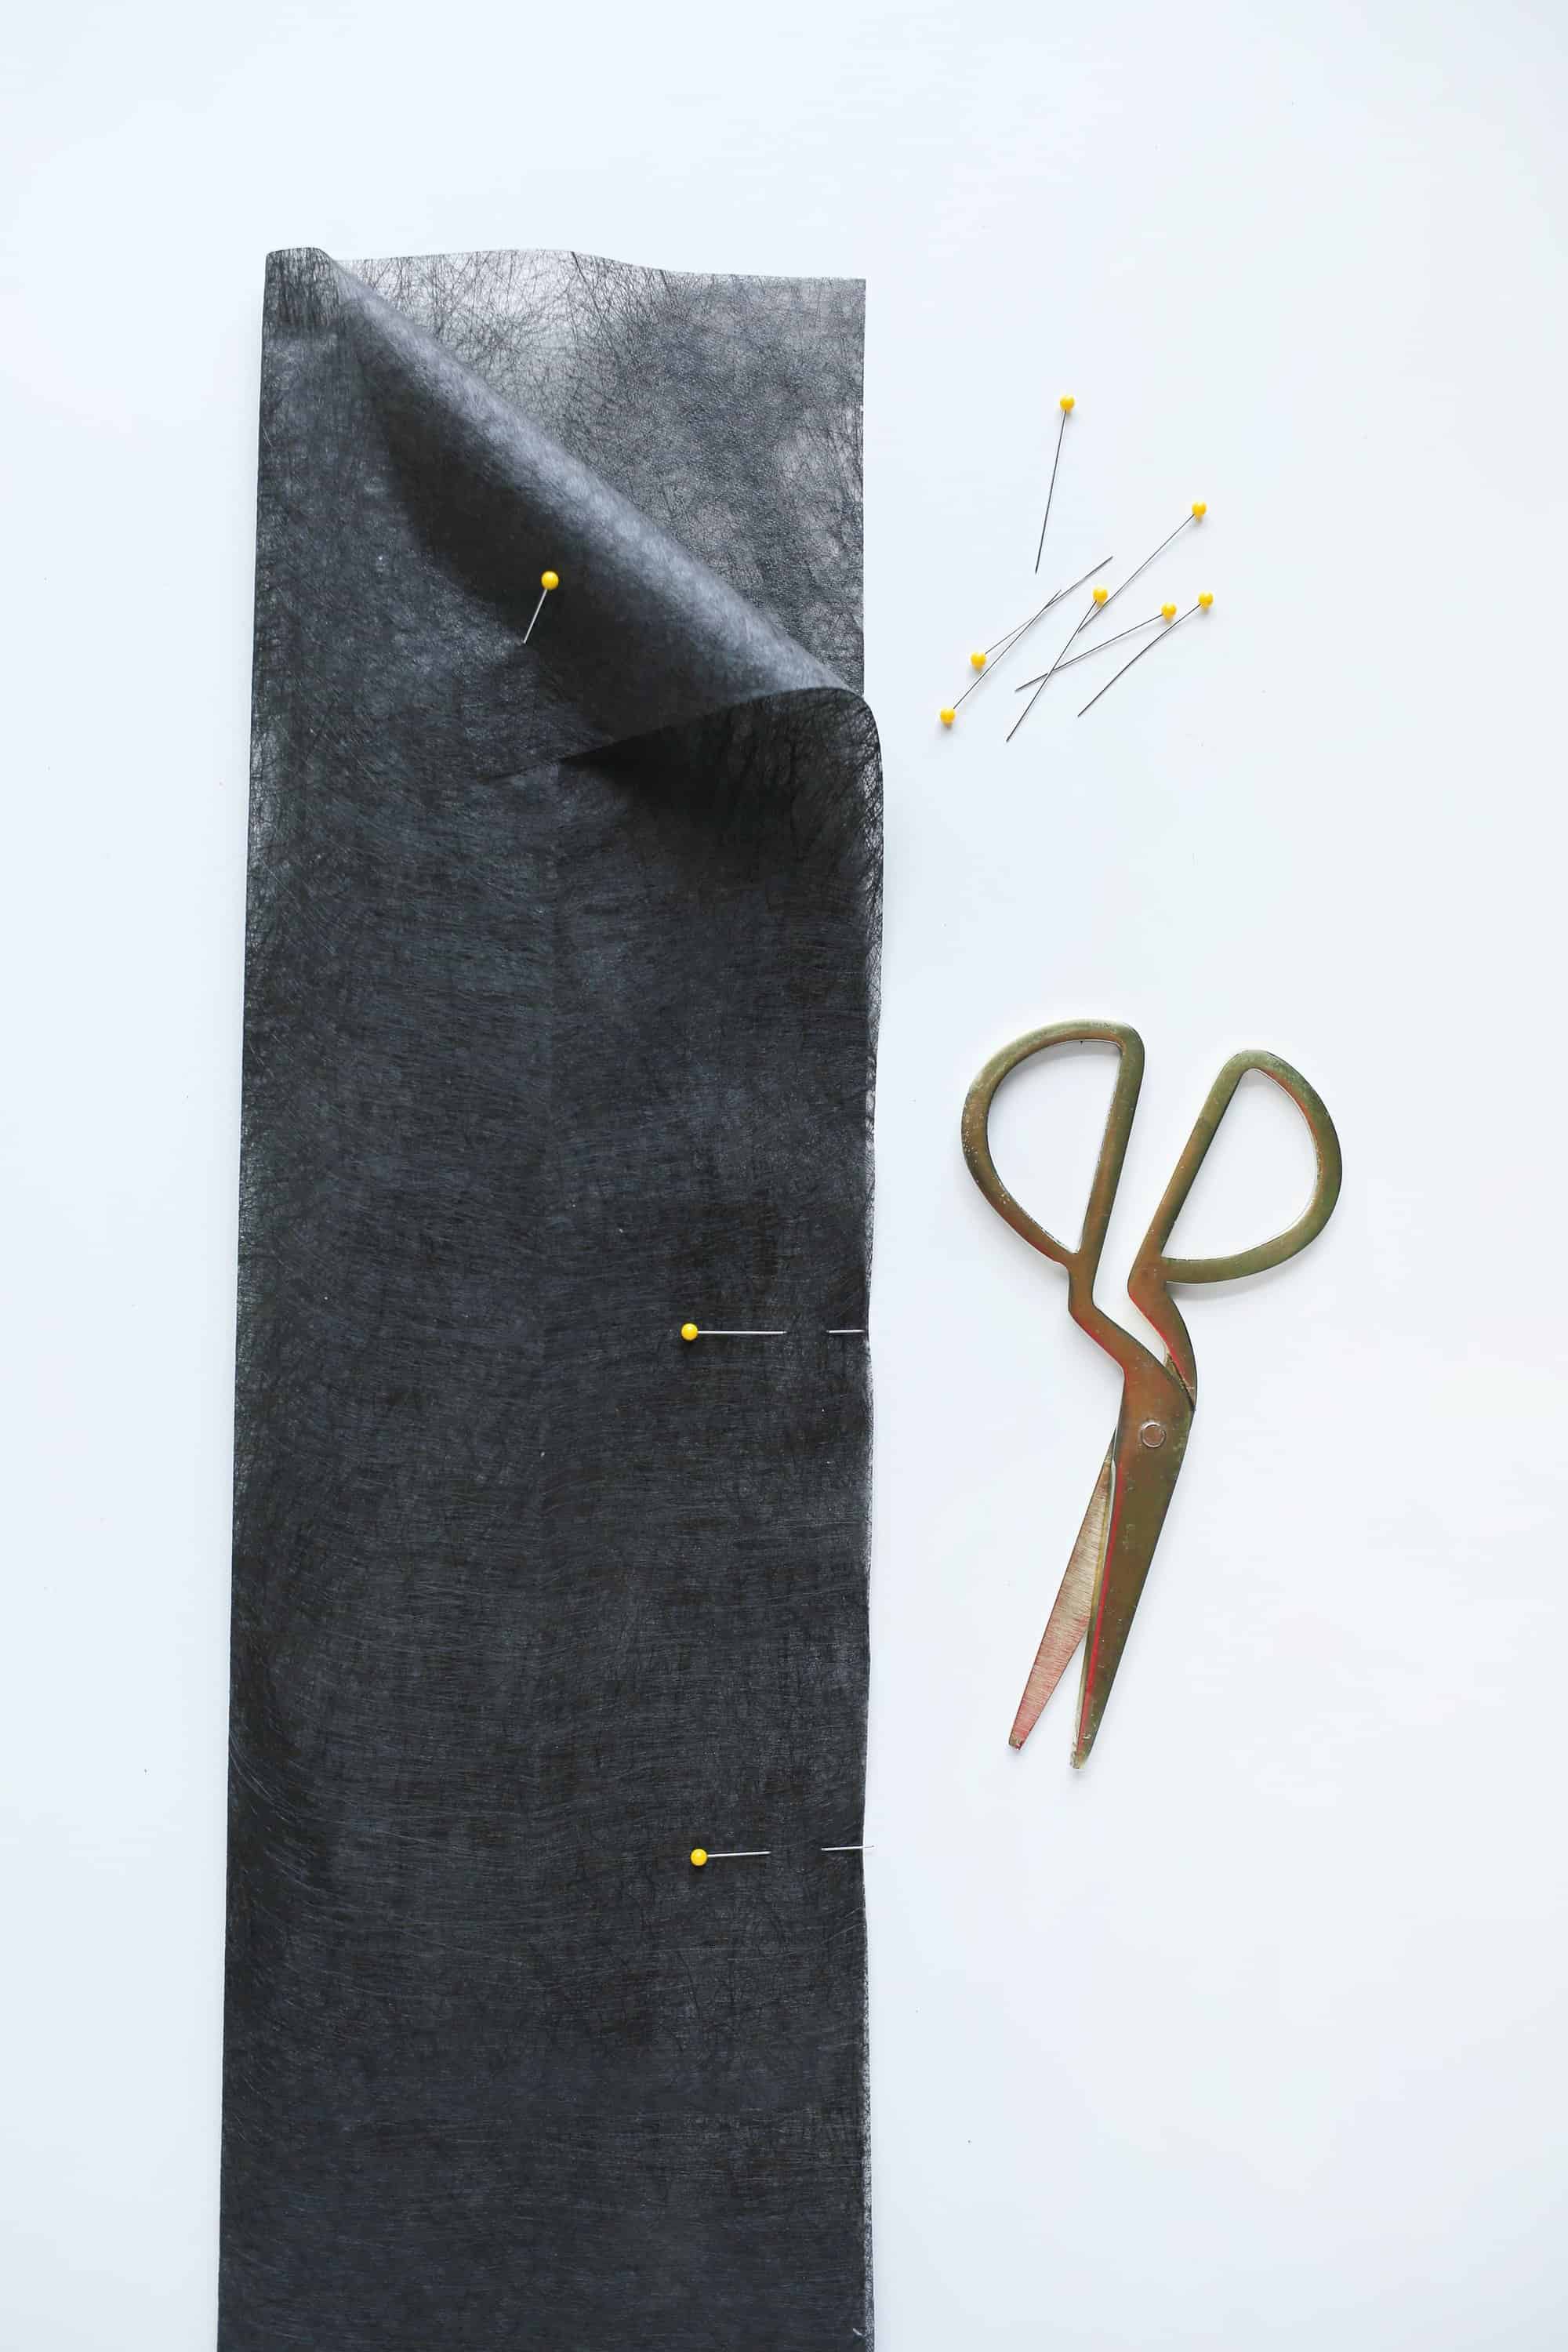 Cut 11 feet from your landscape fabric roll and set the rest aside. Fold it in half lengthwise and add straight pins every 6″ where your two edges meet. It will feel like a lot of fabric to wrestle, so I suggest doing this part on a clean floor.
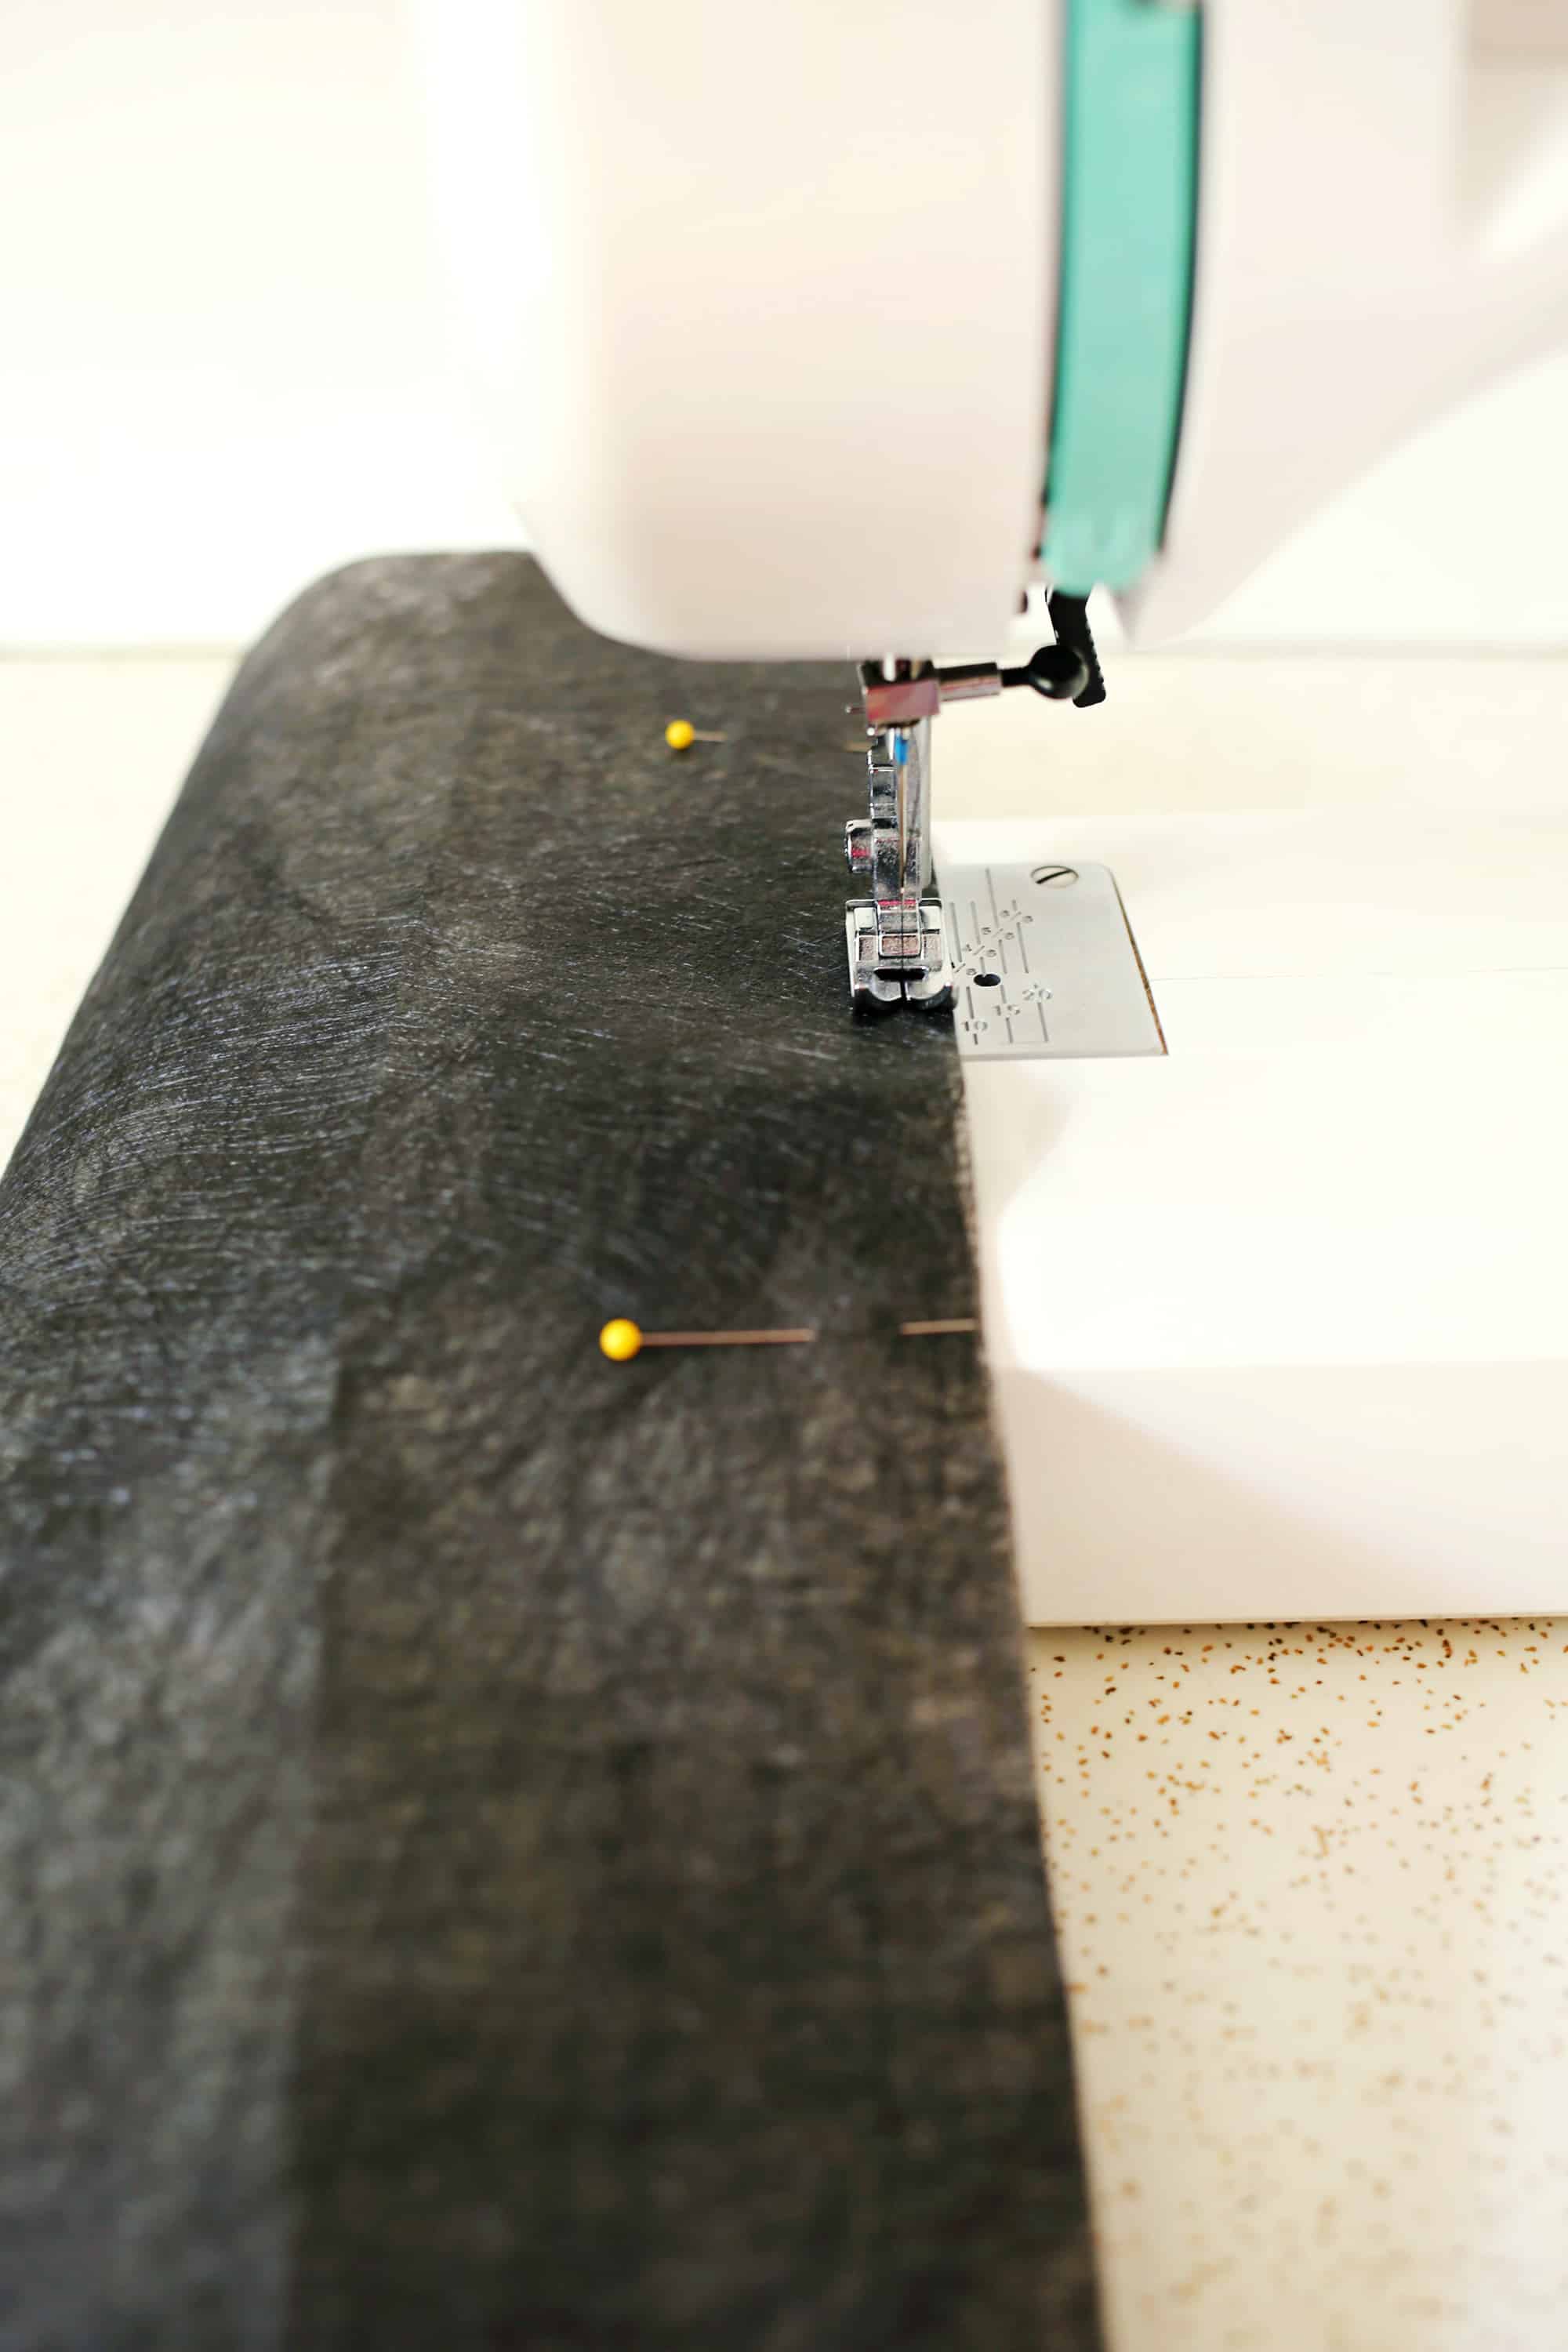 Stitch down the side with the straight pins so that you leave about 1/4″ of room from the edge. Remove your pins when you’re done.
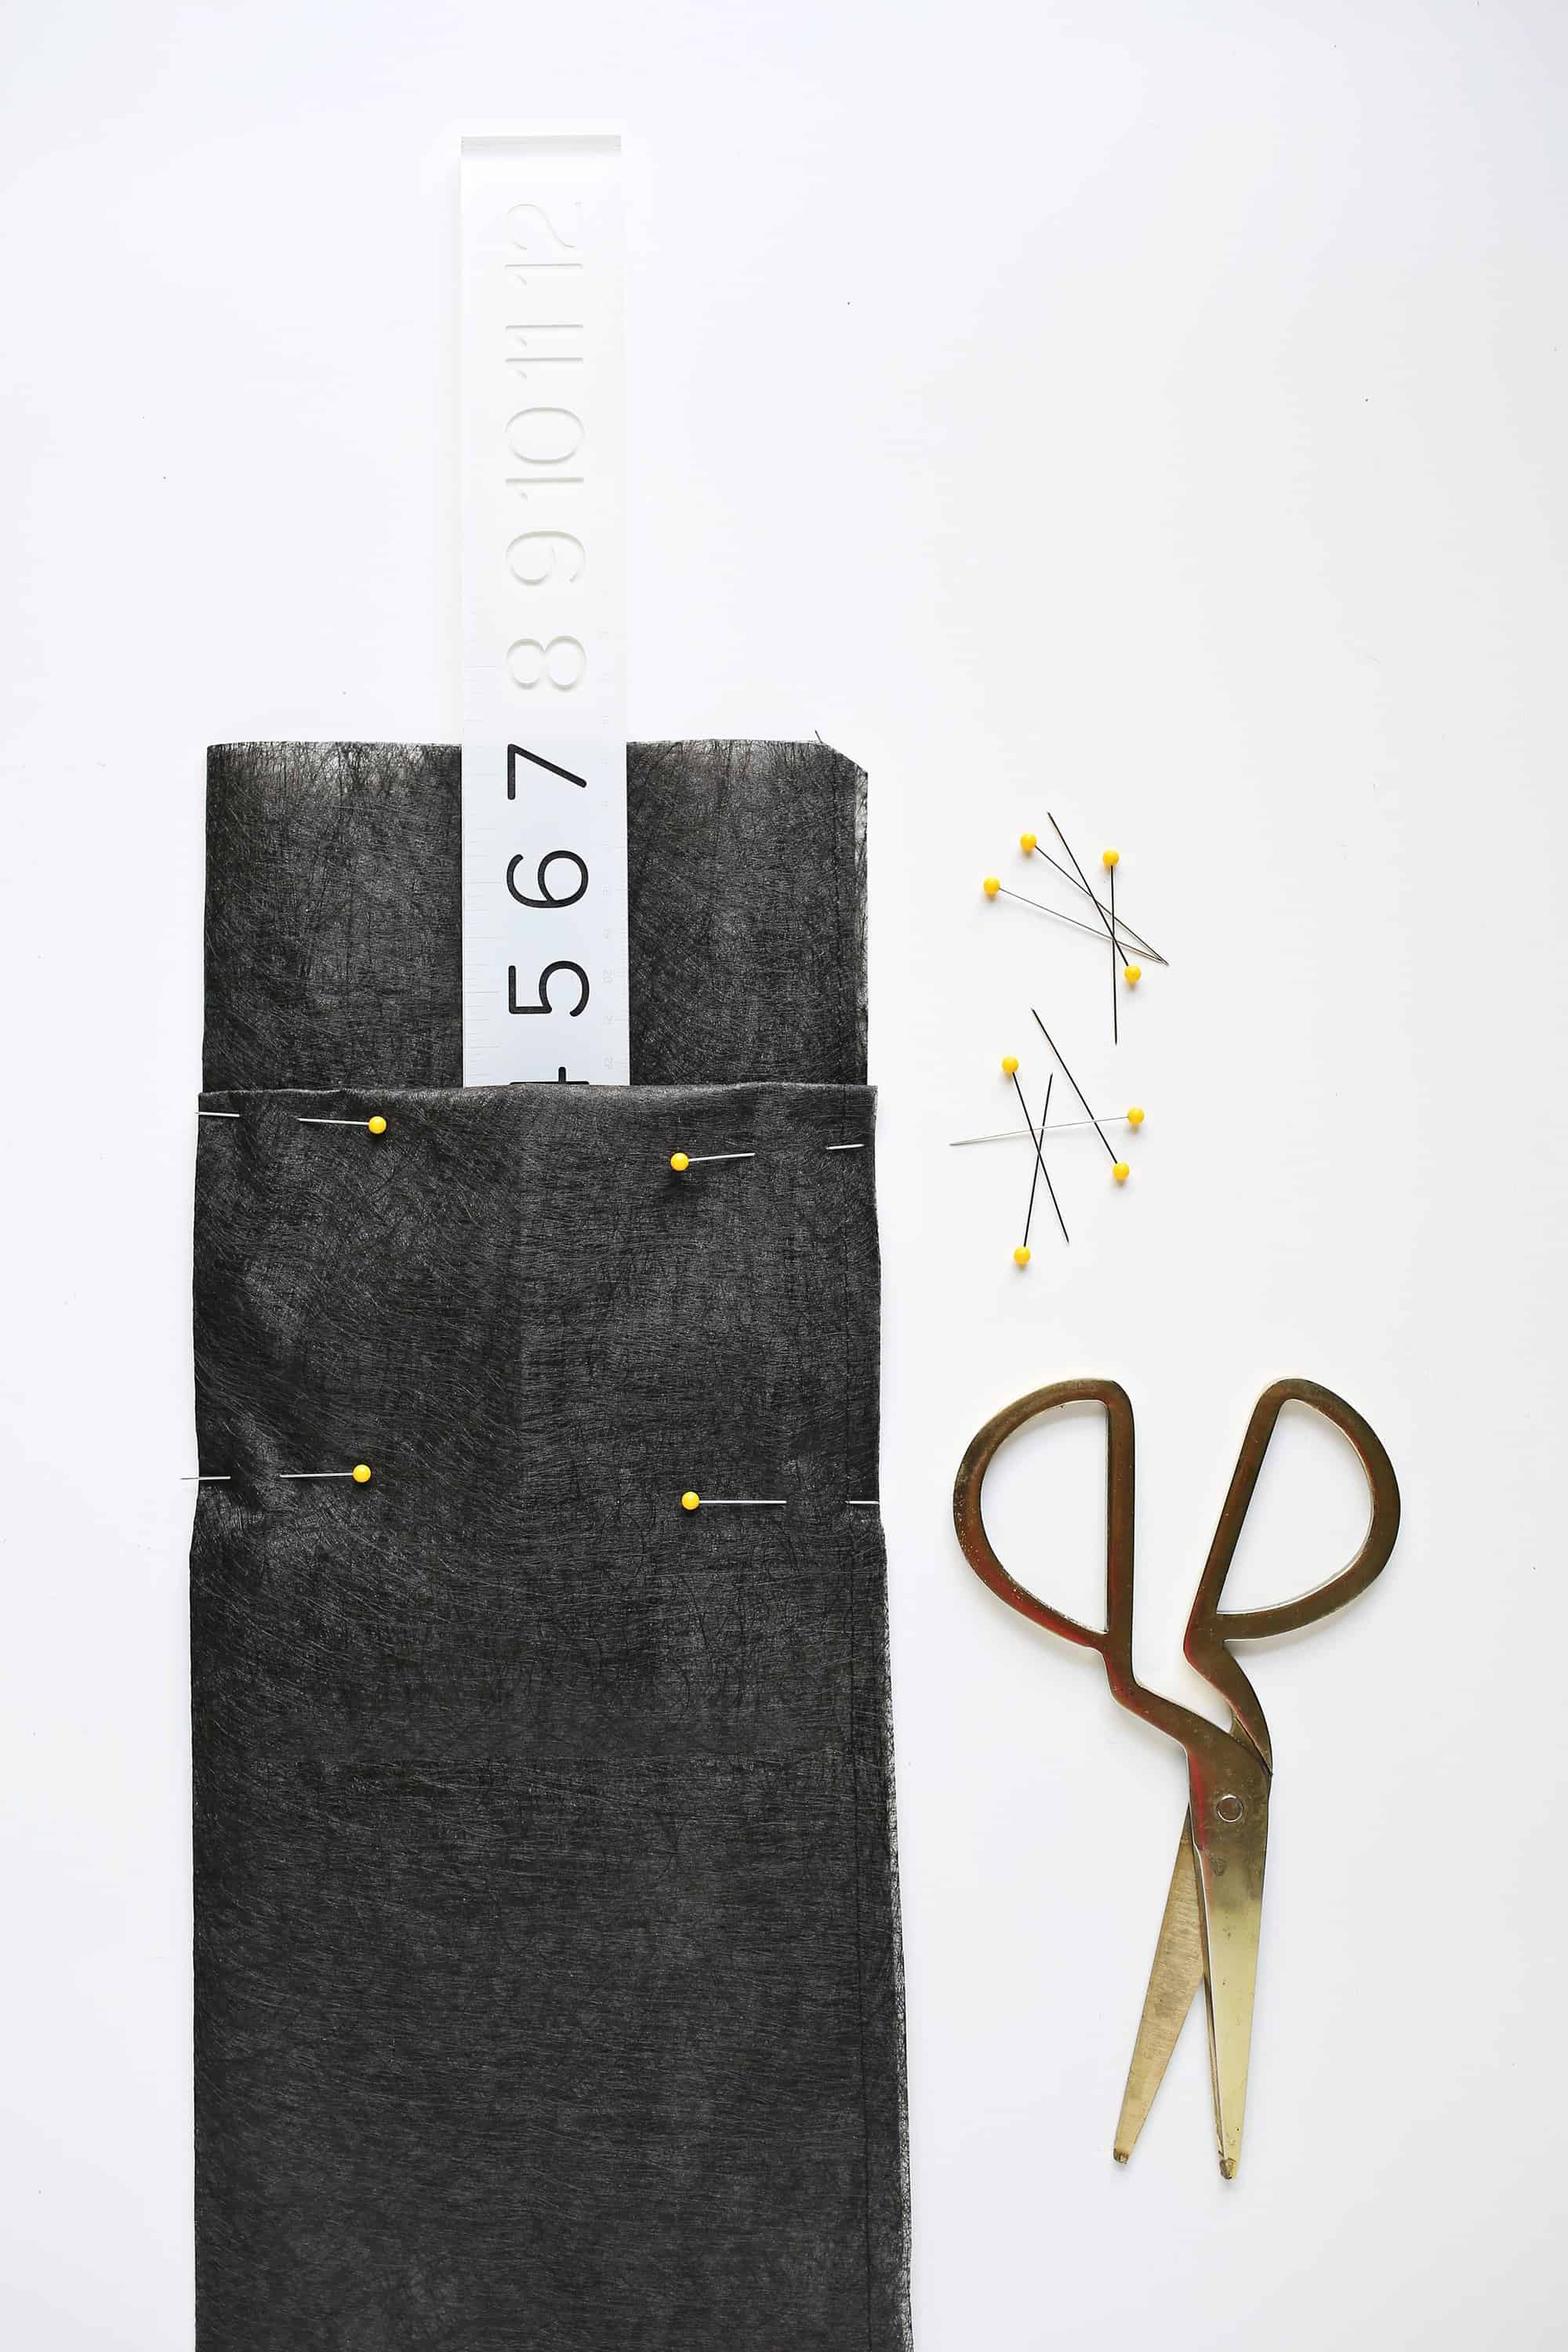 Measure 16″ inches down from one of the short edges of your fabric. Then fold your fabric up to create a pleat that hits at the 8″ mark. In this photo it hits at the 4″ mark. This creates your first of five pockets.
Make sure your pleat is evenly folded all the way across and stick a straight pin on either side of the top of the pocket so that it goes through all three layers of fabric. Stick two more straight pins just above the bottom of the pocket so that it goes through all three layers of fabric. You’ll be able to feel this from the top side of the fabric.  Remove your ruler and measure 16″ down from the top of the pocket you just made. Fold another pleat up to just under the 8″ mark on your ruler. In this photo it hits around the 4″ mark. Repeat the process of adding straight pins to the top and bottom of this second pocket.
Continue these steps of measuring 16″ down from the top of the previous pocket and folding back up to the 8″ mark until you have 5 pockets or have nearly run out of fabric. 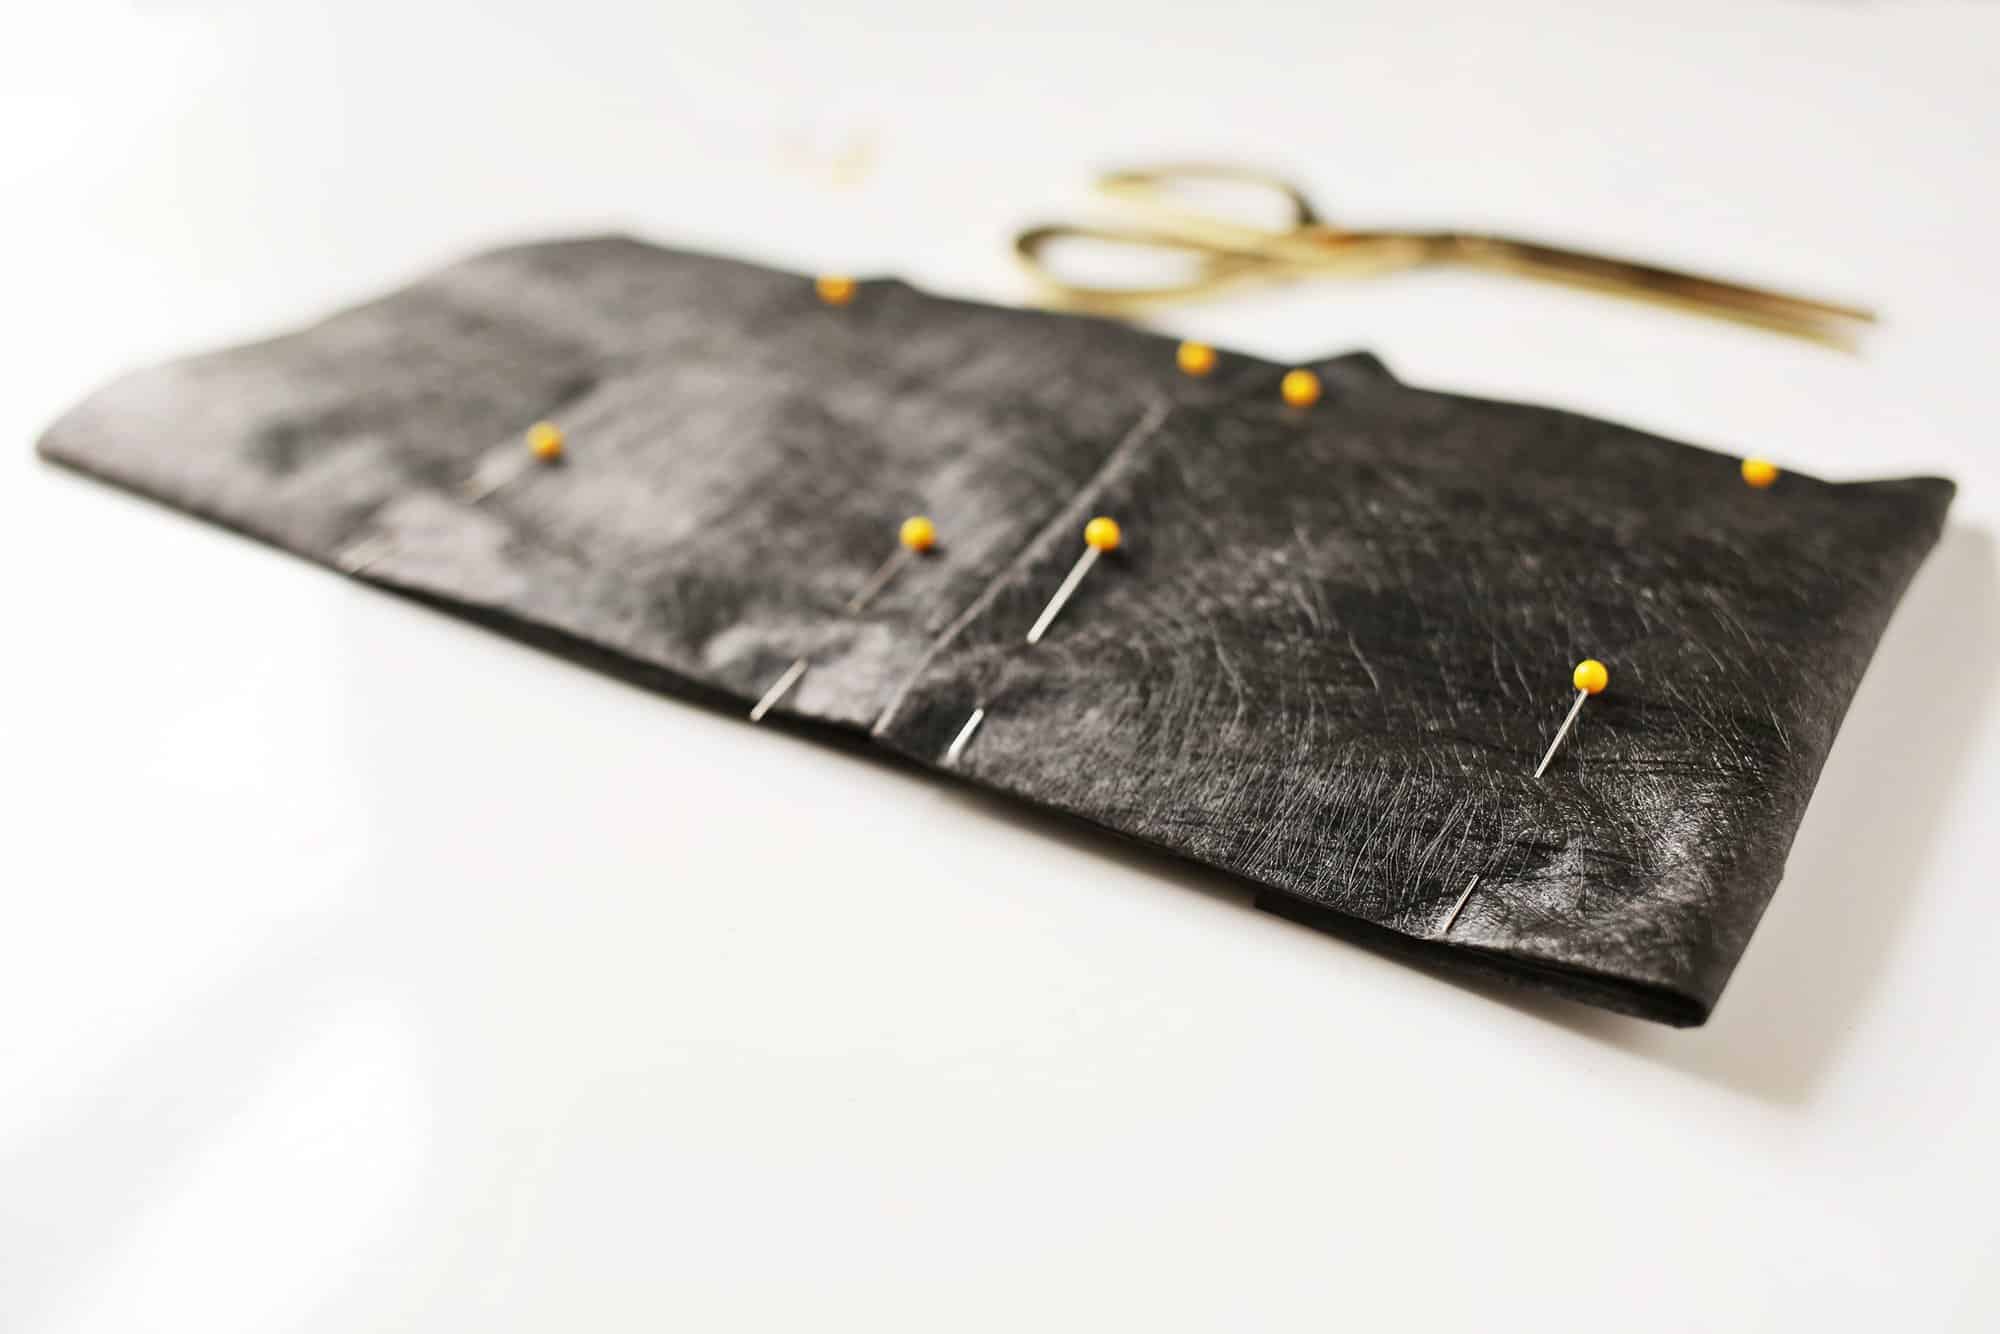 Fold the excess fabric under the bottom of your last pocket and pin in place. This image shows two pockets but you should have five.
 Carefully place your entire fabric piece under your needle and stitch down one of the long sides from the bottom up to the top. Back stitch where each pocket corner begins and ends for extra support.
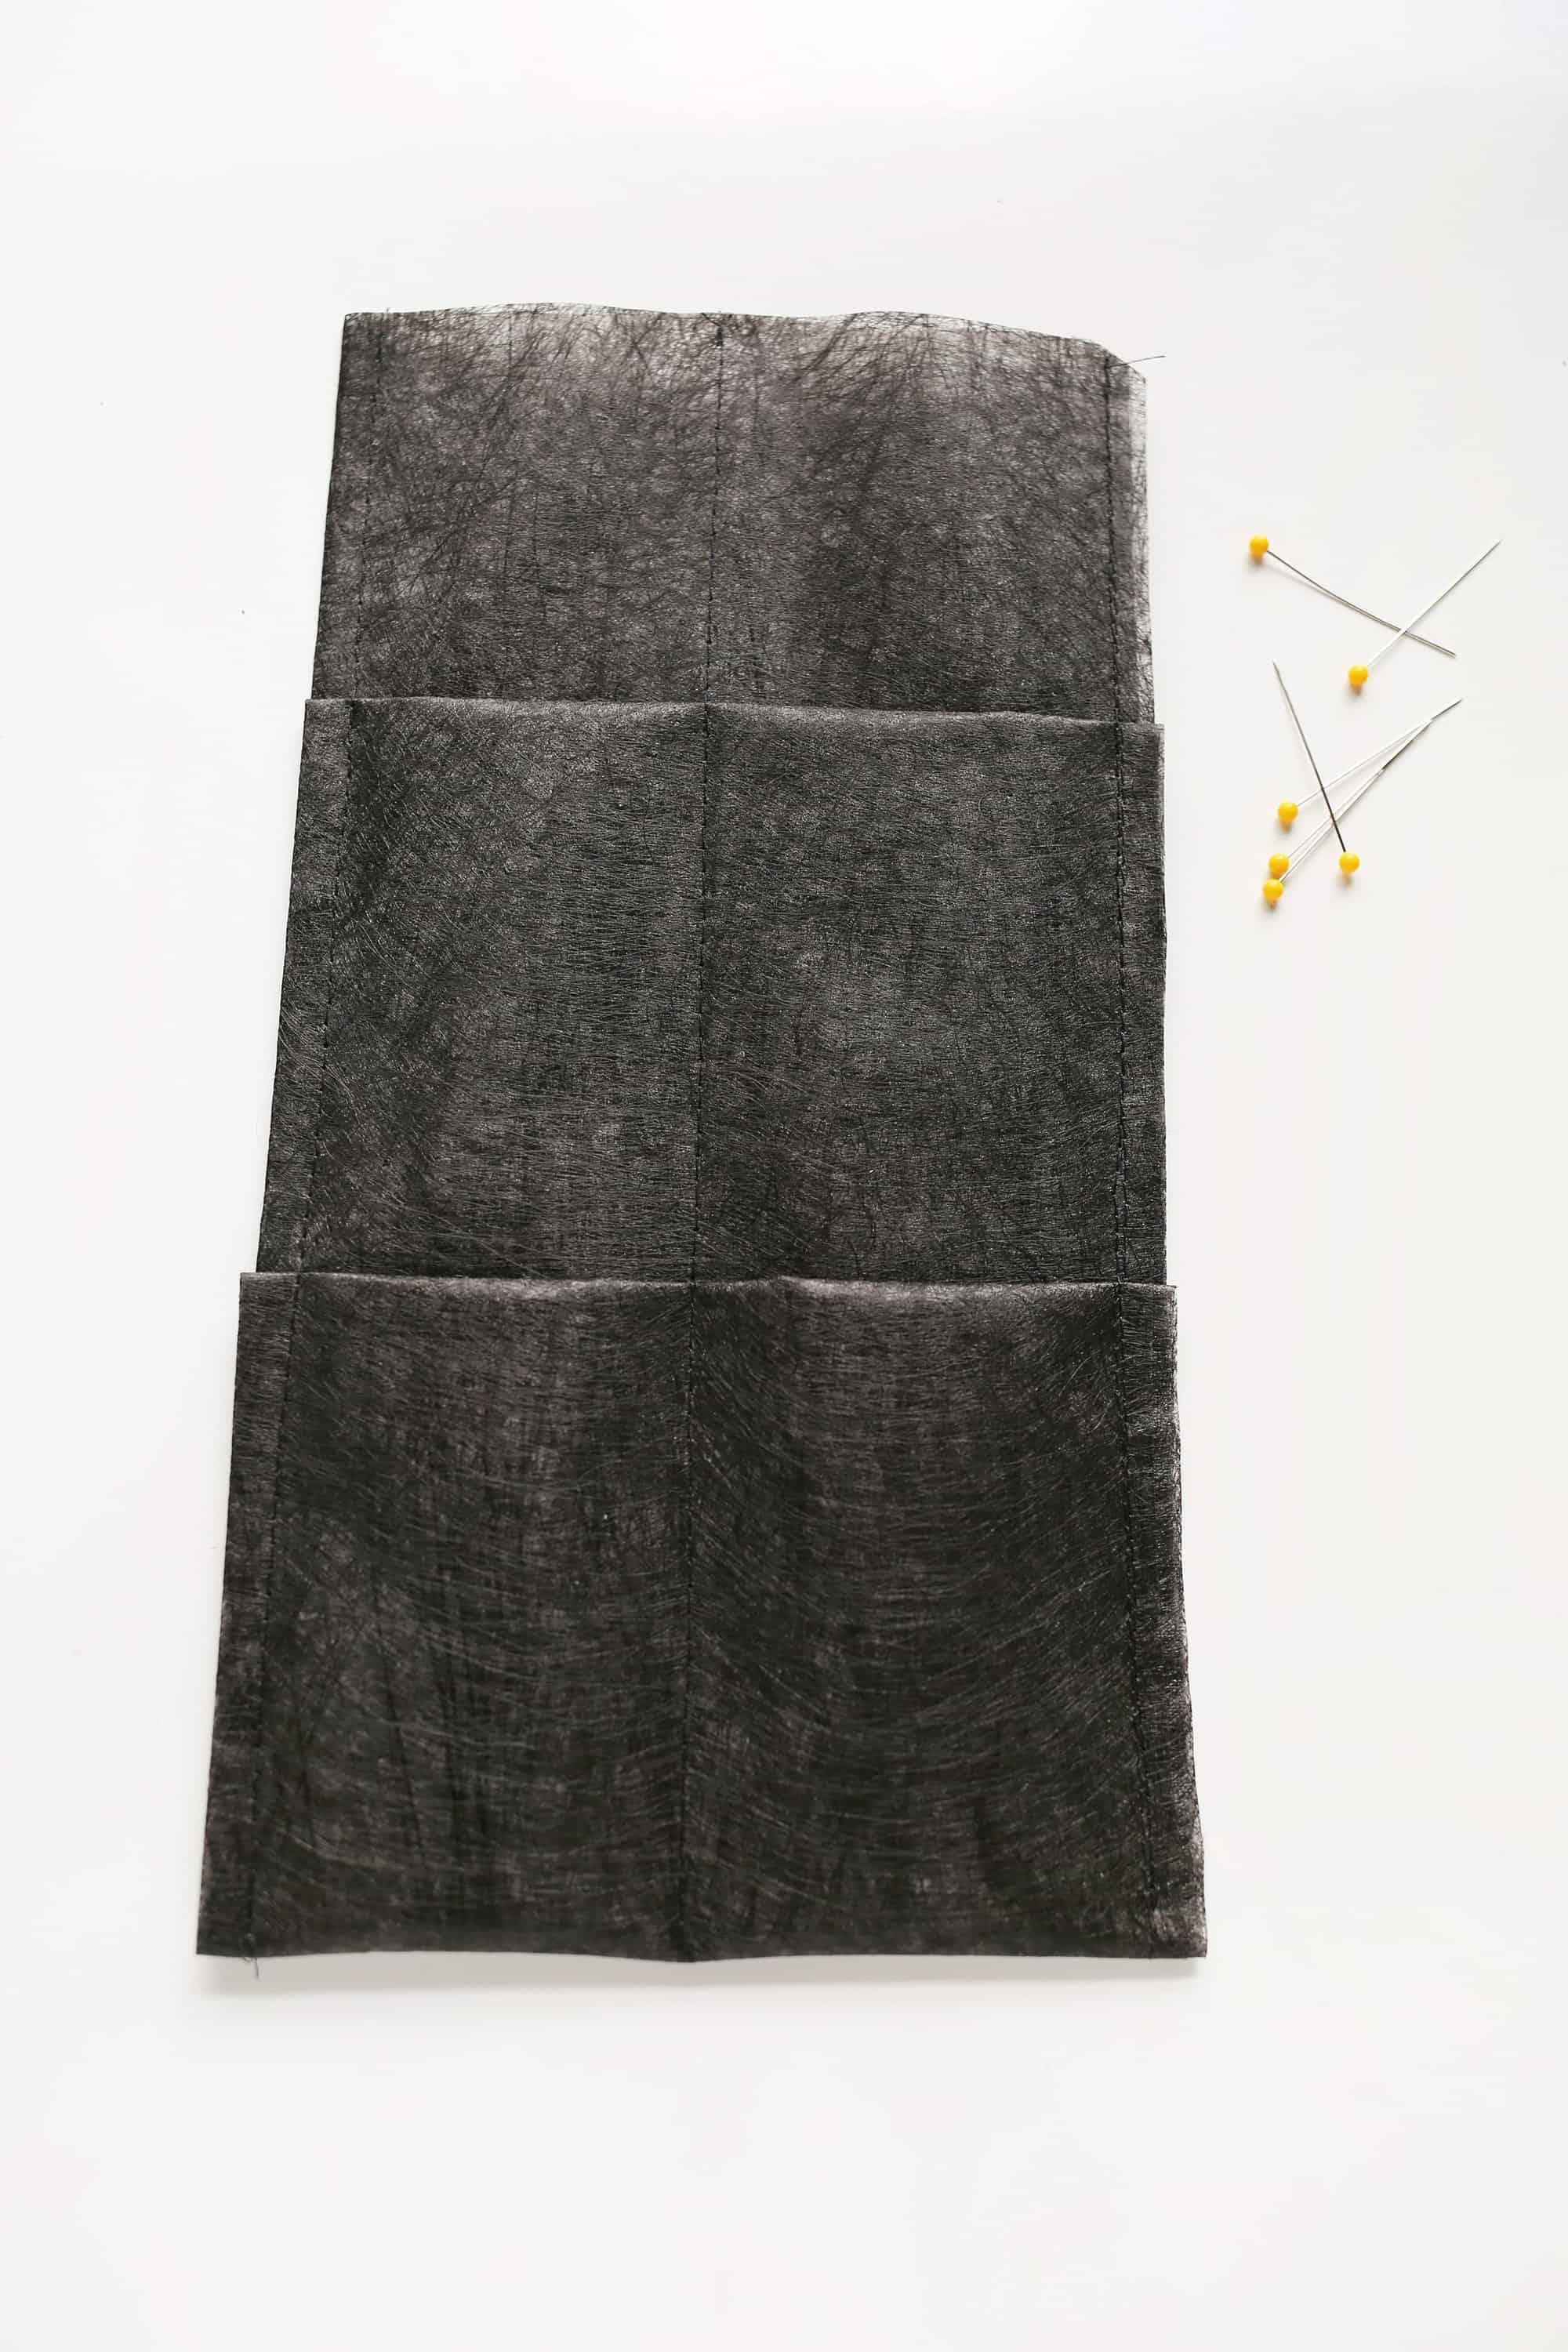
Then remove your pins and fold or roll the long side in towards the center. Starting from the bottom of your fabric piece again, stitch all the way up the other long side. Back stitch where each pocket corner begins and ends again.
Find the center of your fabric piece and mark that spot with a straight pin or chalk. Place the entire piece of fabric under your sewing machine again. Starting from the bottom again, stitch up the center of your fabric piece. Remove all of your pins. Now you have ten pockets!
 Fold the top of your fabric piece to the back side 1/2″ and then again 2″ and pin in place. Stitch on the back so you can follow along the 1/2″ fold. This will create a pocket hem.
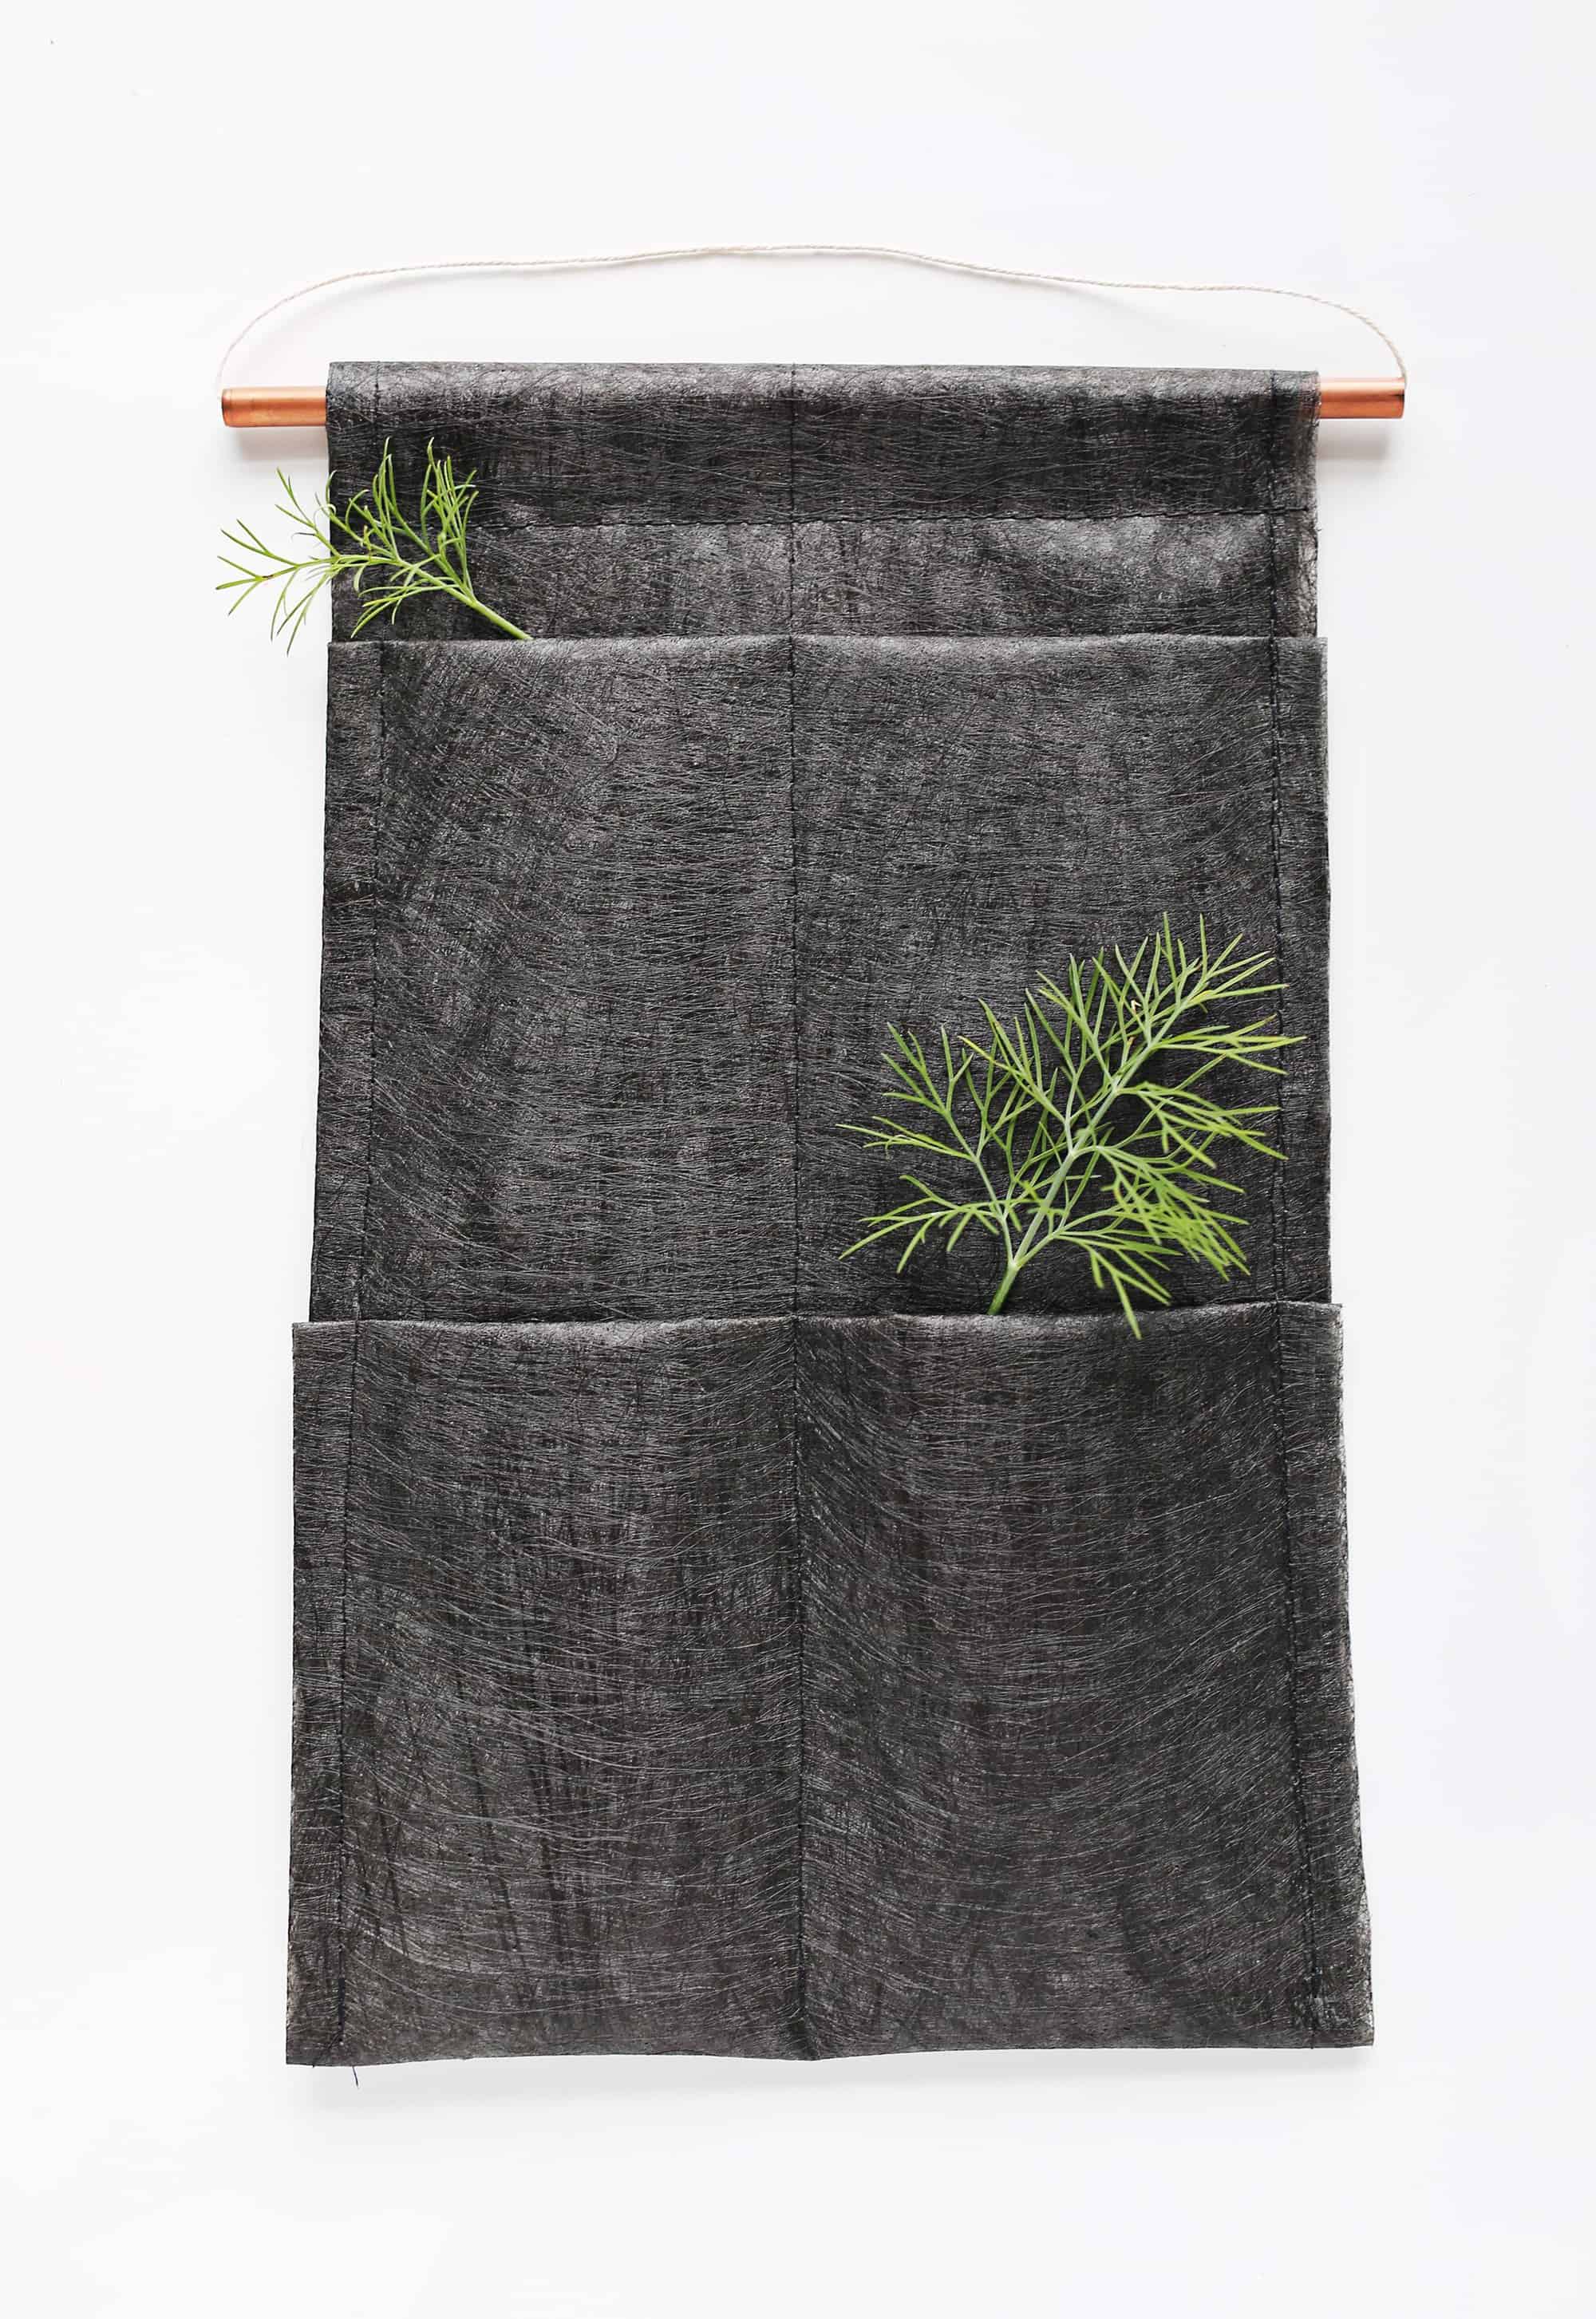 Slide your copper pipe through your hem. It should be about 1″ wider than your new plant hanger on each side. Cut your rope and slide it through your copper pipe. Tie a knot and hide the knot inside the pipe.
 If you’d like to make a shorter and wider panel, measure about 8′ of liner but don’t fold it vertically. Instead, fold it in half so that the two short ends meet up and give you a double-sided panel that measures 4′ long.
Then mark about 20″ down from the fold and then pleat it back up about 6″ and pin. Measure down 12″ from the top of the pleat and back up 6″ and pin again. Do this a third time and then tuck under any remaining fabric. Stitch everything up, add a pocket hem at the fold for your copper pipe, and you’re golden!
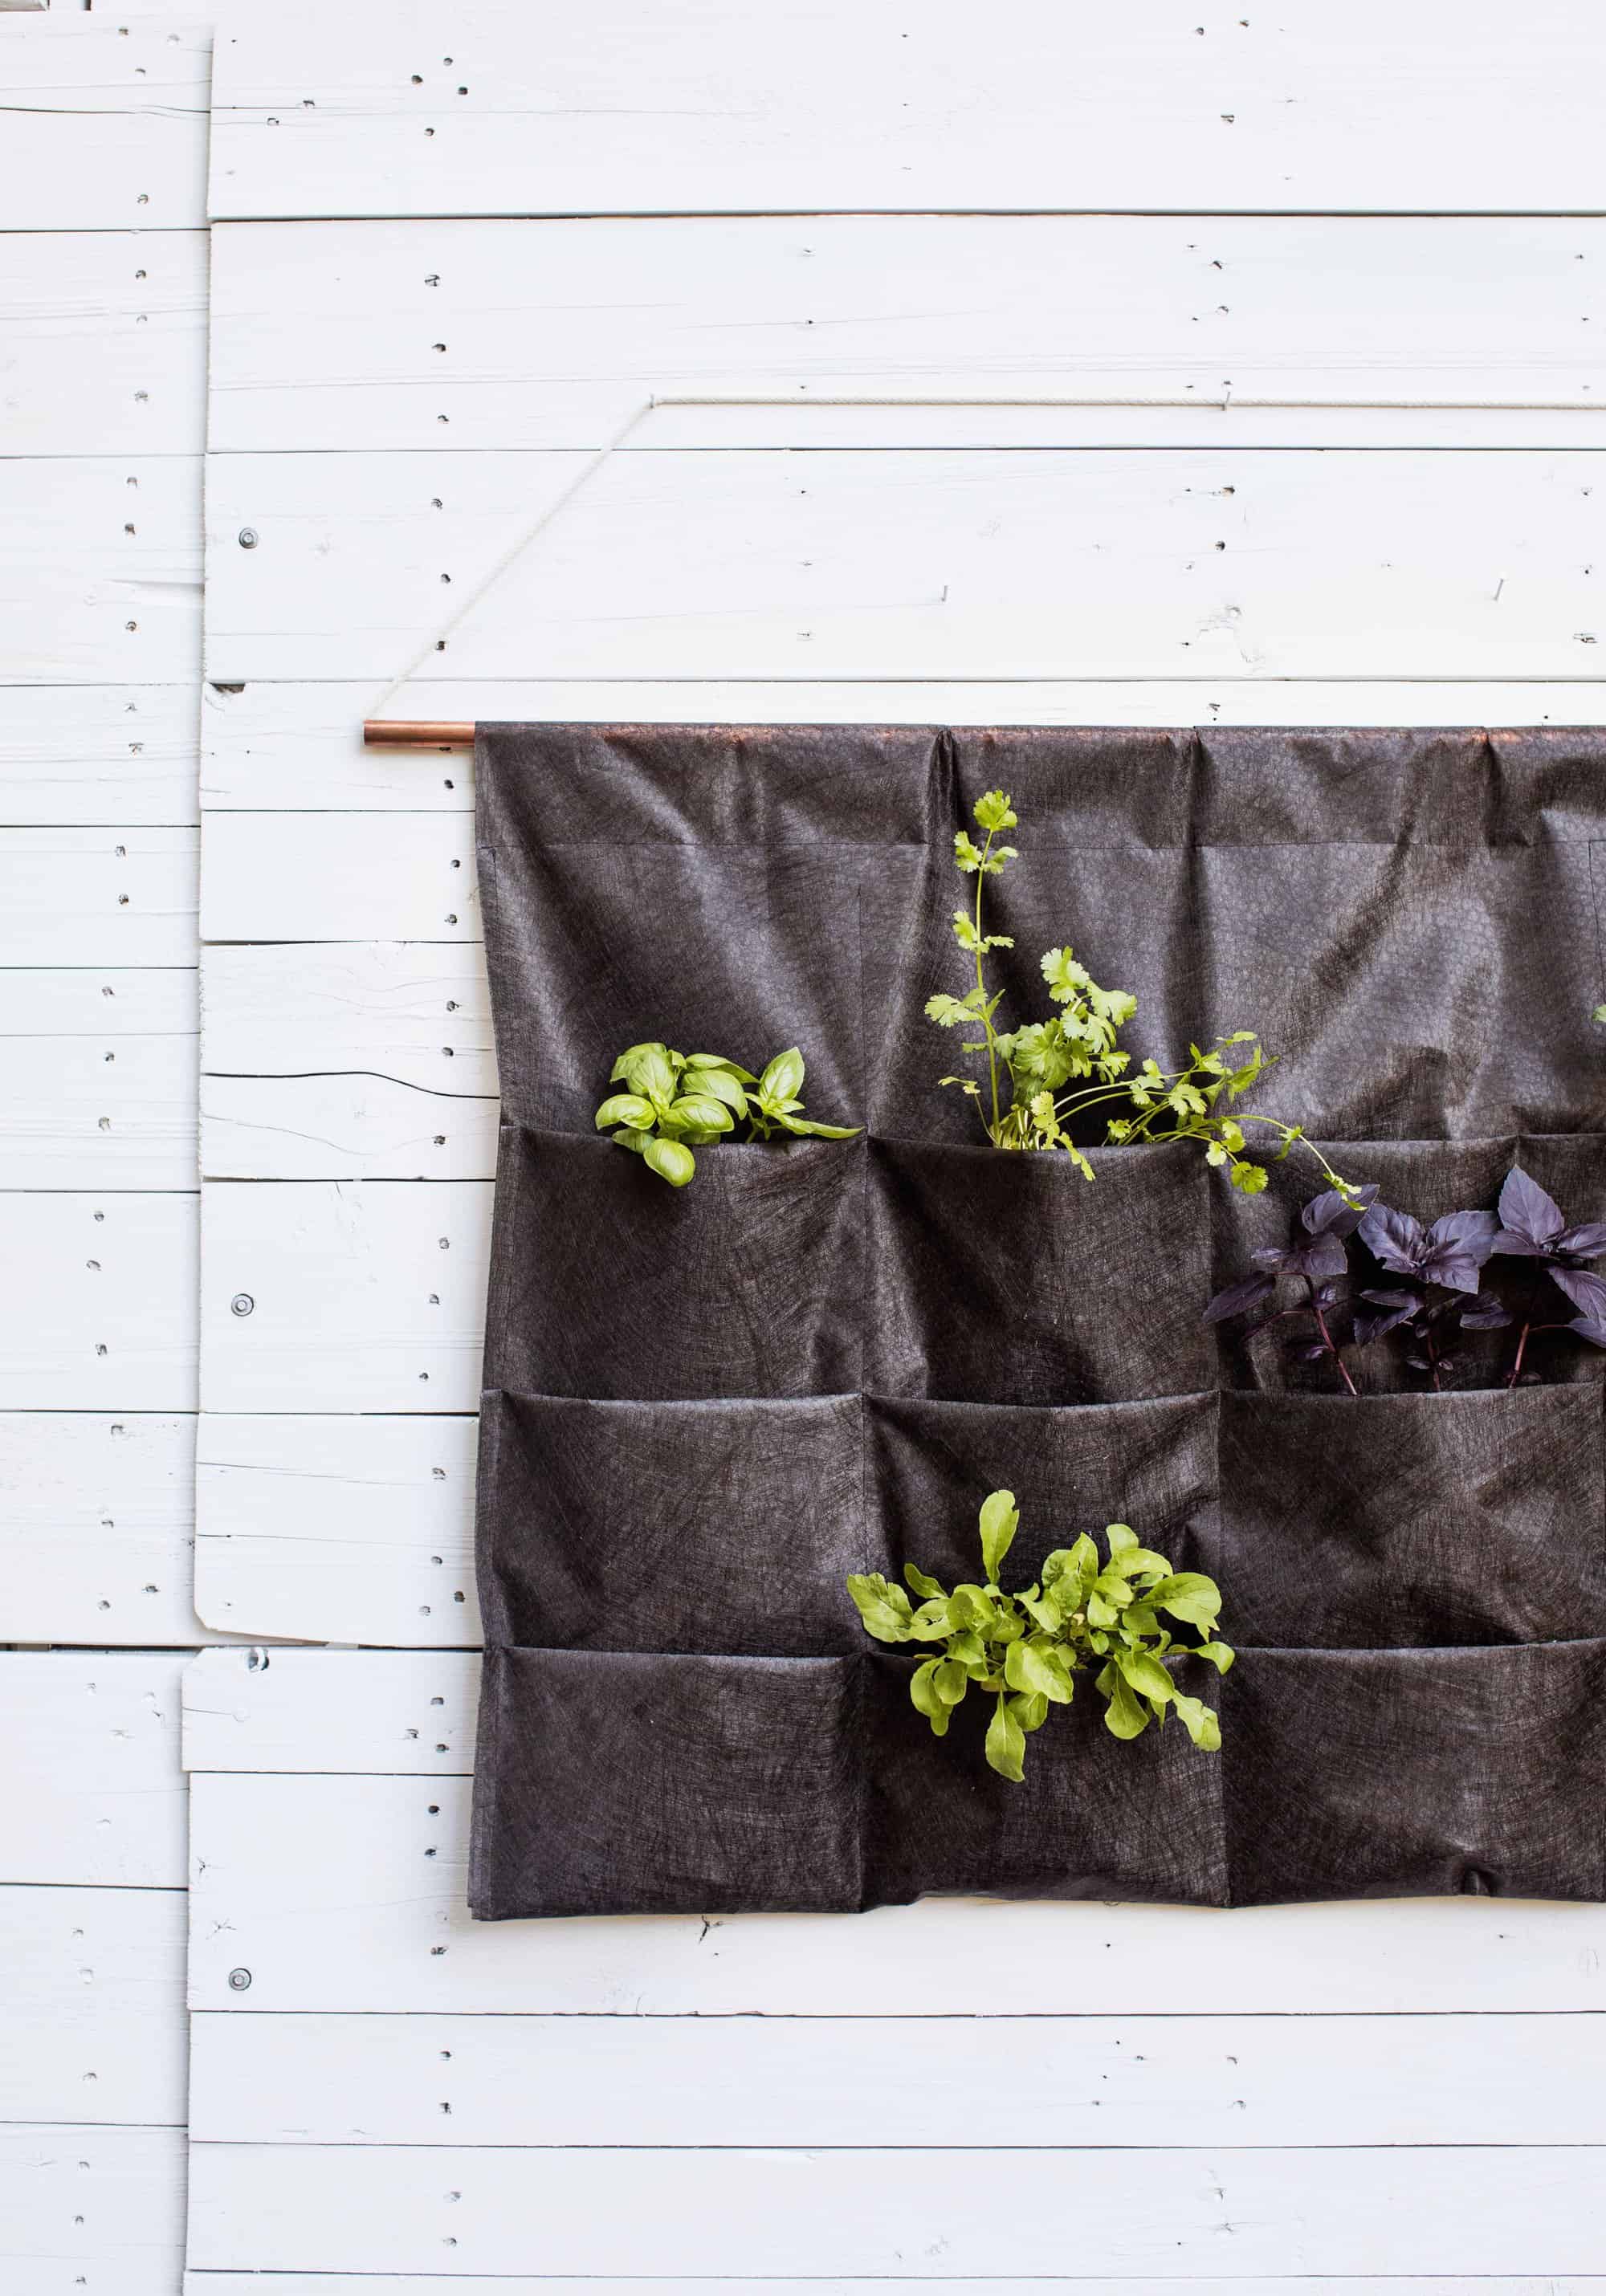
 Find the perfect spot in your yard or balcony for your new hanging herb garden(s) and add your potting soil and herbs! No one will be mad if you add in a beautiful, flowering plant to compliment all of that green.
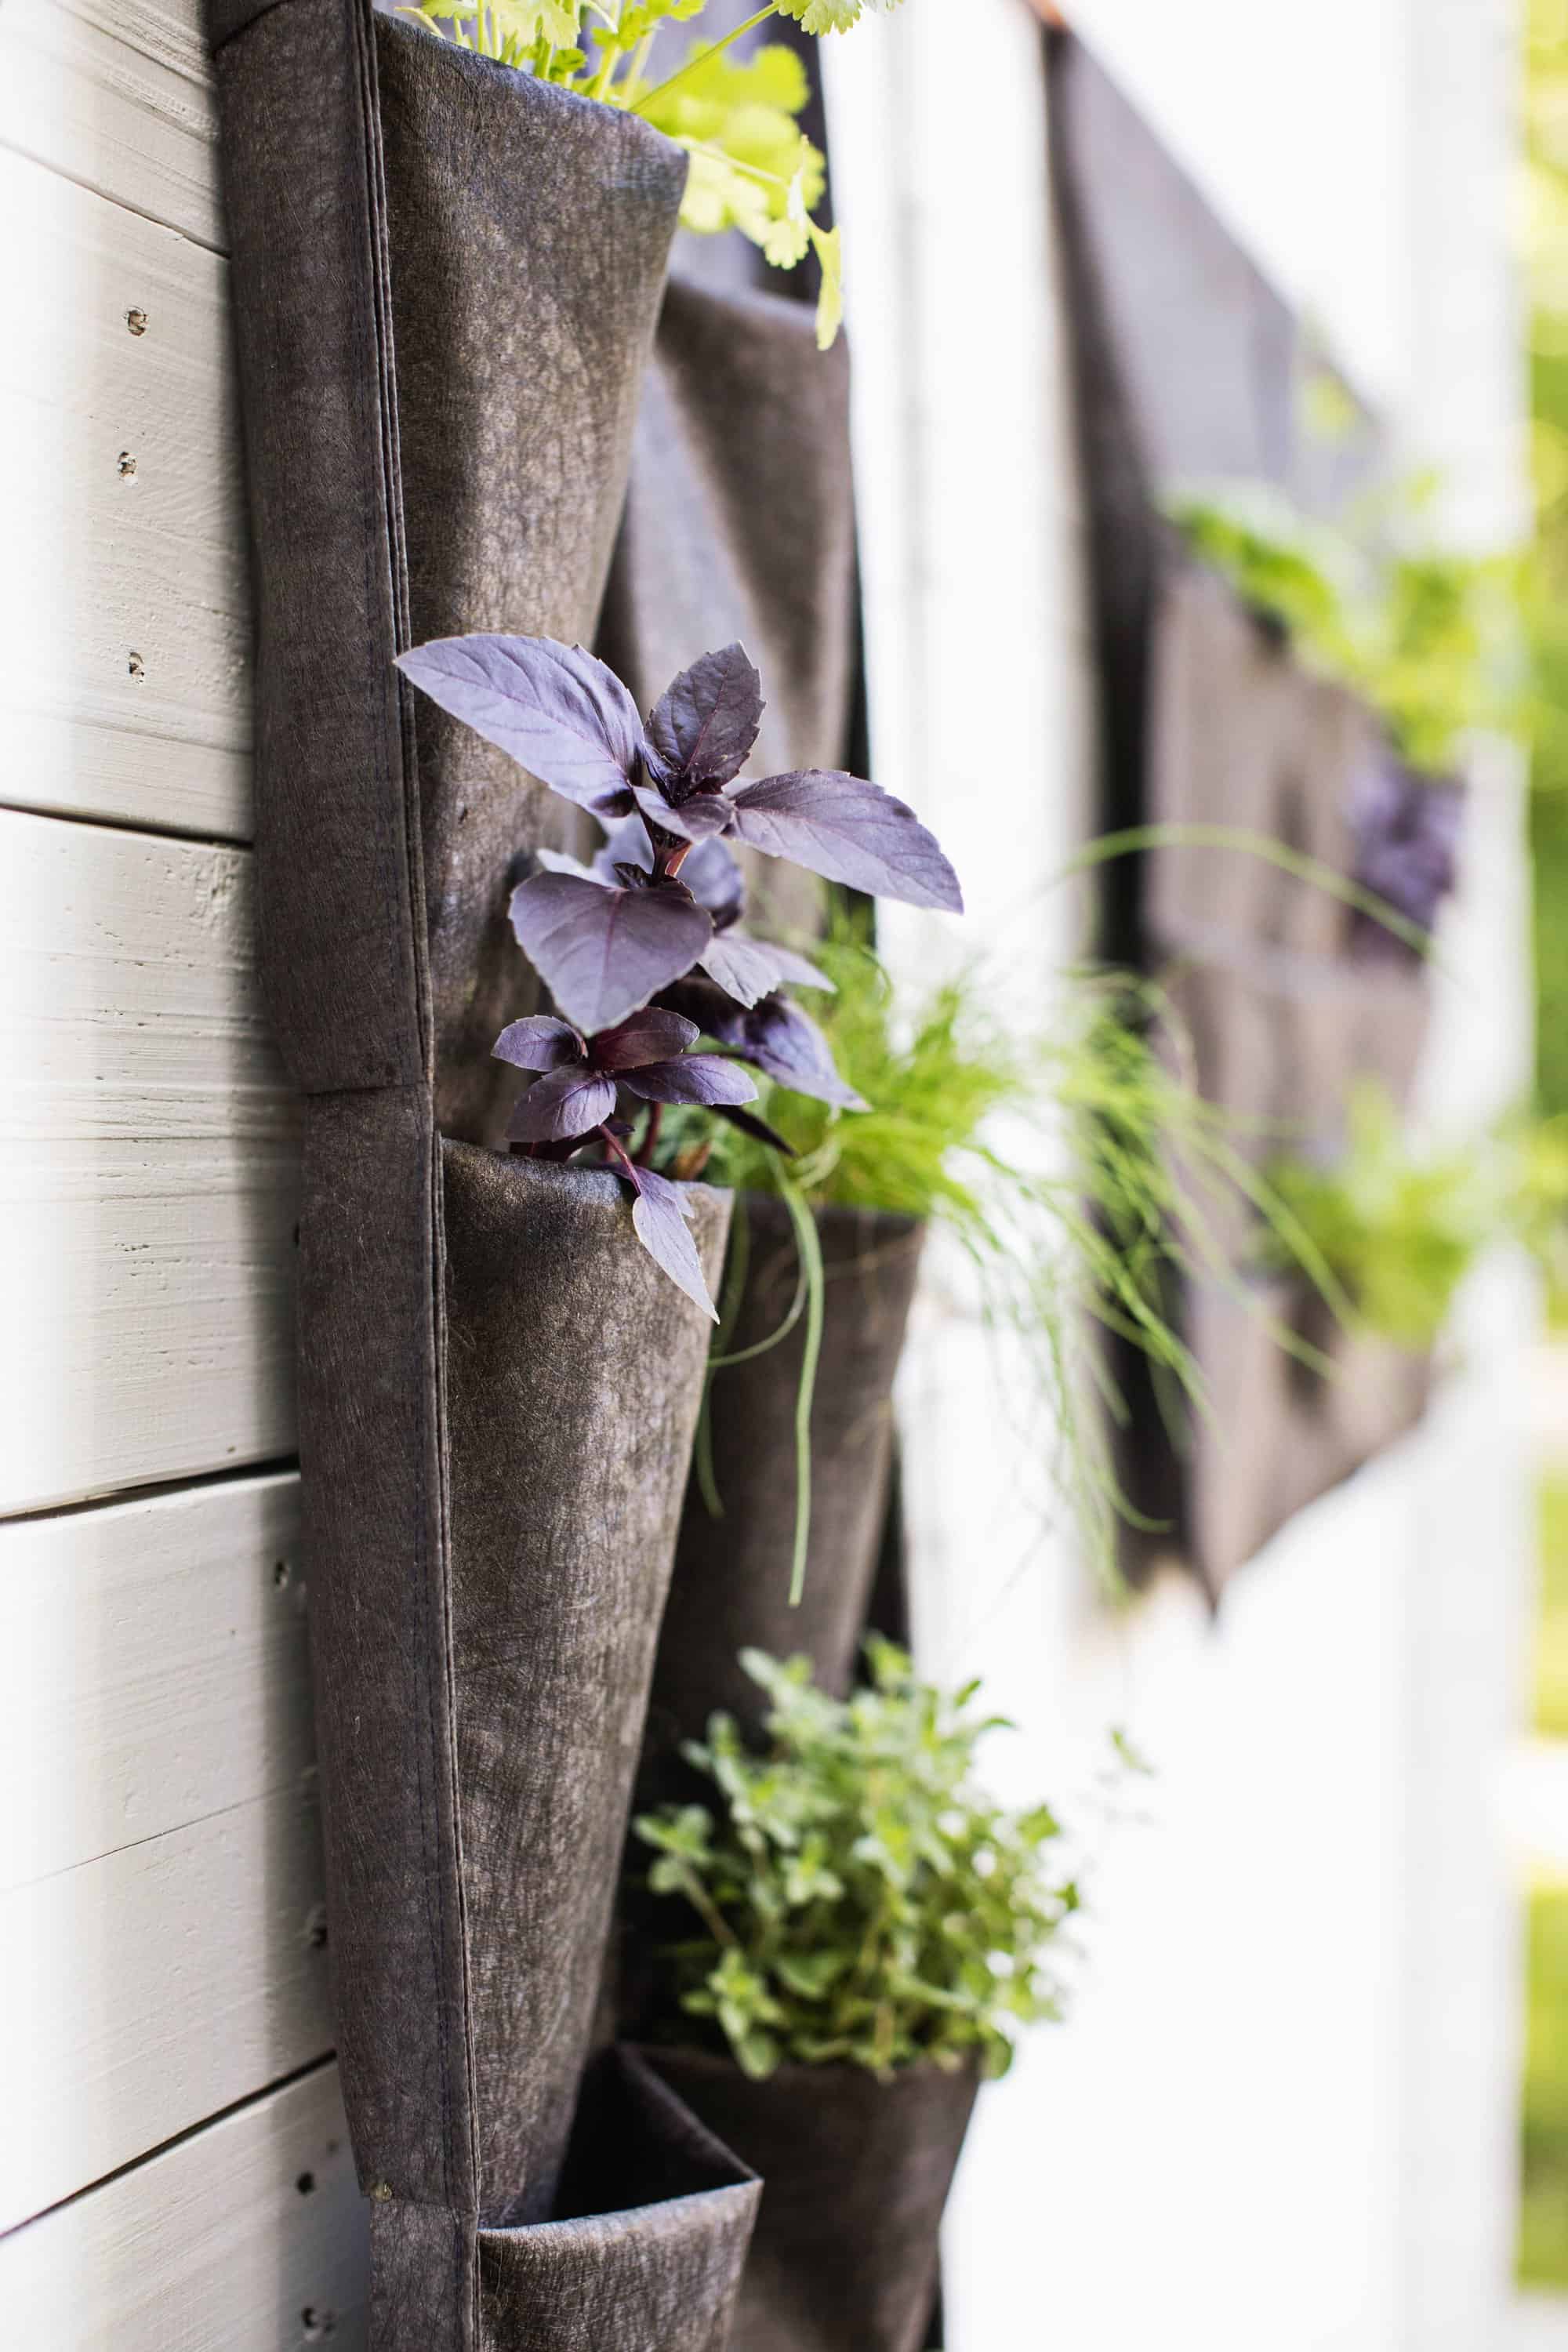
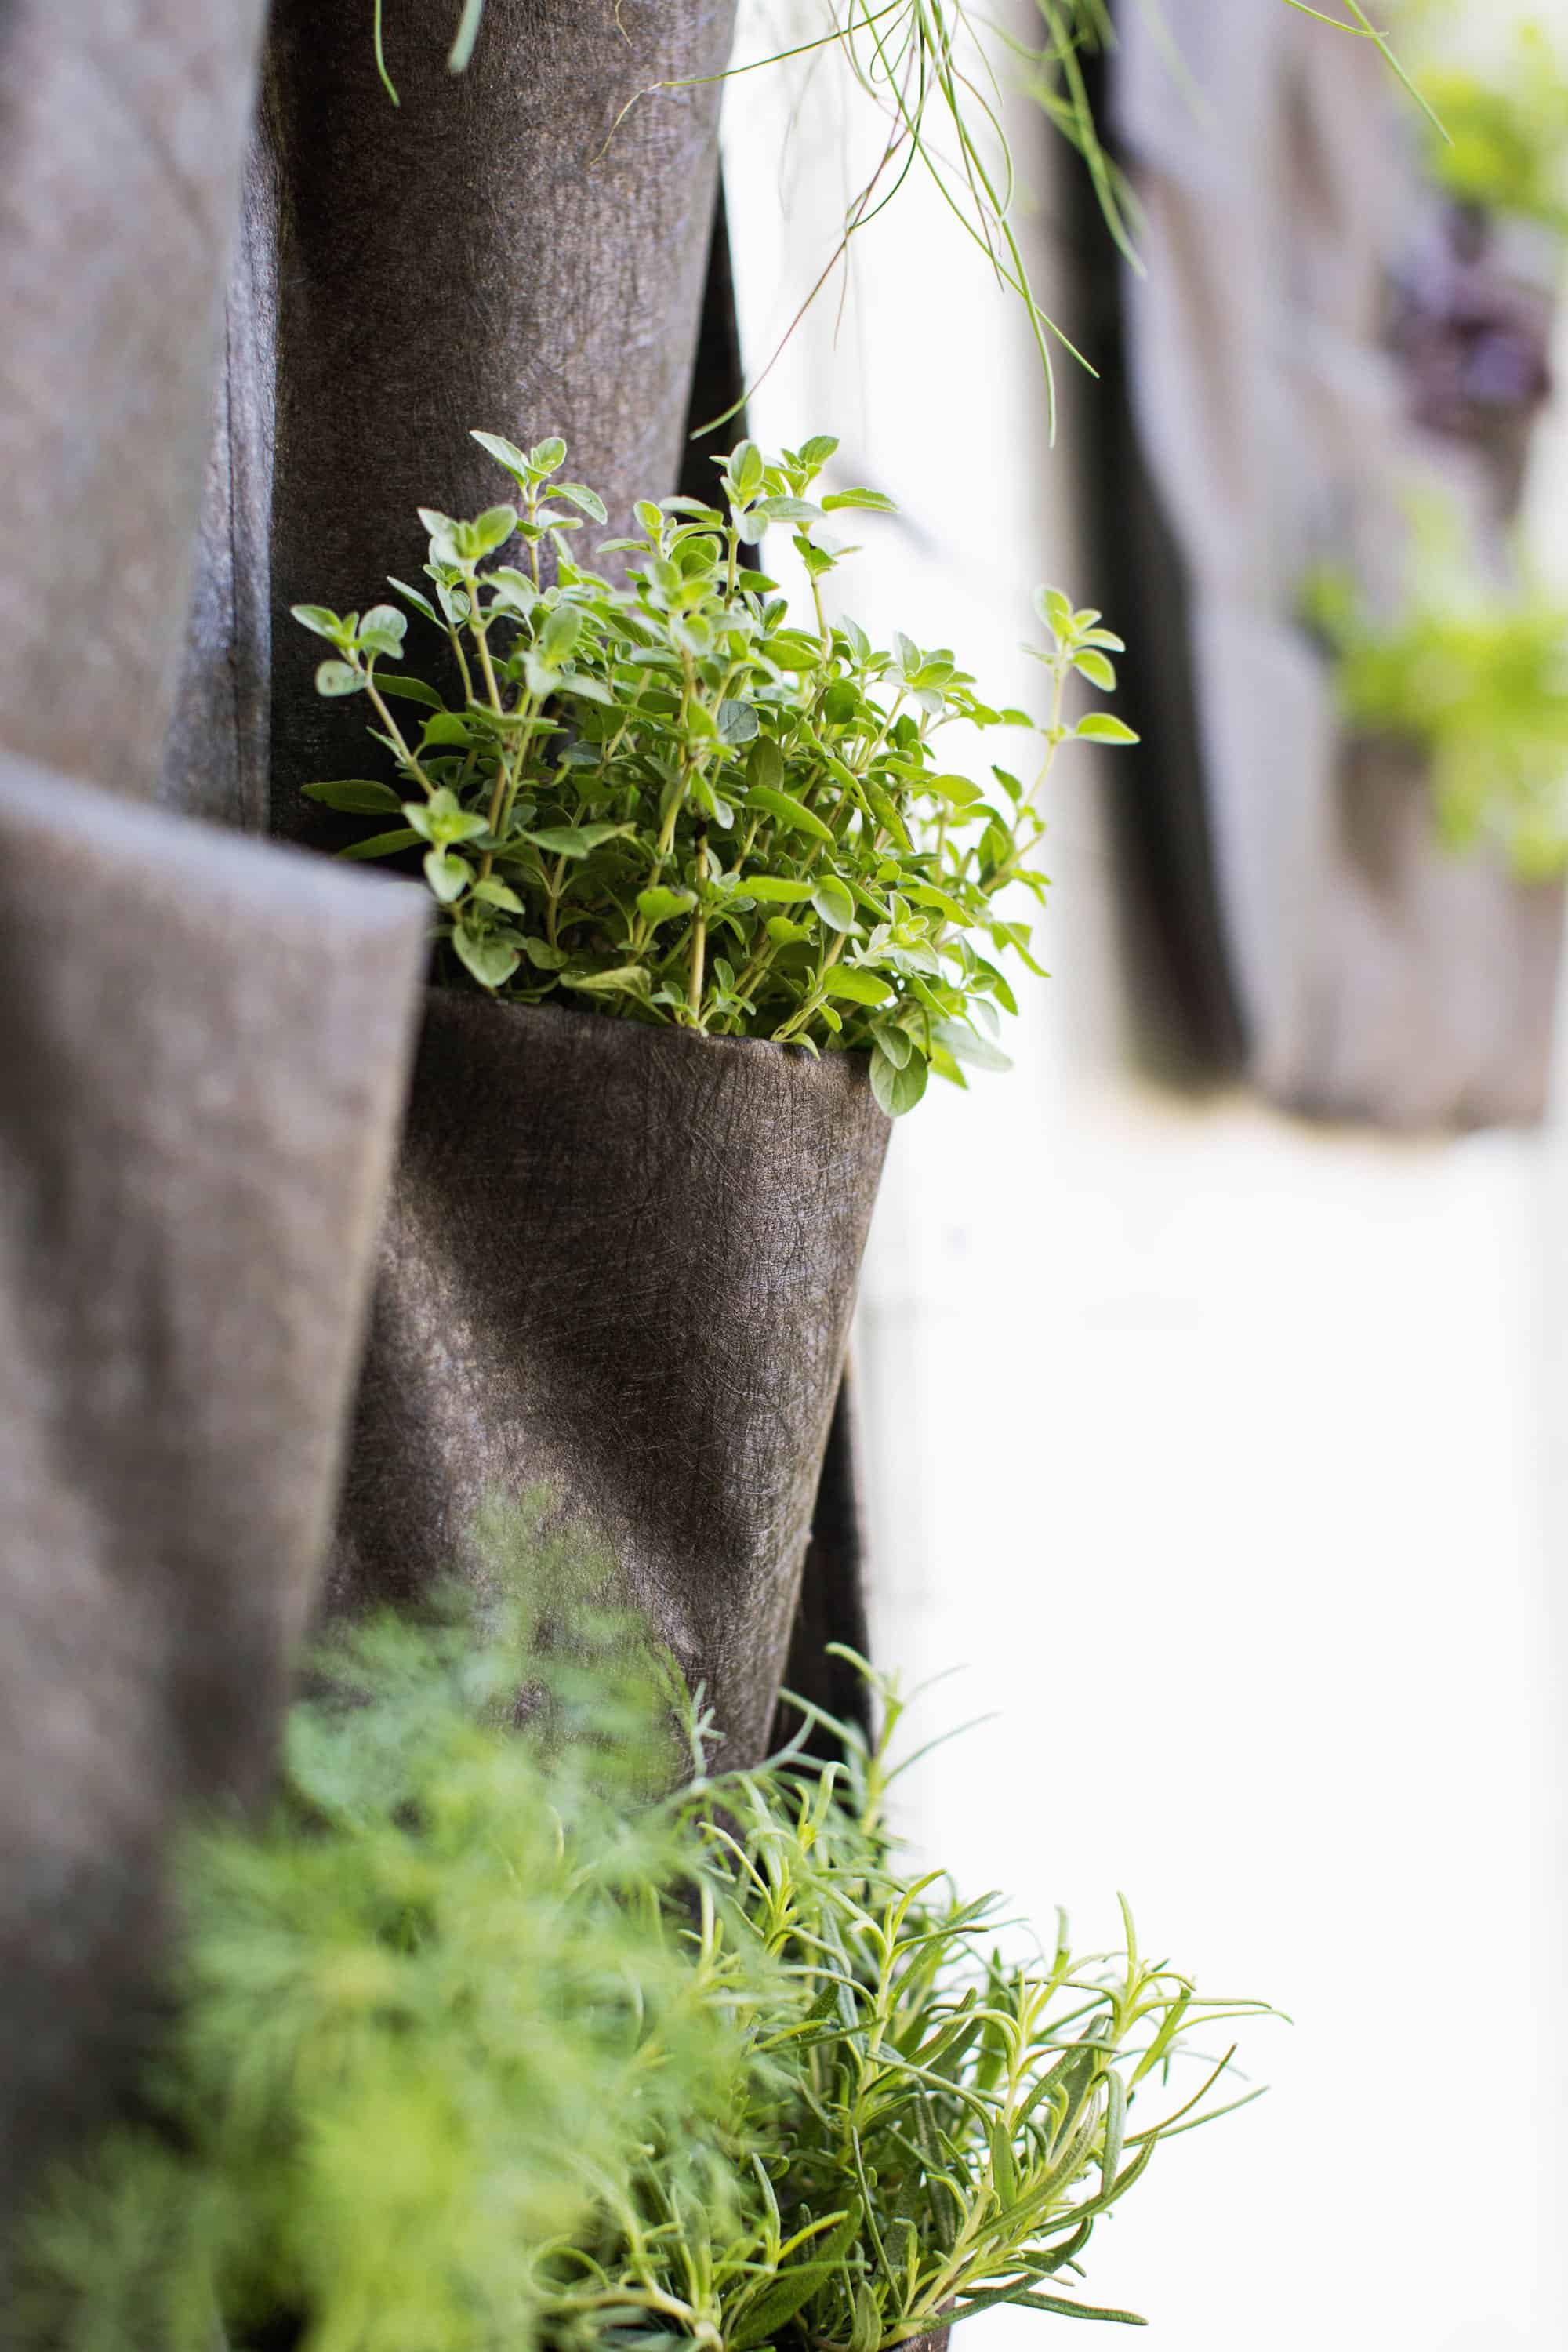 Your herb garden will need regular watering. If you live in an especially dry climate, you might try wrapping the root of each plant in coco liner to help retain more water. I made sure to add herbs I know I’ll use to flavor both summer and fall dishes so that I can have fresh herbs all summer and then start drying them once the temperatures turn chilly. Fresh rosemary for grilled chicken and potatoes now, and then dried rosemary for soups and stews this winter! What are the herbs you use most? –Rachel
looking at this, I was thinking you might be able to use canvas shoe holders. I have seen a few types with this shape. I think I might try it
Really nice idea and execution, thanks for the instructions! I’m wondering if you use pots inside the pockets, or do you just put the soil straight in there?
I would love to know more about the shed in the background (that you hung this awesome DIY from). It’s absolutely beautiful!! And a major inspiration for me as I’m in the planning stage for a shed in my yard. Thanks!!
That is a great idea and it is on my to do list , but could you provide information on your shed(?) that you’re hanging them from. I mean it looks wow and I’m very interested in your plans you used . thank you
It’s a great idea for me to plant herbs because I have a small empty space in the garden. In this way, I can plant some kinds of my favorite herbs such as basil and thyme.
Is there a material you suggest I could use to make this work to hang inside a house?
This looks very smart . Thanks. Carolyn
This looks like a great project! I’m also interested in the potting shed/outdoor room used here. Is there info on its construction? It would be perfect for the pad where my garage used to be.
Is it just me because I can’t quite understand the steps on making the vertical garden. If you could of added more pictures showing step by step on making it, that would of been helpful. I’m really stuck on how you need to fold and stitch the weed barrier. Please help!
This is such a wonderful DIY, thank you! Definitely making some of these.
This is perfect, I have to do this for my balcony!
https://www.makeandmess.com/
This is so cute! I want to make one for our house!
Paige
http://thehappyflammily.com
This is such a fun idea! I love the look against the white fence.
Dumb question, but could a shoe holder be used for that?
Victoire,
I’ve seen it done but most are made of plastic that doesn’t allow the water to drain and can lead to root rot. It’s a similar structure, though, for sure.
-Rachel
Love renter friendly options!! Houses are SO expensive here in Melbourne that we will be renters for a long time. Thanks for the ideas!
Great DIY project.
This would be great for different greens like spinach, kale, and lettuces as well.
Really smart idea…and such a space saver.
-Greta
www.mintyfrosting.com
This is so cute! I wish I have an outdoor space at my place, which I don’t 🙁
https://www.myblackcloset.com/
Great post!,the plants looks fantastic
The Pink Pineapple
New post:http://thepinkpineappleblog.blogspot.com/