Today, I’m going to share a tutorial for building a modern stool, as well as an optional workspace! I really love my new workspace and I know you will too.

Supplies:
-4′ x 8′ (3/4″ thick) Sheet of hard wood plywood or similar
-wood screws aprox. 1 3/8″ long
-wood glue
-drill
-drill bit slightly narrower than screws for pre-drilling
-miter saw
-jig saw
-table saw (optional)
-measuring tape
-straight edge (T-square is recommended)
-3 shelf brackets
Tip: Measure and mark a line (with a pencil) down the center of all the boards so you have a reference for when you pre-drill and screw in the screws.
Step 1. If you buy your wood at a place like Home Depot, they can rip pieces that you need so you don’t have to deal with that at home! Have them rip the plywood vertically into 3 pieces.
The first should be 13″ by 96″ (for your stool) and the other 24″ by 96″ (for the work surface). This will leave you with a piece that is about 11″ by 96″ that can be used for scrap.
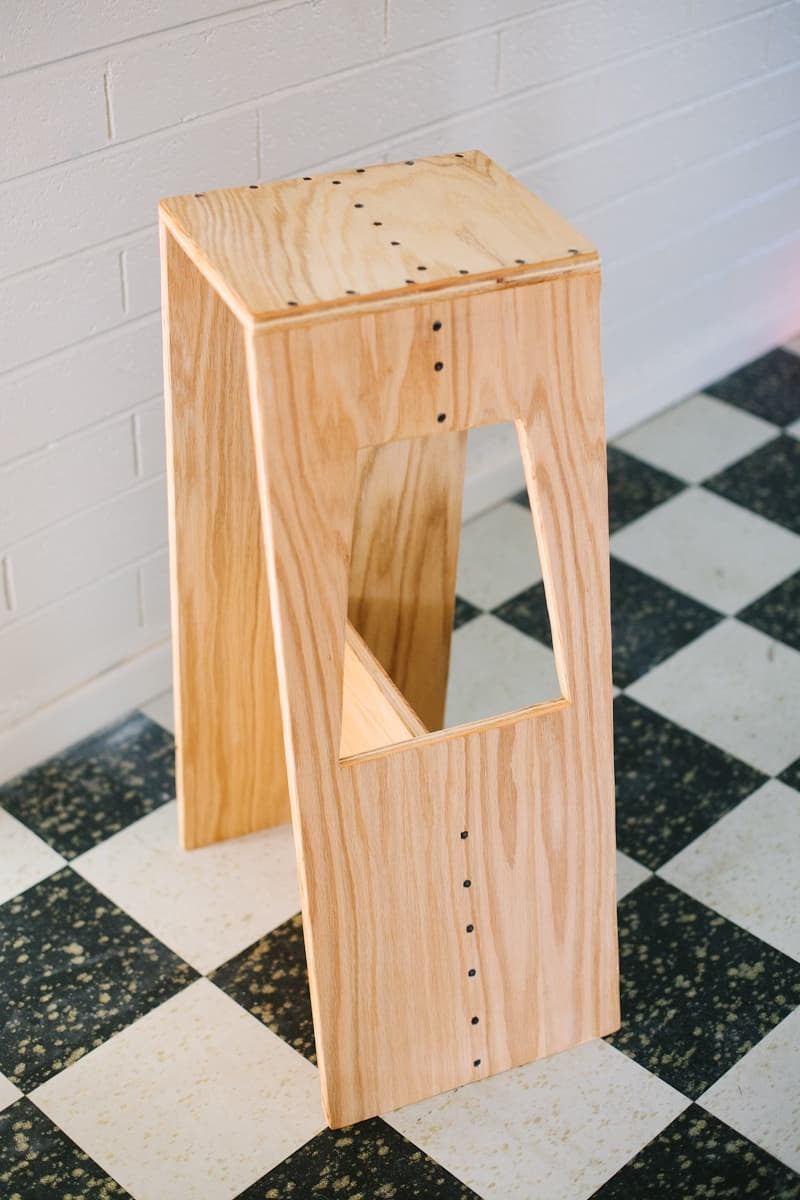
Step 2. Take the 13″ by 96″ piece and cut it into 3 pieces:
Piece A will be the seat (12″ by 13″)
Piece B will be the back leg: (30″ by 13″)
Piece C will be the front leg (30.5 ” by 13″)
Each end should be a 15˚ angle for the angled front part of the stool.
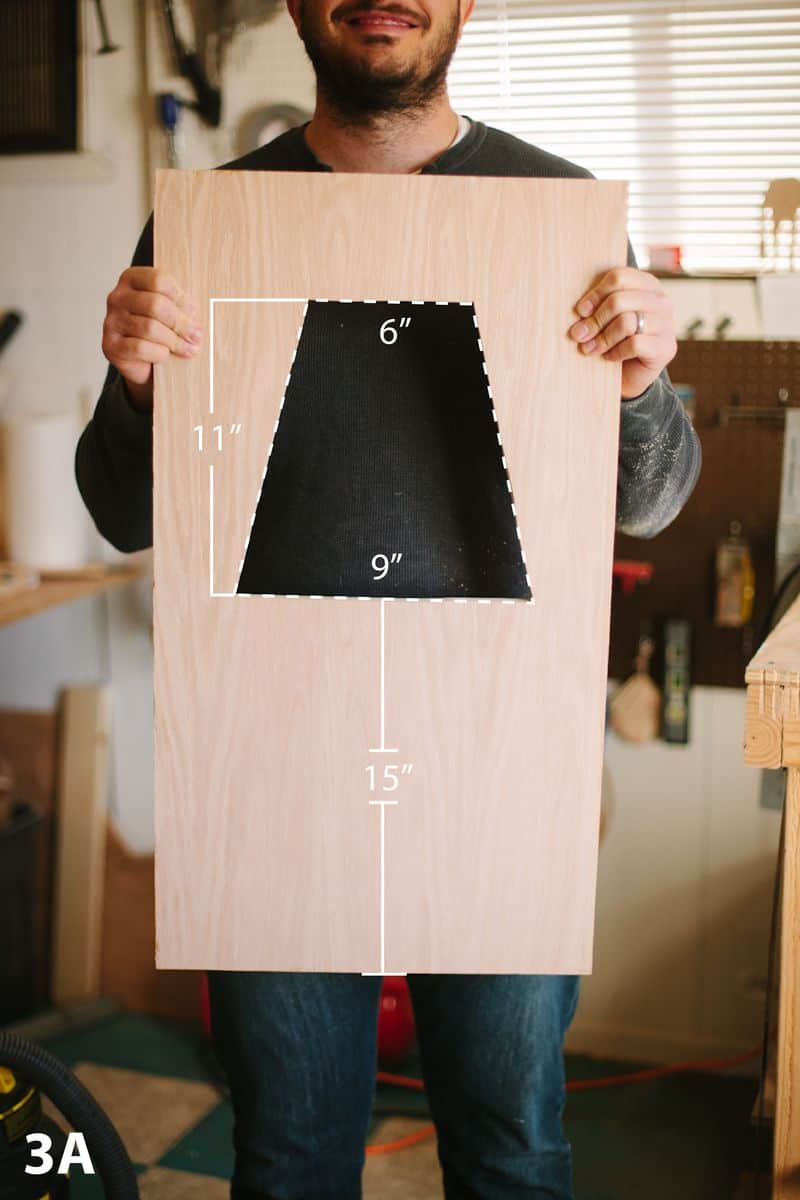
Step 3A. Mark (as shown) on Piece C
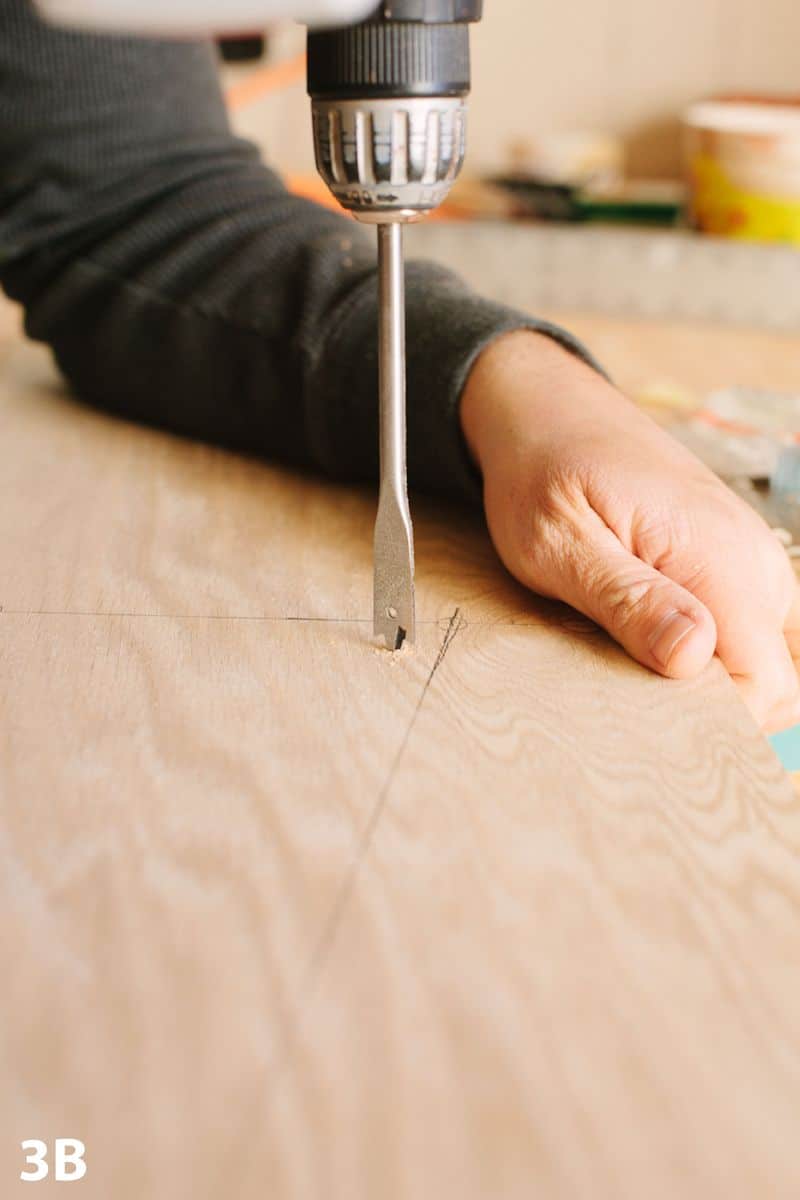
Step 3B. Drill out a couple of holes
Step 3C. Cut out with jig saw
Tip: When pre-drilling and screwing, make sure you pre-drill and screw in the outermost screws first.
Then, you can pre-drill and screw in the middle screws. This will help you to make sure everything is attached straight.
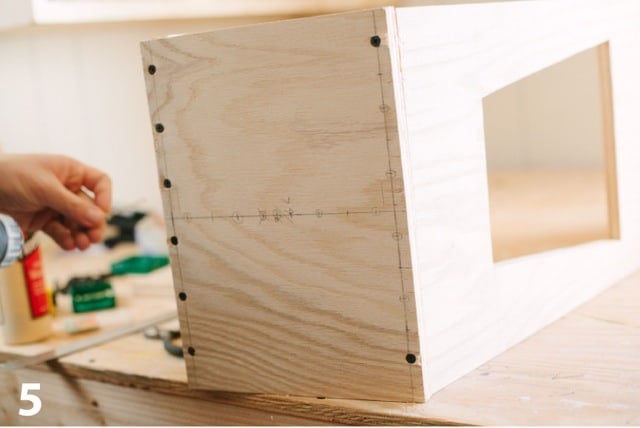
Step 4. Glue pieces A & B together (the wood should be approx. 3/4″ thick, half of that is 3/8″, so measure and mark a line about a 3/8″ from edge so that when you screw in, you’re hitting the middle of bottom piece). Pre-drill holes every 2″ or so and screw in.
Step 5. Glue pieces A & C together, then pre drill holes every 2″ or so and screw in.
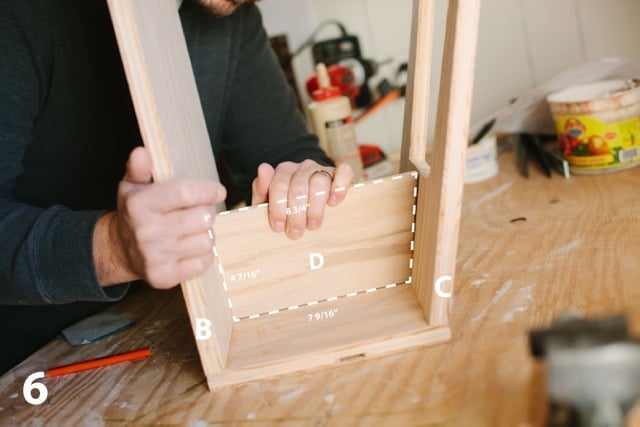
Step 6. Measure and cut for Piece D. I included my measurements, but I would re-measure just to make sure it’s a nice tight fit. Apply glue to three sides.
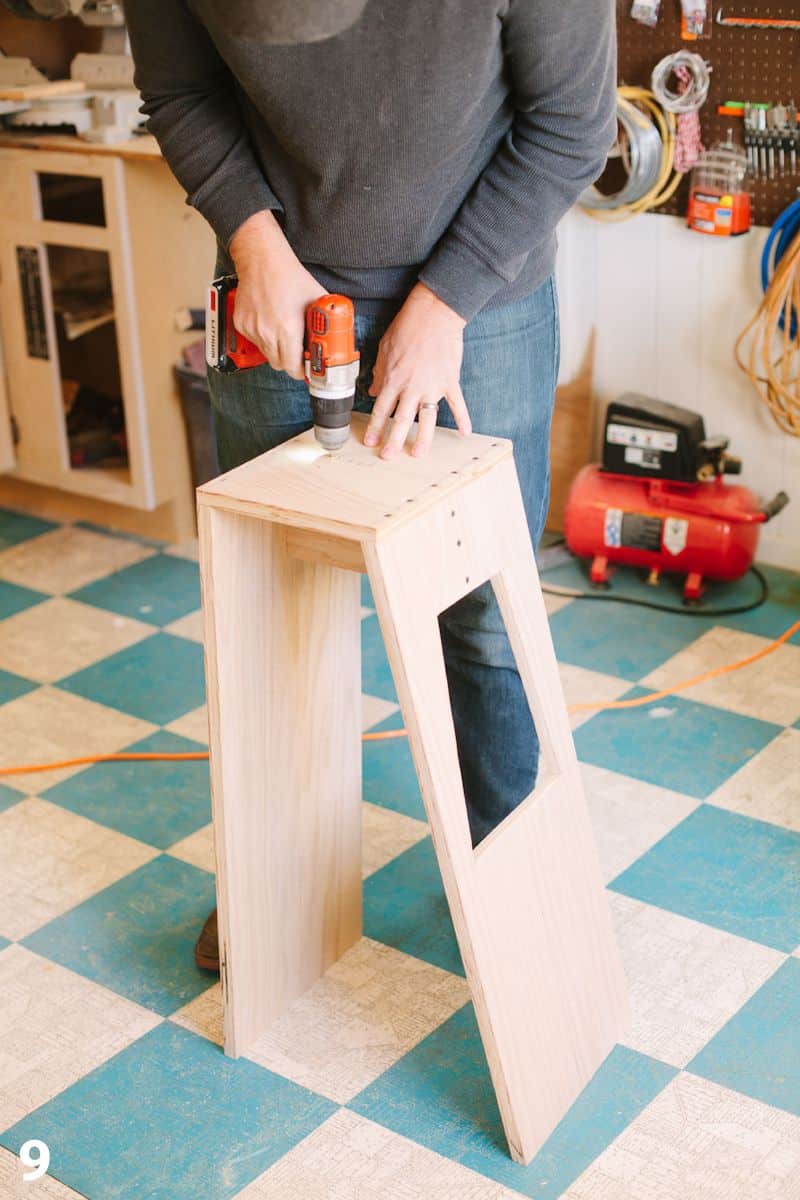
Step 7. Pre-drill and screw three screws through Piece B
Step 8. Pre-drill and screw in three screws through Piece C

Step 9. Pre-drill and screw in 5 pieces through Piece A
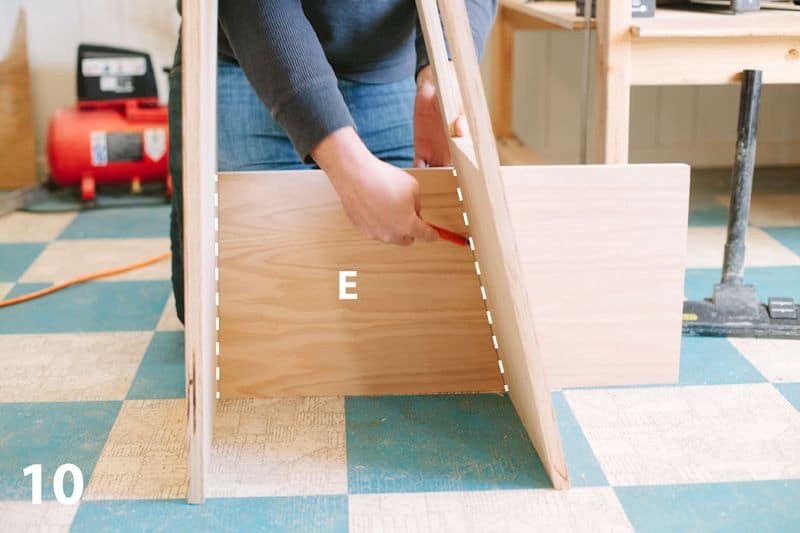
Step 10. An easy way to find out the dimensions for Piece E is hold it against the upright still and mark with pencil (as shown). You may need to mark both sides as Piece B may not be at a 90˚ angle. Cut.
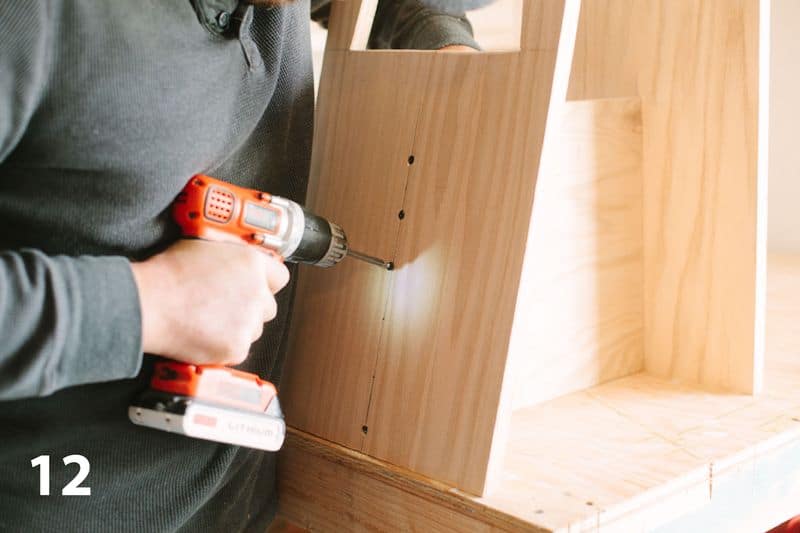
Step 11. Pre-drill and screw in through Piece B every 2″ or so.
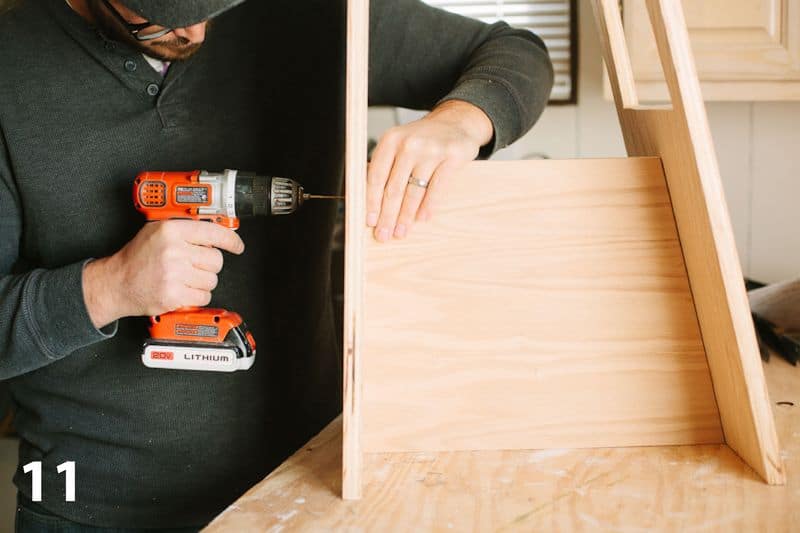
Step 12. Pre-drill and screw in through Piece C every 2″ or so.
Step 13. Let thee glue dry, sand all edges and surfaces, and then apply polyurethane (optional).
Optional Step. To create a standing height workspace, take the 2′ foot piece (sanded and polyurethaned) along with your brackets and install (just like a shelf) a standing height work surface.
We installed ours at 42″ high, but make sure the height is comfortable for you.
Thanks, Josh! You can see more of our wood working projects here.
This is so helpful I love this website